Windows Client/Server Hardening Part 2: Securing Remote Desktop with Certificates.

Securing Remote Desktop with Certificates from your Internal CA.

Implementing Remote Desktop with Certificates

In this post I’m going to be following on from Part 1 located here, talking about further hardening the Windows Remote Desktop Protocol (RDP) with a certificate based system. The certificate is generated and signed by an internal Active Directory Certificate Authority (CA). The issue here being that you have no way of verifying the server or PC that you are trying to connect to via RDP. The machine that you are supposedly connecting to usually presents you with a certificate that is signed by itself, funnily enough known as a ‘self signed certificate’.

The Attack…

The play by an attacker here being that should they have exploited a vulnerability and been able to access your internal network (not for this discussion, however..), they could essentially respond to ARP request by modifying responses sent by an attackers machine. This is done by flooding the network with bad ARP responses, known as ARP poising, the whole attack is known as a Man In The Middle (MITM). There are many ways of carrying out a MITM attack, this just one of them. Once a MITM attack is in play and your arp cache is then poisoned you would essentially be connecting to an attackers machine. The attacker can then sniff the network traffic and all sorts of other rather bad things can happen, like stealing credentials.

A typical self signed certificate presented through RDP looks like the picture above, and clearly states the certificate is not from a trusted certificate authority. If your PC can trust the certificate that is presented by the machine you are connecting too, through the use of a bonafide signed certificate from your internal CA you would know whether or not the machine you are connecting to is genuine. More importantly, through the use of Group Policy you can specify that you are not able to connect to it unless you trust it. Thus preventing any bad MITM rdp sessions.

How do we fix it…

Carlos Perez has written up an excellent ‘how to’ guide from start to finish on how to setup this up. He walks through the certificate templates required for the RDP service. Also setting up group policy to deploy the certificate. This is a great guide so I’m not going to re-regurgitate his excellent work going through all the various screen shots, you can view it here at http://www.darkoperator.com/blog/2015/3/26/rdp-tls-certificate-deployment-using-gpo .

Cisco AAA Authentication with RADIUS against Active Directory 2012 NPS

AAA and RADIUS through the Network Policy Server (NPS) role in Windows Server 2012 R2

I thought I would cover a quick post to demonstrate setting up Active Directory authentication for a Cisco router or switch IOS login. This will be using AAA and RADIUS through the Network Policy Server (NPS) role in Windows Server 2012 R2 to authenticate users in Active Directory on Cisco IOS devices.

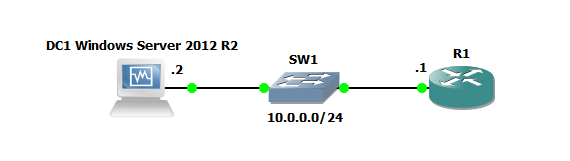
As with all my labs a picture paints a thousand words so here is the GNS3 Network topology we will be using, this is also being used for 802.1x which will be covered in later post:

Cisco AAA Authentication with RADIUS against Active Directory GNS3 Topology

So here is quick run down on the gear we will be using just for this lab:

R1: Cisco IOS (C7200-ADVENTERPRISEk9-M), Version 15.2(4)S4

Server 2012 DC: Windows Server 2012 R2 ( Active Directory Domain Services and Network Policy Server role.

Just to demonstrate a lab as simple as the below could also be used to test this:

radius lab

Active Directory Configuration:

I will be assuming that AD and the NPS role have already been installed. Prior to jumping into the NPS configuration you will need to create an AD group for the users that will be logging into the Cisco equipment, add a couple of test users to this group. In my case I have simply created a group called ‘Radius’ and have added the user ‘Adam’.

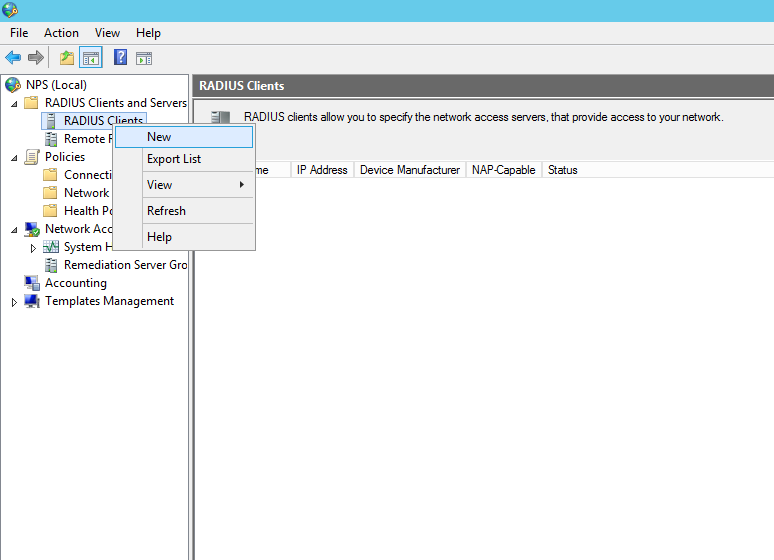
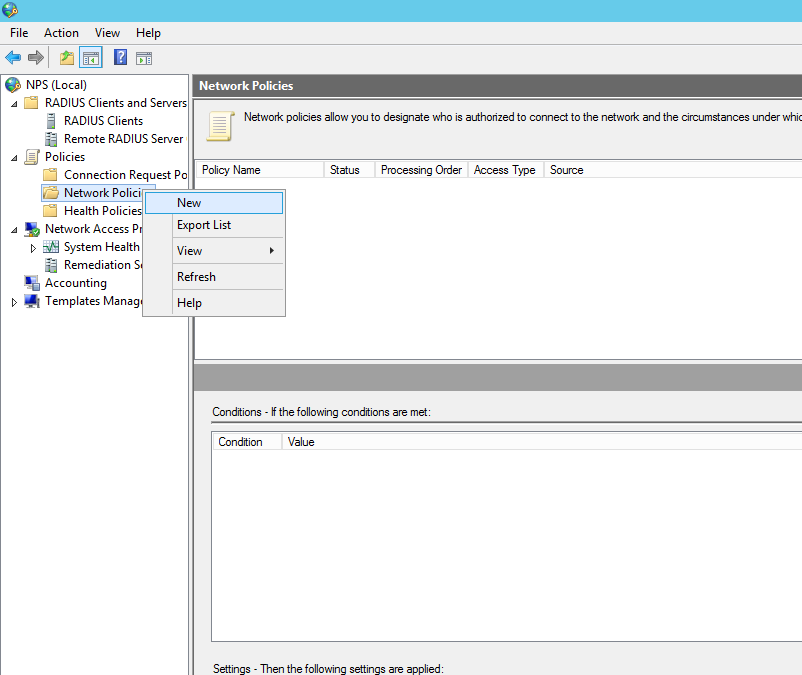
Open the NPS console.

Right click on the NPS(Local) tree node and select ‘Register server in Active Directory’:

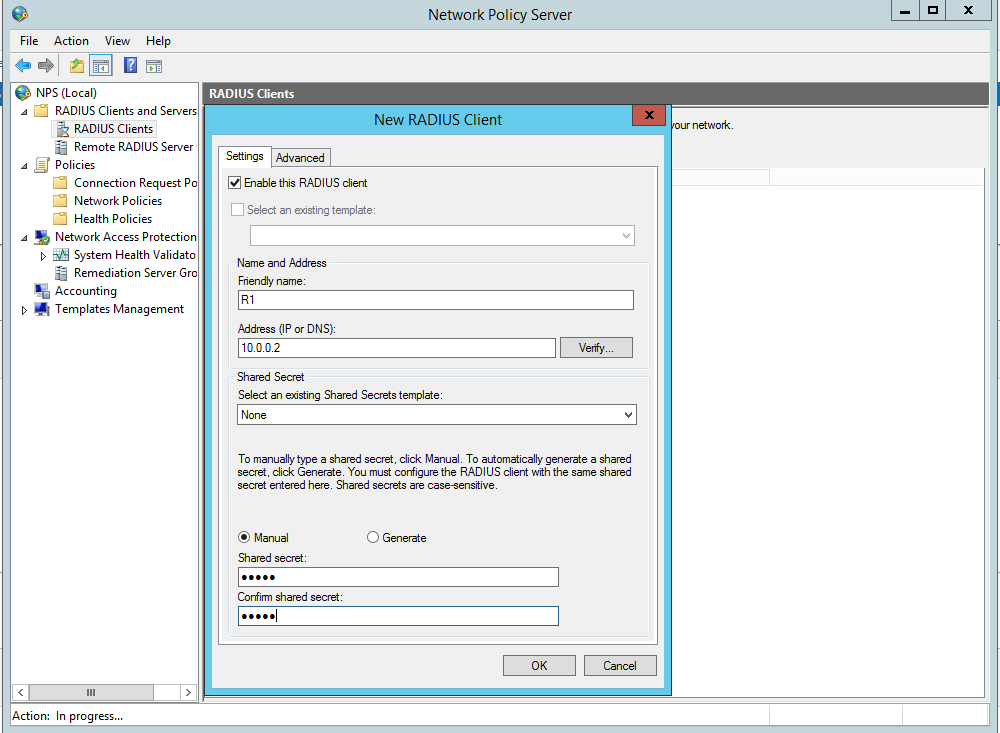
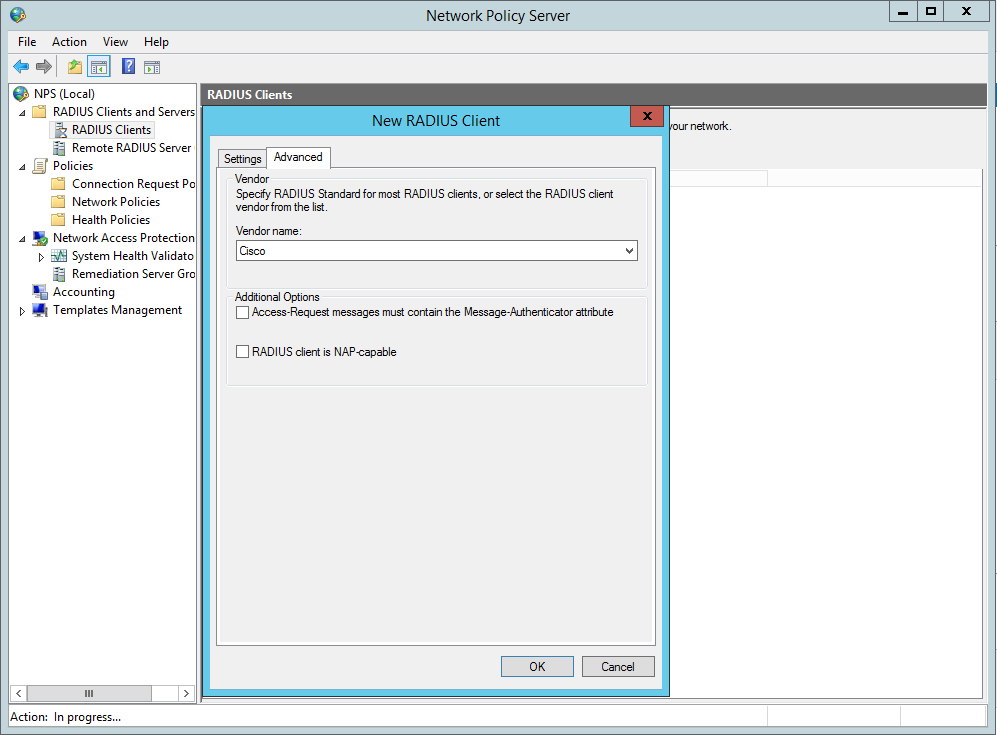
Now create the Radius clients, in our this case this is R1:

Radius Clients, New

New Radius Client Settings

New Radius Client Advanced Screen


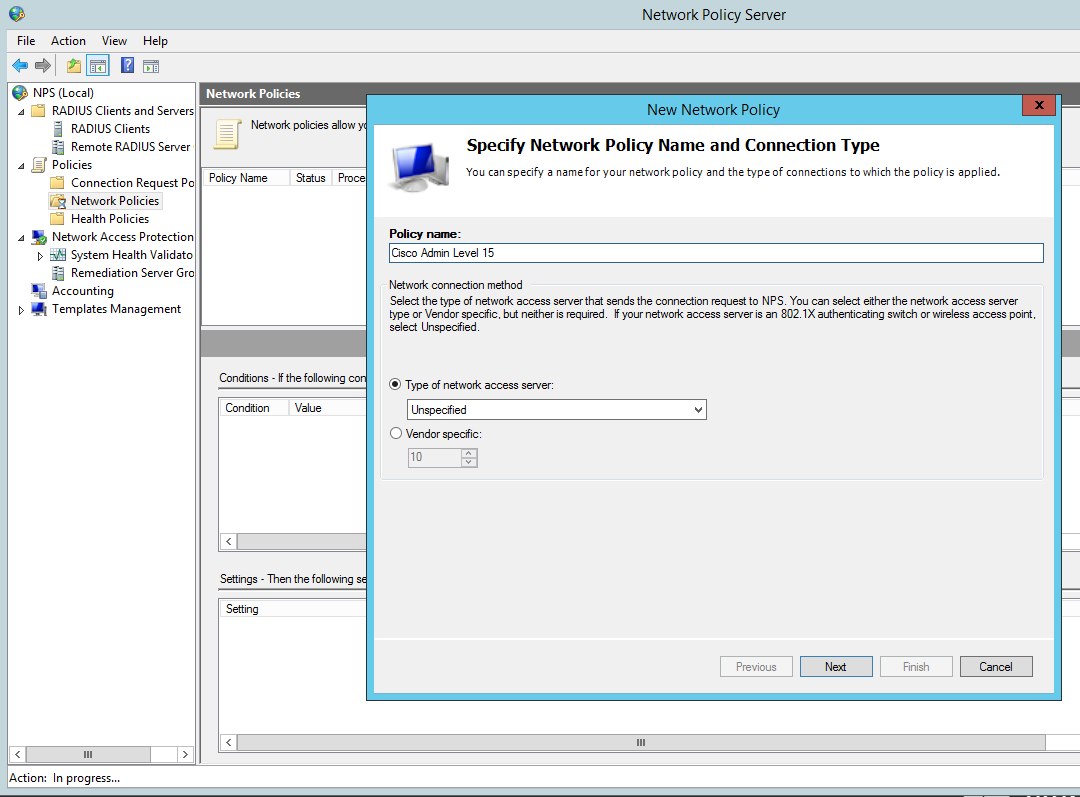
Now we need to configure the Network policy:

New Network Policy

New Network Policy name

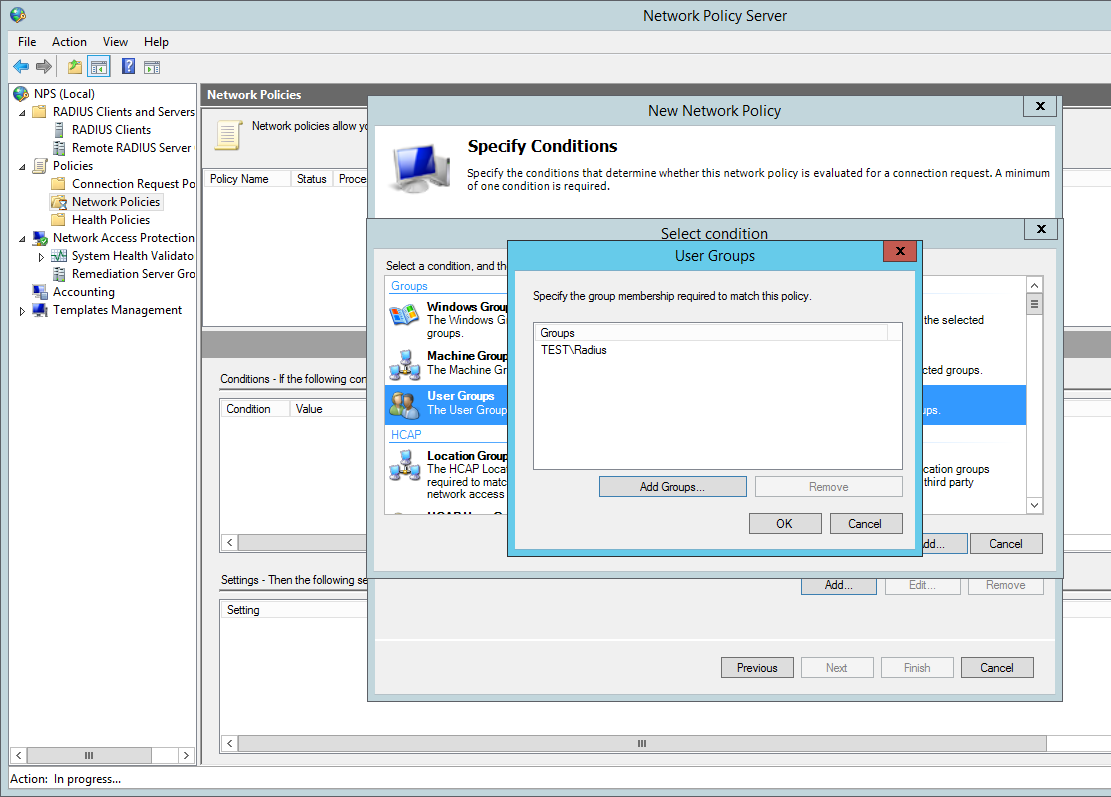
Add our ‘Radius’ AD group. You can tighten the control here by specifying further conditions such as the ‘friendly name’ (R1)  or the local IPV4 address of the radius client, in a production environment you would want to lock this down further for now we are just going to add the the user group to authenticate:

New Network Policy - Add

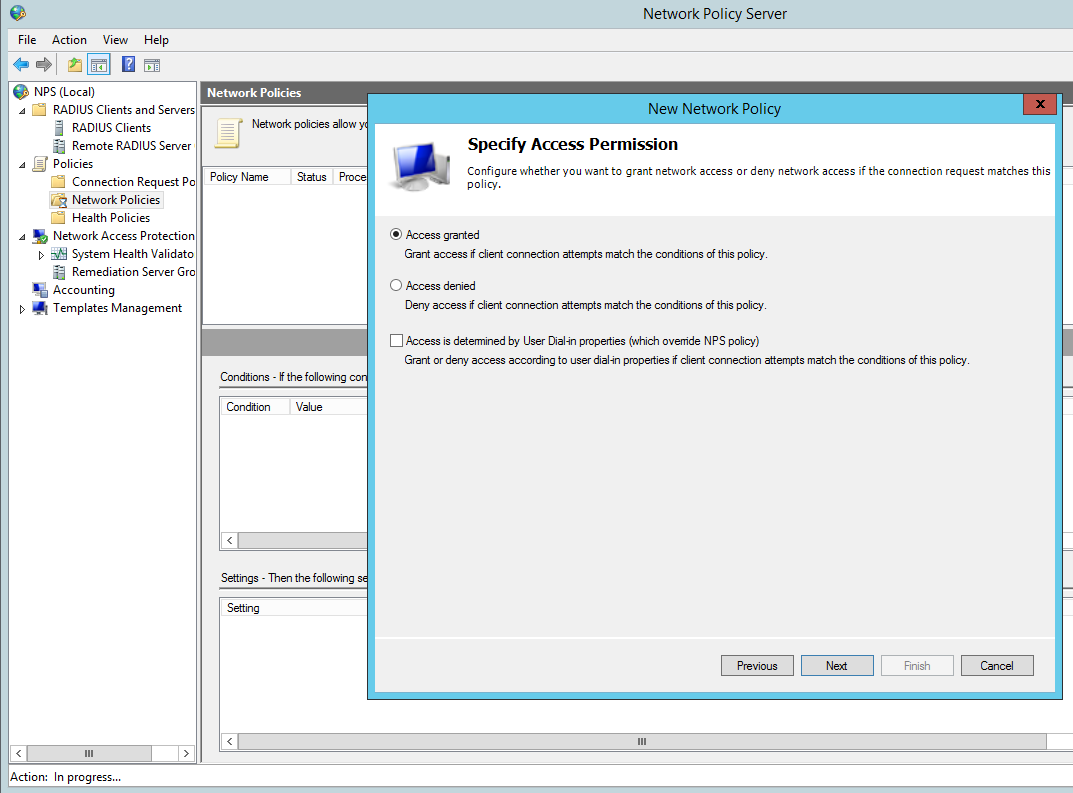
Grant Access for this group:

New Network Policy Access Granted

Configure the appropriate authentication methods:

New Network Policy - Configure Authentication Methods

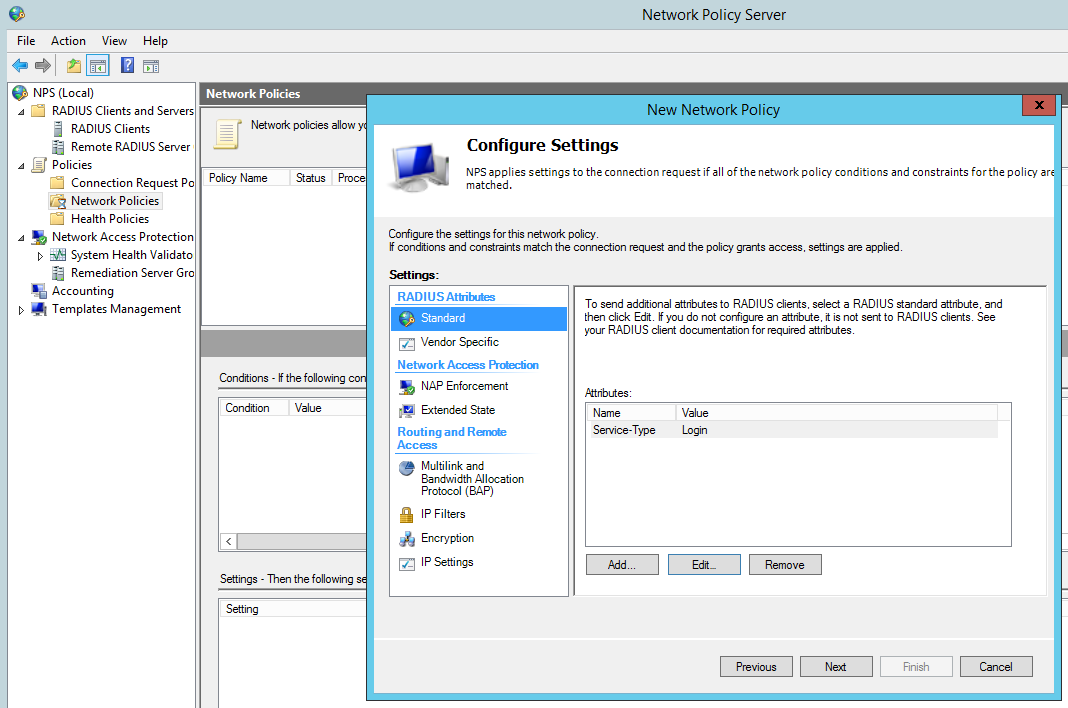
Change the Standard Radius Attributes by removing ‘Framed-Protocol – PPP’. Edit the ‘Service-Type’ value to ‘Login’:

New Network Policy - Standard Radius Attributes

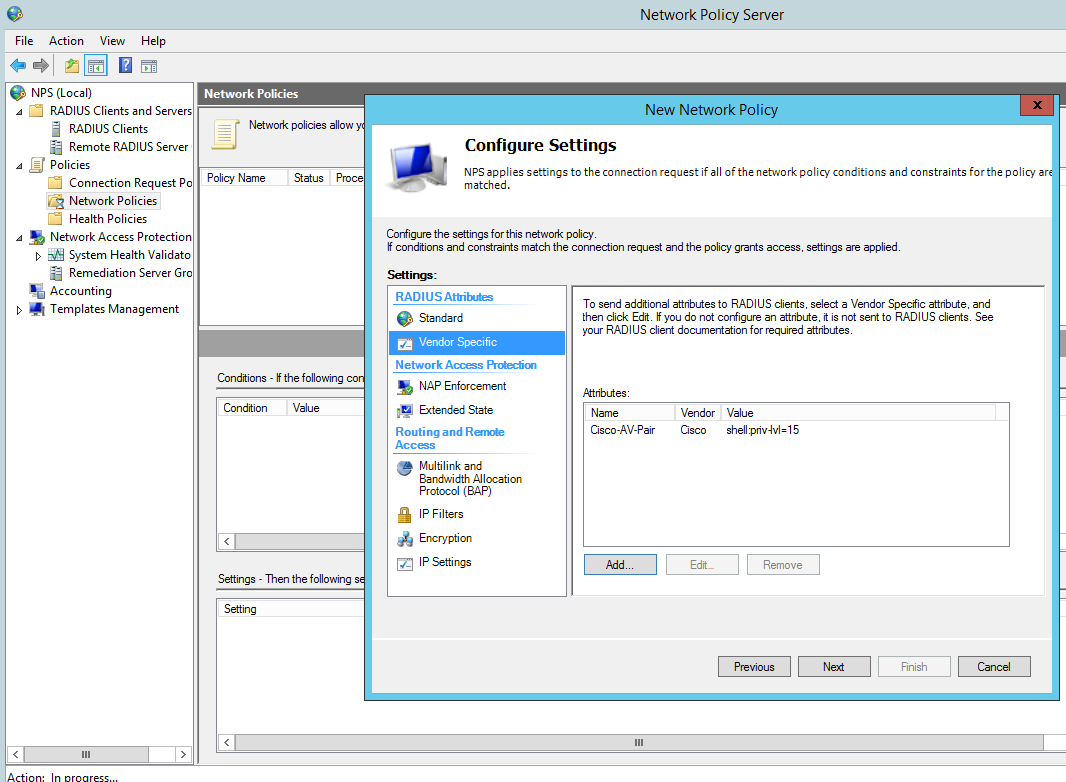
Add a Vendor specific attribute, this allows the radius server to pass the privilege level though the cisco router which we shall see later in the debugging. The value needs to read ‘shell:priv-lvl=15′.

You can create several policies for the different privilege levels. For example you could create a group in AD called ‘Cisco Users Priv 1’, associate this group to a policy and in the below option use the value ‘shell:priv-lvl=1′. When that user logs in the policy will match that user and the NPS use the matched policy passing privilege level 1 through to the router or switch.
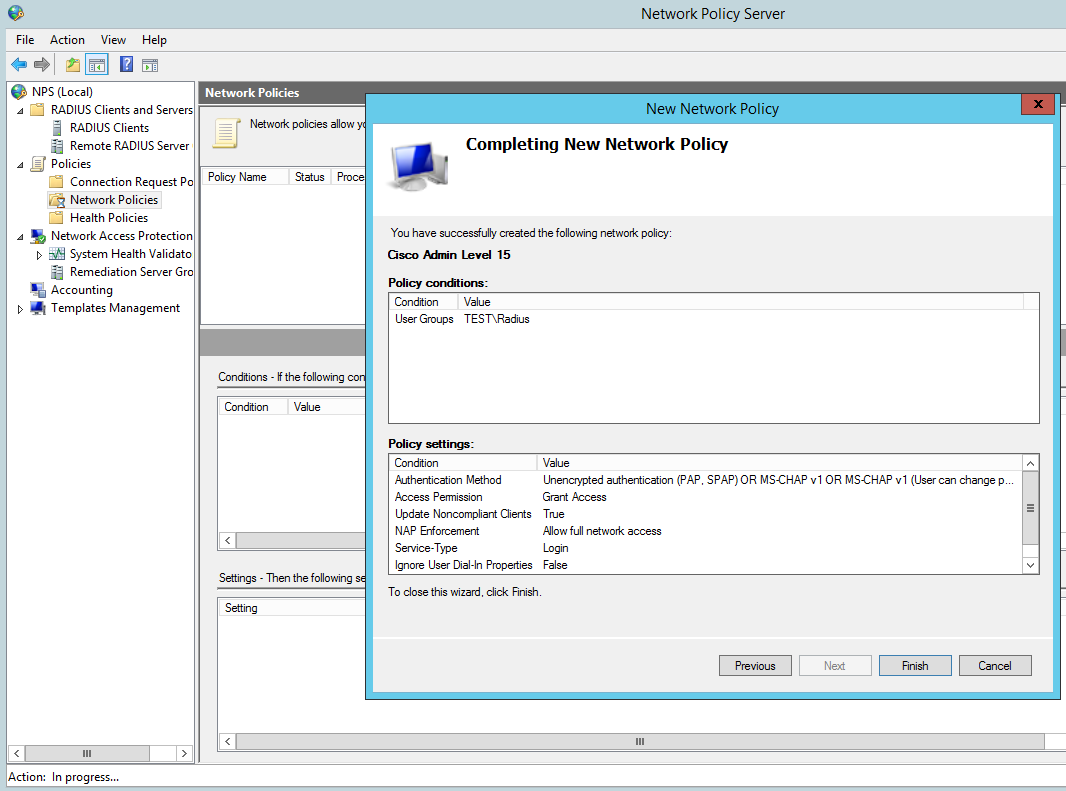
New Network Policy - Vendor Specific Radius Attributes

Then Finish:

New Network Policy - Finish

Cisco IOS configuration

Create a a user with privilege level 15, we wil use this as our fall back should the router not be able to contact the radius server it will use the local AAA database.

R1(config)#username Admin privilege 15 secret cisco12345

Enable AAA:

R1(config)#aaa new-model

Now we will setup the main parts to the radius configuration, tell the switch we would like to use radius and the group RAD_SERVERS:

R1(config)#aaa group server radius RAD_SERVERS

Specify the radius server that we would like to use in our case 10.0.0.2 is our NPS, the auth and acc ports and also the secure key we used:

R1(config-sg-radius)#server-private 10.0.0.2 auth-port 1812 acct-port 1813 key cisco
R1(config-sg-radius)#exit

Specify that for  the default login  for authentication an authorization that we want to use the group called RAD_SERVERS that we have just created and if that fails we use the local database. This is particularly important so we do not lock ourselves out on the router:

R1(config)#aaa authentication login default group RAD_SERVERS local
R1(config)#aaa authorization exec default group RAD_SERVERS local if-authenticated

All together this looks like the below:

R1(config)#aaa group server radius RAD_SERVERS
R1(config-sg-radius)#server-private 10.0.0.2 auth-port 1812 acct-port 1813 key cisco
R1(config-sg-radius)#exit
R1(config)#aaa authentication login default group RAD_SERVERS local
R1(config)#aaa authorization exec default group RAD_SERVERS local if-authenticated
R1(config)#aaa authorization console

We can test simply by logging out and back in.

Troubleshooting

It obviously goes without saying you need to test the authentication to the Radius server, exit right out of the console and log back in using your AD credentials.

If all has been configured correctly you should be able to login. its also worth testing the fall back option configured for local AAA authentication. We can do this just simply stopping the NPS service then try the local credentials, again all being configured correctly you should be able to login.

There are a few useful debugging commands we can use  to monitor and troubleshoot the authentication these being:

R1#debug aaa authentication
AAA Authentication debugging is on
R1#debug aaa authorization
AAA Authorization debugging is on
R1#debug radius
Radius protocol debugging is on
Radius protocol brief debugging is off
Radius protocol verbose debugging is off
Radius packet hex dump debugging is off
Radius packet protocol debugging is on
Radius elog debugging debugging is off
Radius packet retransmission debugging is off
Radius server fail-over debugging is off
Radius elog debugging debugging is off
R1#

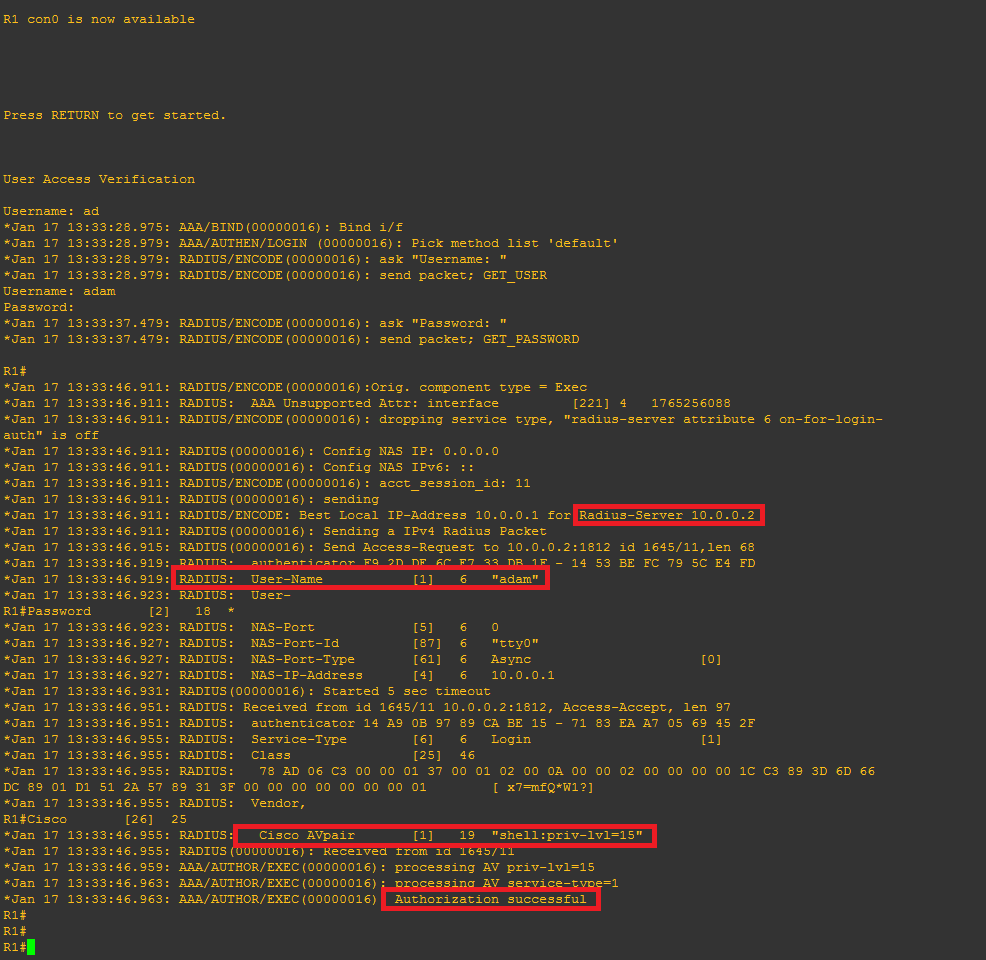
This time when we login we can see the debug information for an attempted login, it should look similar to this, note the highlighted area’s:

radterm

I hope this has been informative.

Server Hardening: Securing SSH Part 1

This will be the first of two posts in the server hardening Series where we will discuss the Secure Shell (SSH) service.  I will cover the options available to us for hardening SSH. SSH is a cryptographic network protocol used for remote management over an insecure (or less secure) communication channel. Whether this is a web server, an appliance or a firewall, out on the internet or in your local subnet. For example most remote Linux based servers have SSH enabled in order for administrators to remotely manage them rather than being directly in front of the server/appliance with a monitor at the console. According to arstechnica (2015) Microsoft is also to introduce native support for SSH in 2015 – so watch this space.

There are a number of hardening techniques that we can undertake to further secure the SSH service from an out of the box typical install. These include:

  • Disabling SSH Protocol 1 and using Protocol 2. (Part 1)
  • Limit the the users who can login. (Part 1)
  • Disable root login and use a standard user account. (Part 1)
  • Run SSH on a different port to 22. (Part 1)
  • Use Public Private keys for Authentication. (Part 2)
  • Filter SSH with iptables (demonstrated in one of my previous posts here) (Part 2)
  • Setting strong cryptographic algorithms (Part 2)

I will be demonstrating these tasks on Ubtuntu 14.04. however the options and configurations will be very similar across the different Linux distributions.

Disabling SSH Protocol 1 and using Protocol 2

Disabling SSH Protocol 1 is done in the following file ‘/etc/ssh/sshd_config’, so using your favorite text editor nano, vi, leafpad etc (mines nano) open up the ‘sshd_config’ file and find the protocol line and ensure it has a the ‘2’ parameter next to it like the below:

# Protocol 1
Protocol 2

Limit the the users who can login

Locate the authentication section again in the file ‘/etc/ssh/sshd_config’, and add in the line ‘AllowUsers Adam Mark’ and any other usernames as needed. This should be used in conjunction with disabling the root login. This will only let ‘Adam’ and ‘Mark’ login for example.

AllowUsers Adam Mark

Disable root login and use a standard user account

Locate the authentication section and specifically the ‘PermitRootLogin yes’ and either comment the line out with a # and add a new line in or change the parameter to ‘no’.

# Authentication:
LoginGraceTime 120
# PermitRootLogin yes
PermintRootLogin no

Run SSH on a different port to 22

This can clearly be achieved in a number of different ways depending on how your infrastructure is configured. For example you could change the port on your SSH Service in the sshd_config file or adjust port forwarding/translation rules on your firewall or router. The main goal of this exercise is to obfuscate the SSH service to a potential attacker, we must be clear here this doesn’t protect the port in any way however does distract from the fact port 22 is not open for business. I say again this will not protect you against an attacker with enough intent, an attacker with enough experience will have scanned all 65k ports and verified all services on all open ports. Never the less if somebody has only scanned the top 1k ports its still an option, but should not be relied upon. I’m not going to get into the debate of ‘security by obscurity’ in this post. From the following file ‘/etc/ssh/sshd_config’, locate the ‘port 22’ line and change the number parameter to the unused port of your choice

# I have changed the default SSH port from 22 to 3333
Port 3333

I have added a comment in the line above as a reminder here to allow the next person to see what I have done for any troubleshooting purpose. You never know when you will move on and the next person needs to administer the box, this is useful to them. 😉

In most cases the SSH service will need to be restarted in order for the changes to take effect. From a terminal: (I always add a ‘-v’, optional for verbose)

Service ssh restart -v

As always I would suggest you try these out first in a test environment making one change at a time before changing your corporate machines.