In this post, I’m going to take you through a hands-on exercise in hardware hacking — specifically how I accessed an old Netgear WNR1000v2 Wireless-N router through its UART debug pins. These debug ports are intended for developers and support engineers, but as penetration testers we can use them to uncover device secrets, configuration, and in some cases full system compromise.
Step 1 – Identifying the UART Header
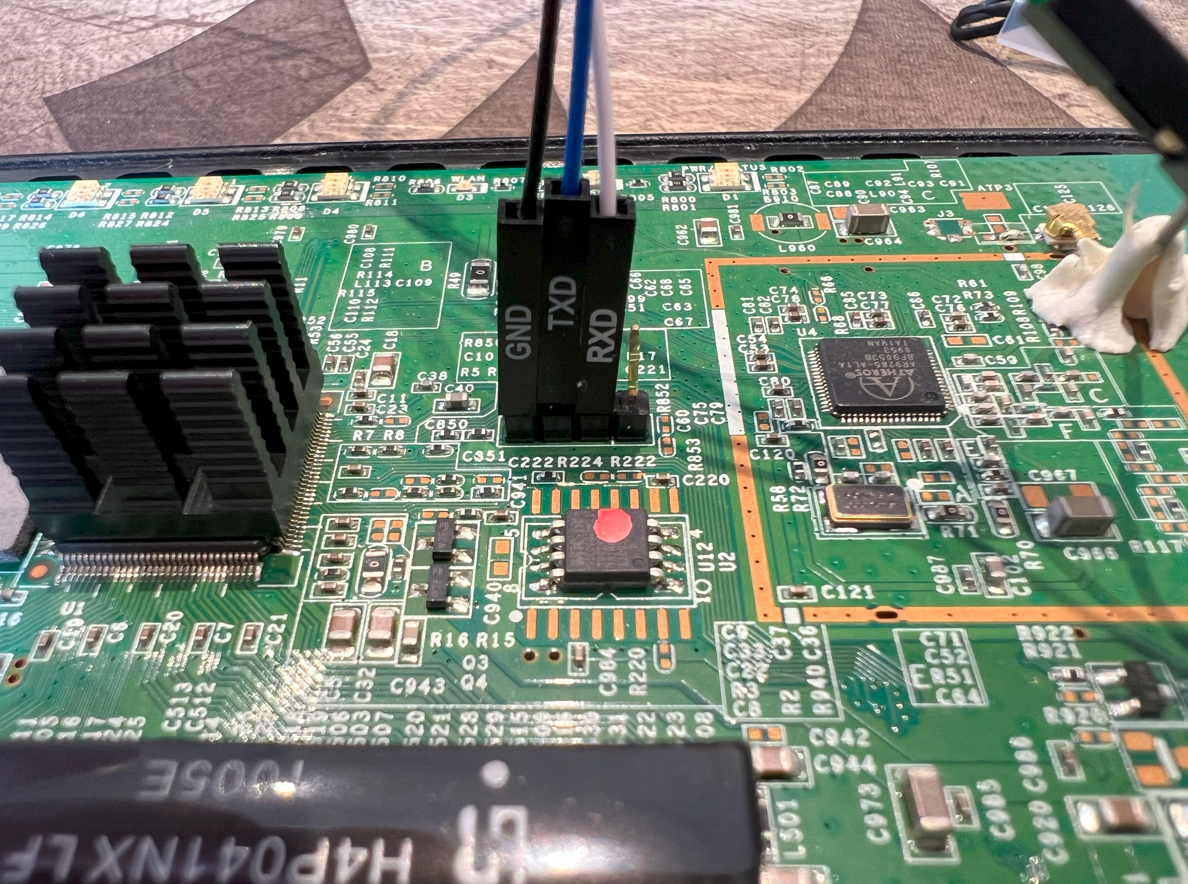
Opening the casing of the WNR1000v2 revealed a neat row of four unpopulated pads on the PCB.
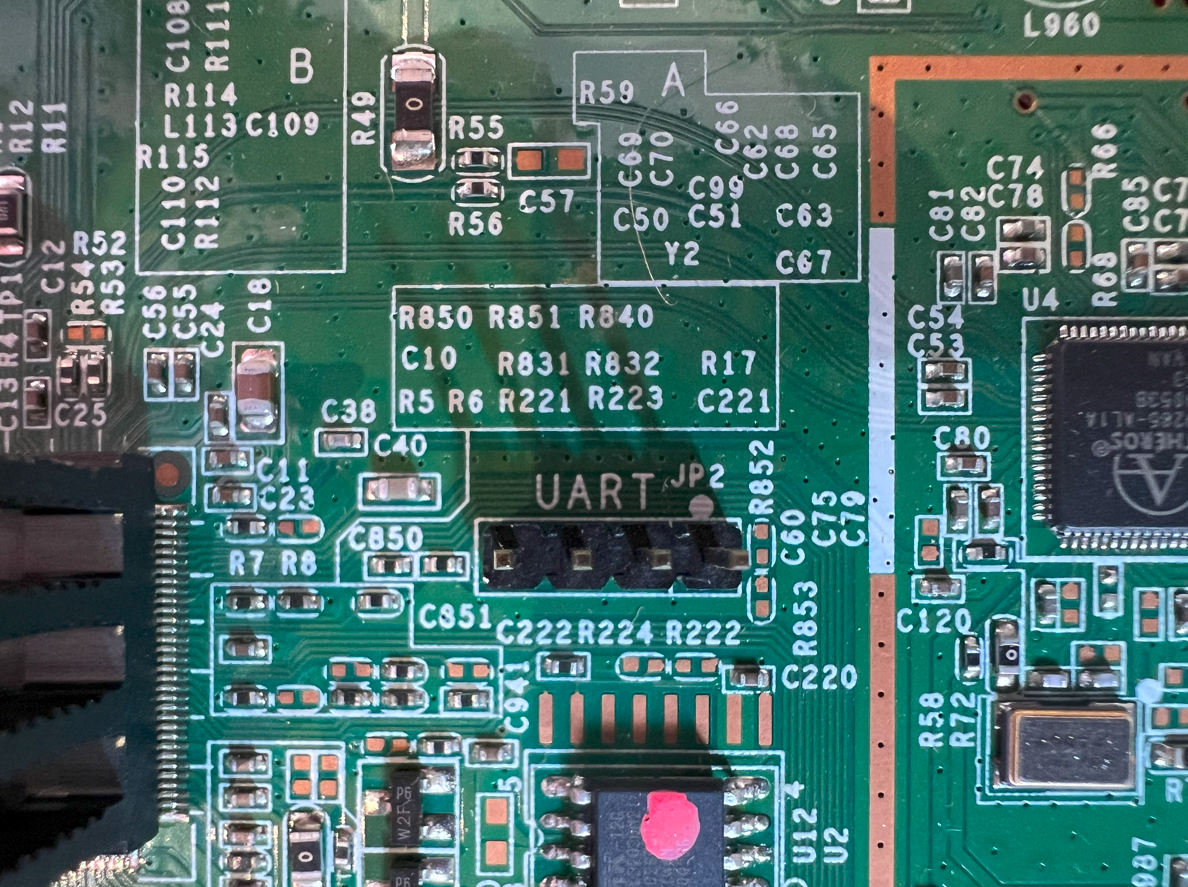
These are the UART test points. The first task was to work out which pin is which: GND, VCC, TX, RX.
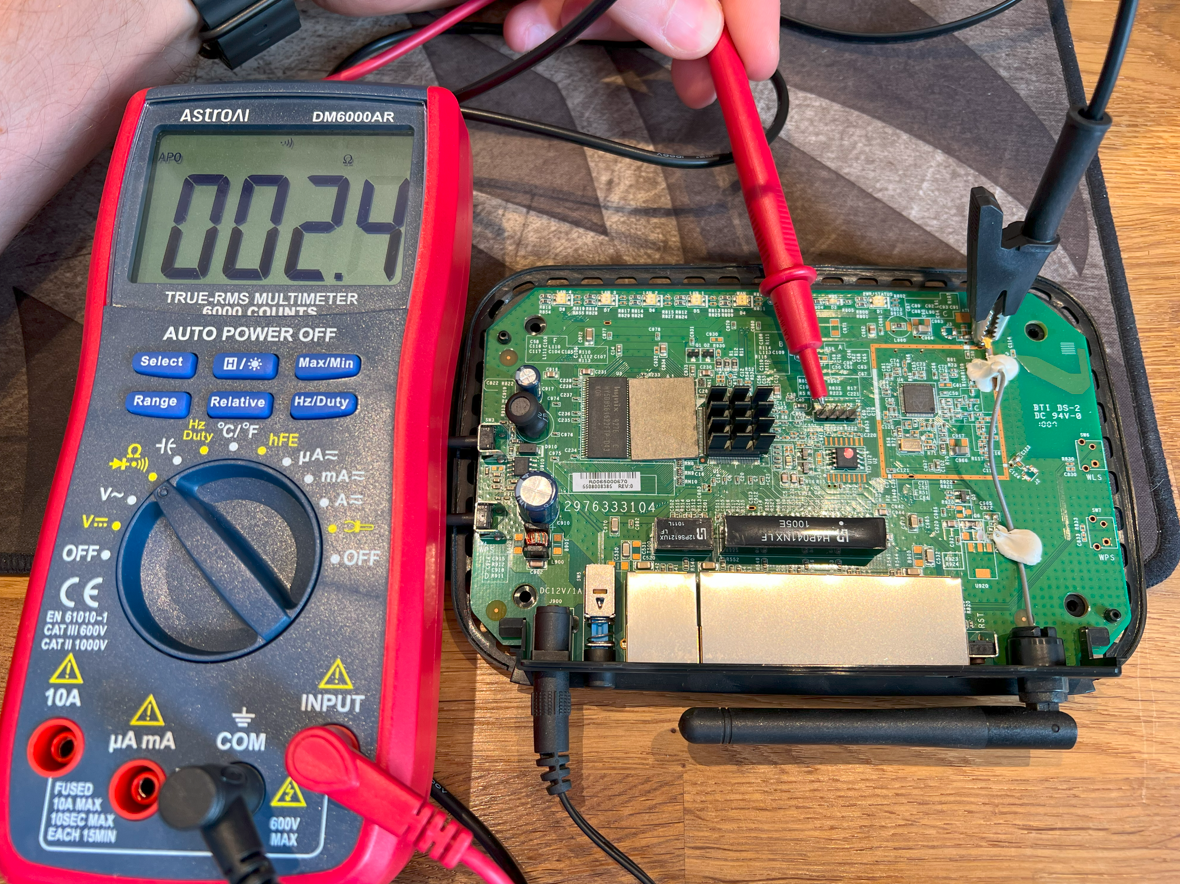
I used my AstroAI DM6000AR multimeter in continuity mode. By placing the black crocodile clamp on the arial connector (a known ground) and probing each pad with the red lead, I found which pad was GND as below:
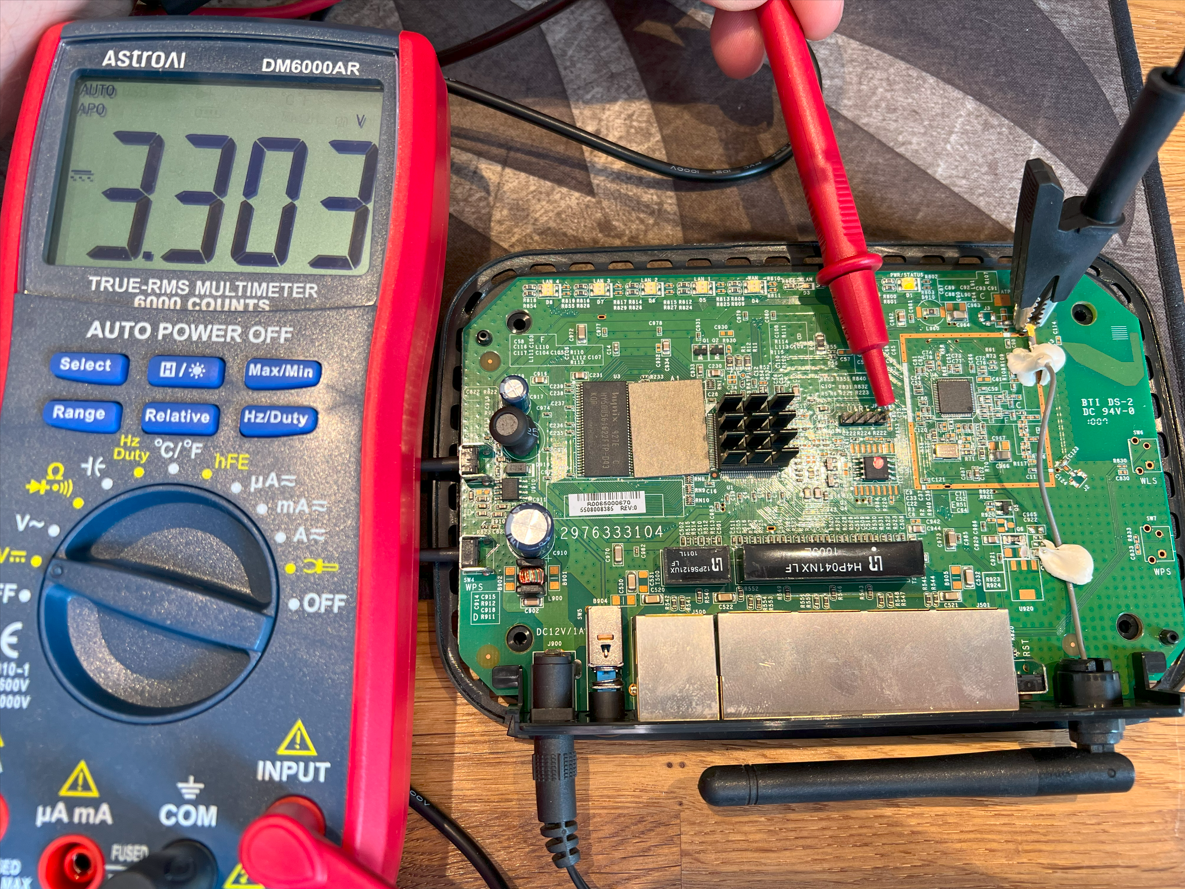
 Then, by powering on the board and measuring voltages, I identified the ~3.3V VCC pin:
Then rinse and repeat on the the other two pins to reveal the TX and RX.
Step 2 – Connecting with a USB-to-TTL Adapter
For the connection, I used a DSD TECH SH-U09G USB to TTL cable (FTDI FT232RL chip at 3.3V logic) purchased from amazon. I connected the pins as follows:
- Adapter GND → Router GND
- Adapter RX → Router TX
- Adapter TX → Router RX
- Important: Leave VCC unconnected (the router powers itself)
Step 3 – Capturing Boot Logs
With the adapter connected, I opened PuTTY in Serial mode on the detected COM port with settings 115200 8N1, no flow control.
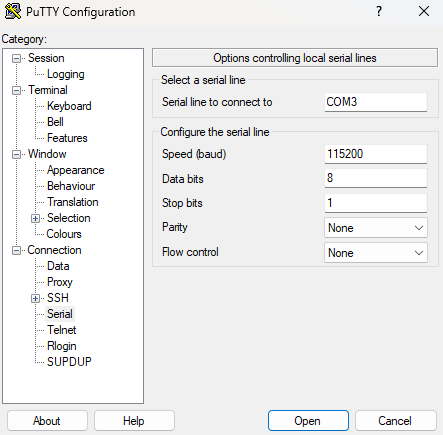
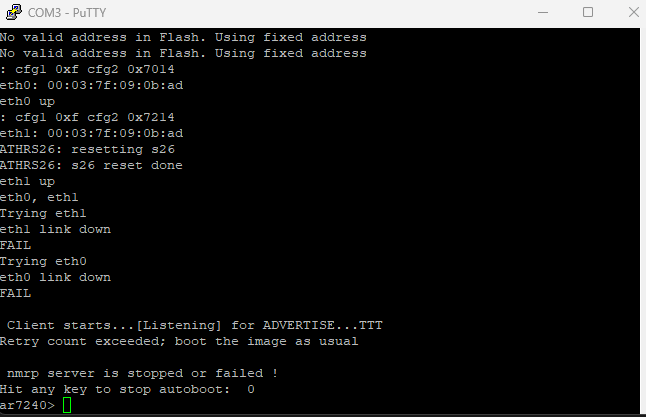
Powering on the router produced a flurry of boot messages:
U-Boot 1.1.4 (Sep  3 2009 - 20:04:48)
ar7240>
This is the U-Boot bootloader prompt, which already gives a lot of power over the device. You can essentially interrupt the boot sequence to drop into this prompt early in the cycle.
Step 4 – Dropping Into BusyBox
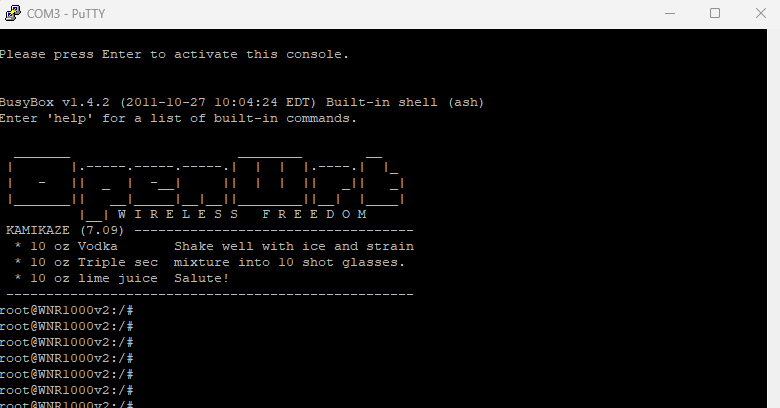
Allowing the device to fully boot landed me directly into a BusyBox root shell with no authentication:
BusyBox v1.4.2 (2011-10-27 10:04:24 EDT)
root@WNR1000v2:/#
This is effectively full root access to the underlying Linux operating system, bypassing the web interface entirely.
Step 5 – Exploring Config and Partitions
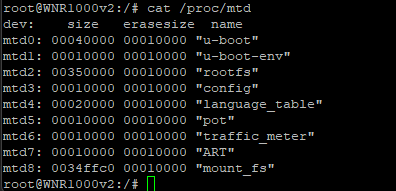
From the root shell, I could list memory partitions:
cat /proc/mtd
Output showed multiple partitions such as u-boot, rootfs, config, and mount_fs. The config partition held factory defaults, while mount_fs contained the live runtime settings used by the Netgear web interface.
These partitions can be dumped using dd or mtd read commands, then exfiltrated over UART by cat’ing the output into the putty log:
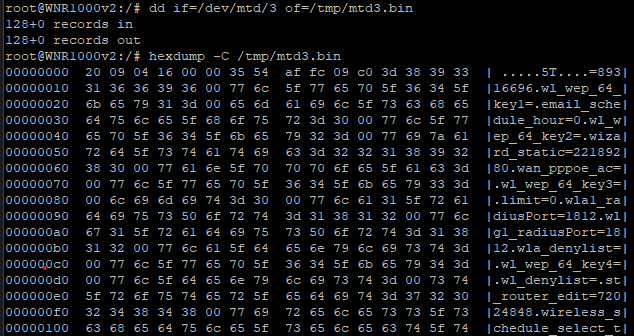 Even without any further analysis we can see some of the config in clear text.
Findings
- Root shell access was trivially available via UART, with no authentication.
- Config and credentials could be recovered from the
configandmount_fspartitions. - Netgear’s firmware was based on an old OpenWrt “Kamikaze” build, customised with their own web UI and config ontop.
Why This Matters
This exercise highlights a key issue with older consumer and IoT devices: debug interfaces are often left enabled in production hardware. A simple USB-to-UART adapter and some probing gave full administrative access, bypassing all security in the web interface.
For penetration testers, this demonstrates how physical access and hardware hacking can completely change the attack surface. For vendors, the lesson is clear: disable or properly protect debug ports before shipping devices.
Next Steps
If you’d like to try something similar:
- Get an old router or IoT device (something expendable), this one was around £5 off ebay I had lying around from an old WiFi lab.
- Locate UART/JTAG headers on the PCB.
- Use a 3.3V USB-to-TTL adapter to capture boot output.
- Be mindful of risks — always work on your own kit and avoid writing to flash unless you’re prepared to recover a brick!
This was a fun exploration of hardware-level attack vectors, and I’ll continue exploring how debug ports expose systems in unexpected ways.