VLAN tagging in Kali Linux 2.0

Connecting to Trunked Ports!

Just a quick post on how to configure VLAN tagging in Kali Linux 2.0. If we have a trunk port presented to us, how do we utilise it?

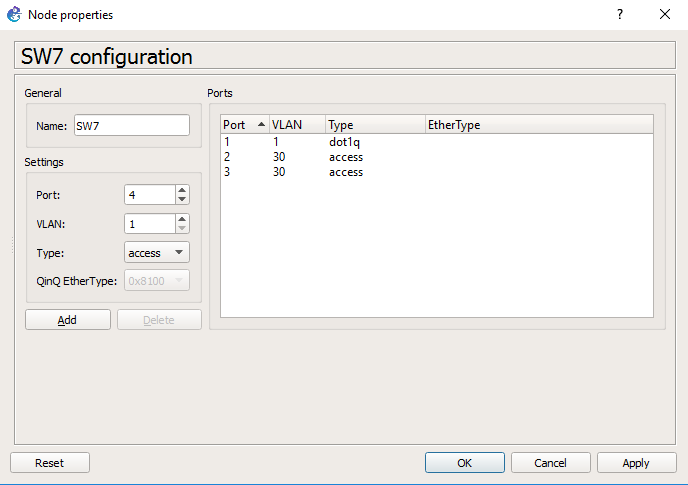
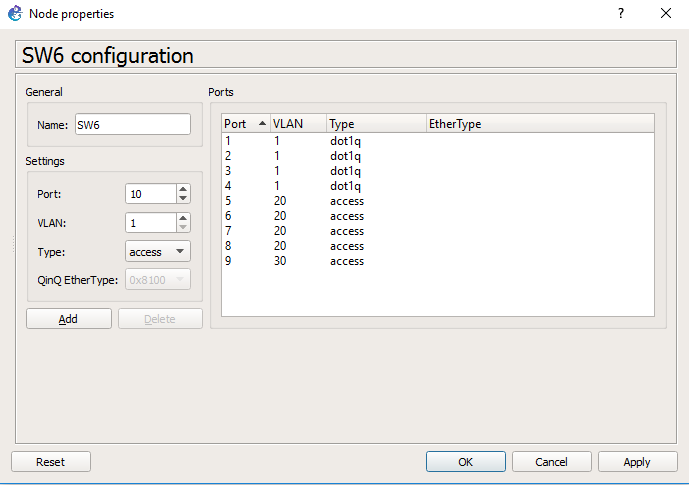
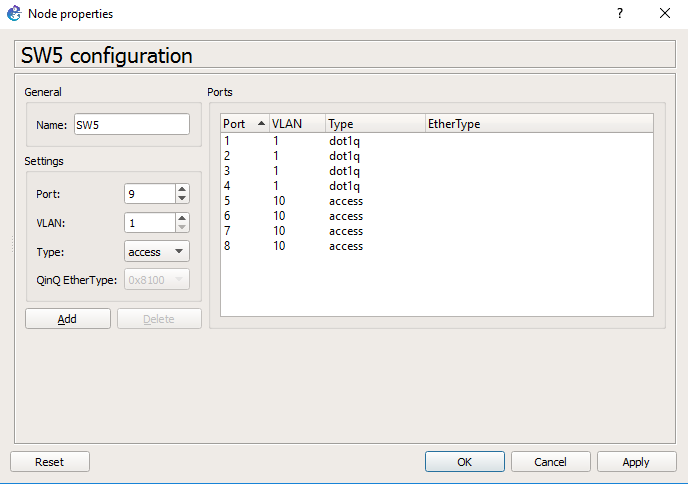
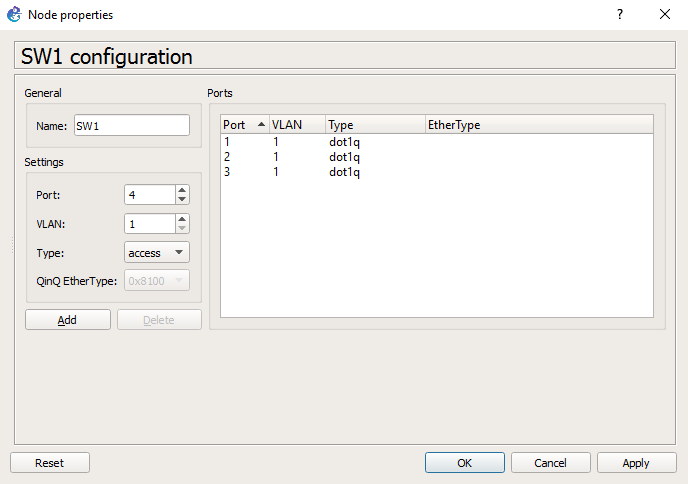
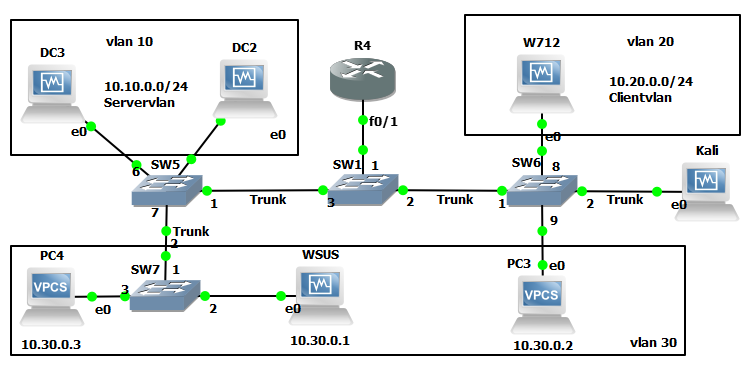
To setup vlan tagging in Kali Linux 2.0 is pretty straight forward, to set the scene and demonstrate this further we need a lab. The below lab is our ‘test.local’ environment set up in GNS3. There are 3 vlans, 10 20 and 30. 10 and 20 are routable, vlan 30 is isolated from 10 and 20. In the lab we have a ‘router on stick’ configured  at R4, fa0/1 is sub interfaced with vlans 10 and 20. utilising DHCP, vlan 10 for servers and vlan 20 for clients. All devices in vlan 30 are statically assigned IP addresses and not routable to the 10 and 20 vlan networks.  In all switches there are a variety of 802.1q trunked and access ports.

The idea of the lab is that vlan 30 can’t talk to vlan 10 or 20. However as a trunked port is presented to the Kali vm, it will be able to communicate to all vlans.

This is how it looks:
VLAN tagging in Kali Linux 2.0 - switch configuration

Lets look at how we would configure Kali to test all hosts in the different vlans, first via CLI and then via GUI in Network Manager:

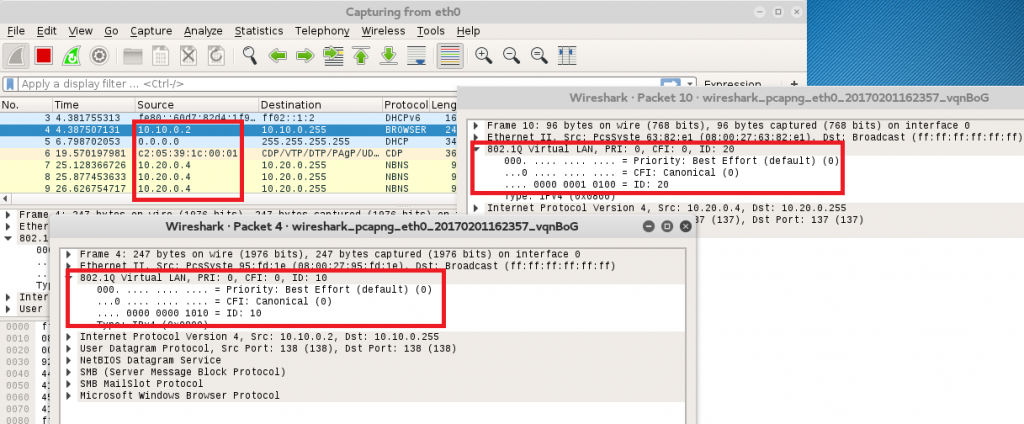
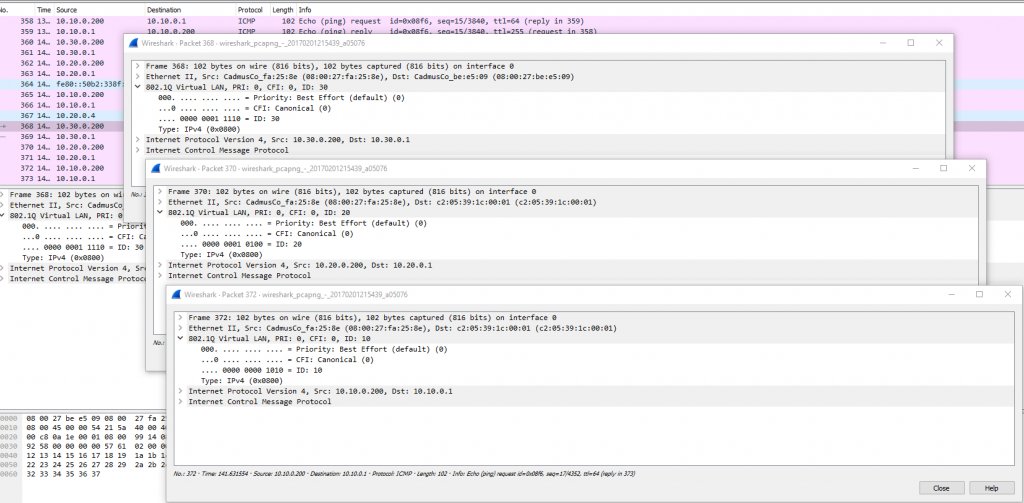
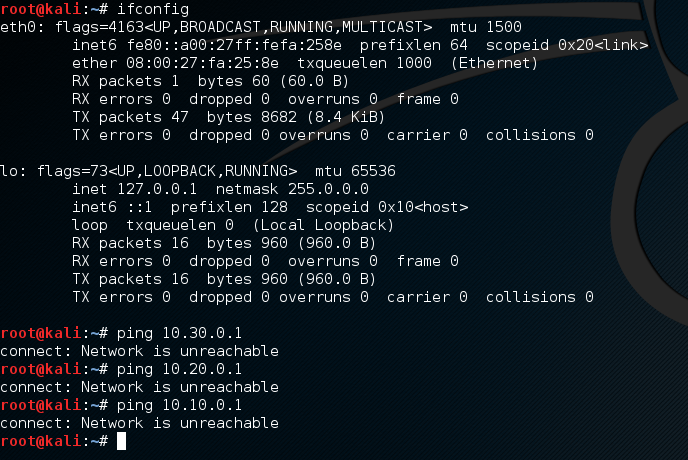
As you can see with the current trunk connection we can’t access any of the networks, however a quick Wireshark does reveal we can see traffic and the different vlans…
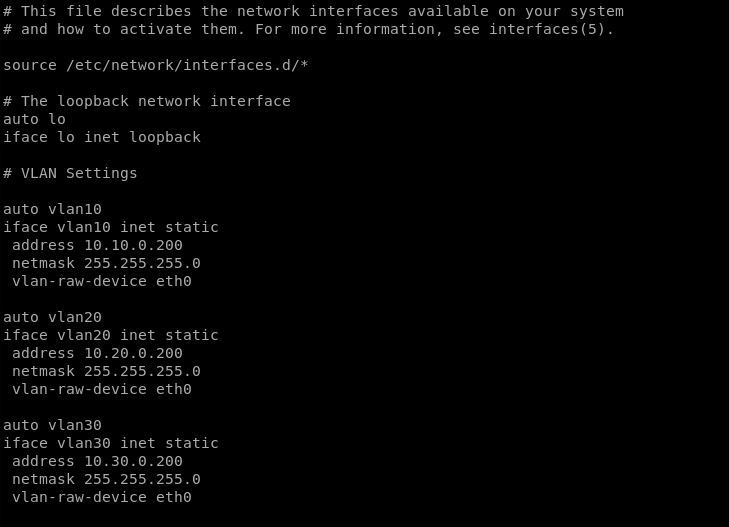
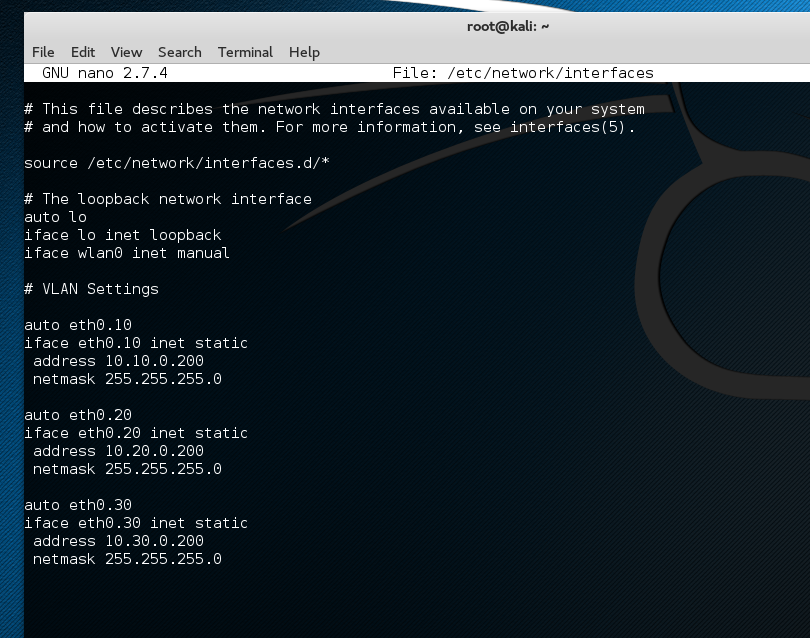
First lets open up ‘/etc/network/interfaces’ in nano and add our interfaces. The idea is very similar to a cisco router we are essentially sub interfacing our network connection in the interfaces file:
An alternative configuration for the interfaces file which I have used as well is the following, both work just as well:

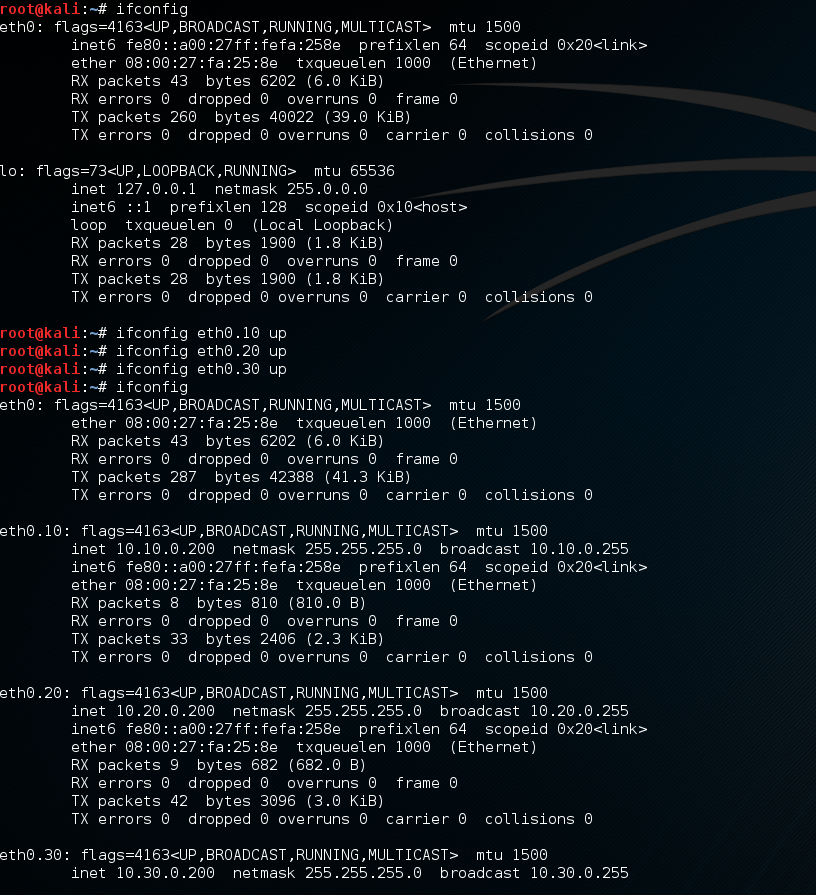
Save our file  restart the networking service and then simply bring up the sub-interfaces with ‘ifconfig XXX up’ where XXX is our subinterface so:

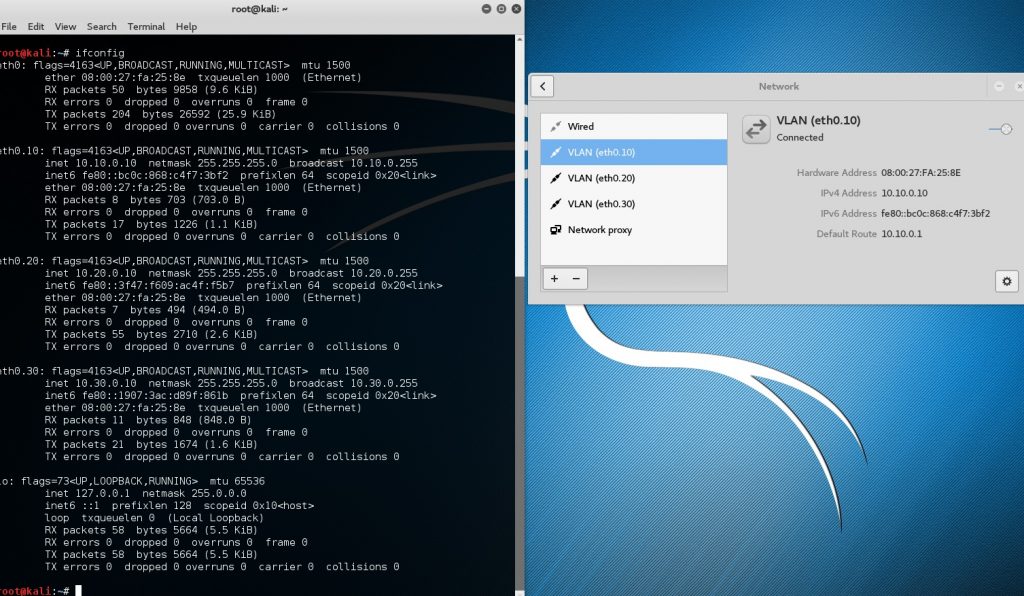
‘ifconfig vlan10 up’ or ‘ifconfig eth0.10 up’ as below:

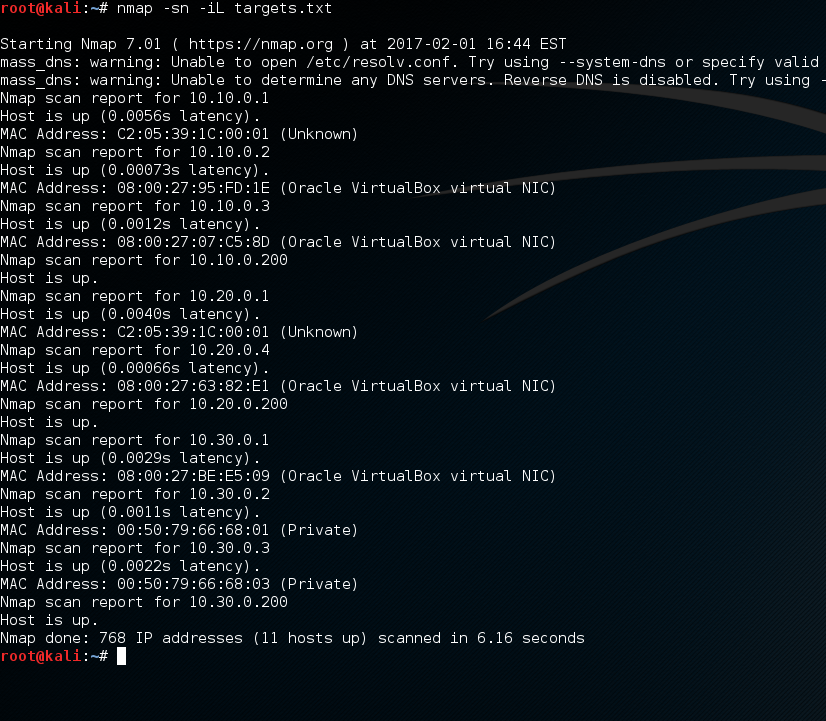
We can now access all of our vlans in question.

Further to this, if we set off a ping to each network and Wireshark the trunk connection we can see our tagged packets. Hooray.

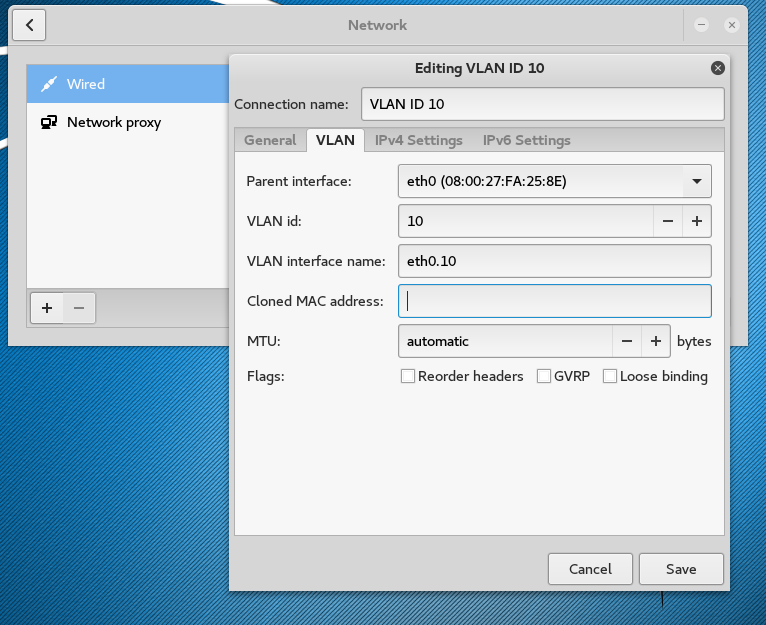
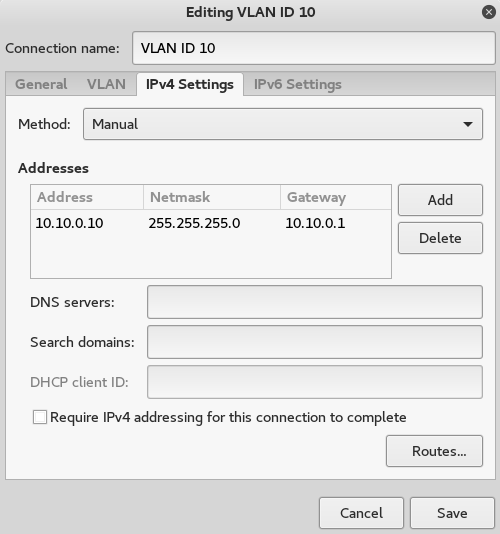
The Gui is even easier, lets configure it via the Network Manager. We will do this via opening up our network connections/Network Manager, simple click on the ‘+’ sign, select ‘VLAN’ fill in the details on the vlan tab as well as the ‘IPv4Settings’ tab:

And there you have it.

I hope this helps someone!

Metasploit database cache not built

Fixing Metasploit database cache

Just a quick reminder to myself and others of how to fix the Metasploit database cache not built issue.  When we use Metasploit the search is super slow and returns the ‘slow search warning’ This where you find either the database isn’t connected or when you try to search for a vulnerability the return is ‘[!] Module database cache not built yet, using slow search’ due to the database not being connected like below: This doesn’t seem to be a huge issue and the search still works however its a fairly easy fix and makes the searching significantly quicker. I’ve posted this as I’m usually finding myself having forgotten the syntax to fix it after rebuilding a kali vm, and searching around various other posts on the internet for it, so here it is:

Module database cache not built yet, using slow search

If we check the database in Metasploit with db_status we find the below error:

Metasploit db_status

So to fix the issue:

Start the postgresql service and ensure it starts at startup:

Metasploit start service

Initialize the msf database with:

Metasploit initialize msf database

Load msfconsole and recheck the database you should find this is now connected:

Metasploit db_status connected

Finally rebuild the db cache, give it a few minutes and you should find the search instantaneous :

Metasploit db cache rebuild

et voila!

Installing VirtualBox Guest Additions in Kali Linux v1.x

A brief summary of the commands needed to install VirtualBox Guest Additions in Kali Linux v1.x. Having the Guest Additions installed is very useful, being able to copy and paste text like bash lines like the below is extremely useful. There is also the extra screen options such as the transparency mode. Being able to copy files in and out of the system into the host is also very useful.

Linux headers need to be updated.

#apt-get update && apt-get install -y linux-headers-$(uname -r)

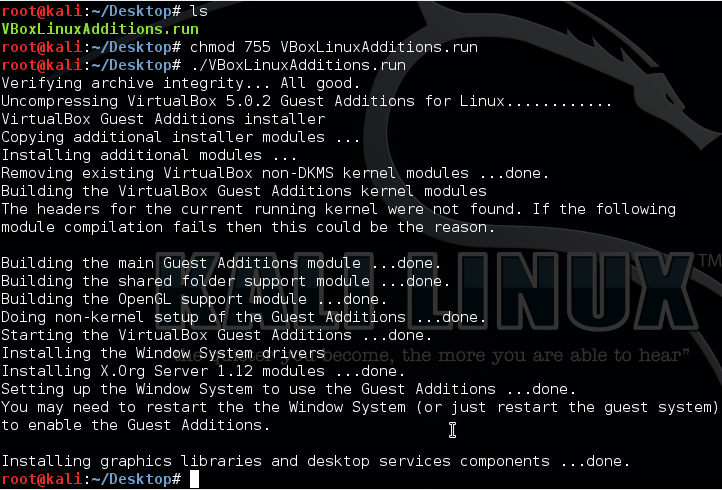
Copy the VBoxLinuxAdditions.run file to the Desktop.

Restart.

#cp /media/cdrom/VBoxLinuxAdditions.run /root/Desktop/
#cd /root/Desktop/

Make it executable:

#chmod 755 VBoxLinuxAdditions.run

Install it:

#./VBoxLinuxAdditions.run
kali Virtualbox
Installing VirtualBox Guest Additions on Kali Linux version 1.x

Reboot for a final time.

After it has successfully installed you will now be able to go full screen, add in file sharing options, copy and paste and clipboard functionality. Enjoy.