Lets Encrypt! Free Certificate!

I thought I would run through the process of obtaining a certificate for a web server from Lets Encrypt the open certificate authority by the Internet Security Research Group (ISRG) , for free!
The Lets Encrypt initiative has been setup to simplify the process of obtaining a certificate and make it more accessible for people to use encryption on their websites you can read more about it here: https://letsencrypt.org/. Certificates are free and valid for 90 days and need to be renewed for continuation of the service. (which can be automated). Those who have been through the process of provisioning certificates will understand the involved process to get it working, this is a breath of fresh air in comparison.
Sounds great so what do we need to do? Well the below example runs through the process for an already created standard HTTP apache debian based system.
OK So Lets Encrypt!
First we need to obtain the Lets Encrypt files. We will pull the files across from the Official GitHub repository. We’ll do this through git. This ensures that we have the latest version of the Lets Encrypt files. We will drop it under the /opt folder.
If you don’t have git installed… install it with:
apt-get install git
Then pull across the Lets Encrypt folder with:
git clone https://github.com/letsencrypt/letsencrypt /opt/letsencrypt
(If you want to update in the future run ‘git pull’ in the same folder.)
Move into the lets encrypt folder:
cd /opt/letsencrypt
We then need to install the Lets Encrypt client through the ‘letsencrypt-auto’ command, when this is run it will essentially pull down all the related dependencies from your OS repositories and update the client through either apt-get or yum for example. From there on you can run either ‘letsencrypt’ or ‘letsencrypt-auto’ command for new certs of renewals.
Next we will obtain our certificate and bundle for our test domain testdomain.co.uk and subdomain www.testdomain.co.uk with the letsencrypt-auto command. This is the recommended method from the Lets Encrypt website.
There are a number of plugins that can be used with letsencrypt run command, and a number of command line parameters you can pass, these are all designed to help ease the process along. We are going to be running the Apache plugin and so will pass it the ‘–apache’ command. This plugin is designed to be used with Apache (funnily enough!) which automates the process of obtaining and installing the certificate with Apache2.4 on Debian based systems. This effectively sorts all the certificate configuration within Apache and then restarts the service.
./letsencrypt-auto --apache -d testdomain.co.uk -d www.testdomain.co.uk
After this is executed you should see the updates scroll through pulling content from your repositories, after a while you will presented with the following screen asking you to confirm your email. This is used as a reminder for renewal:
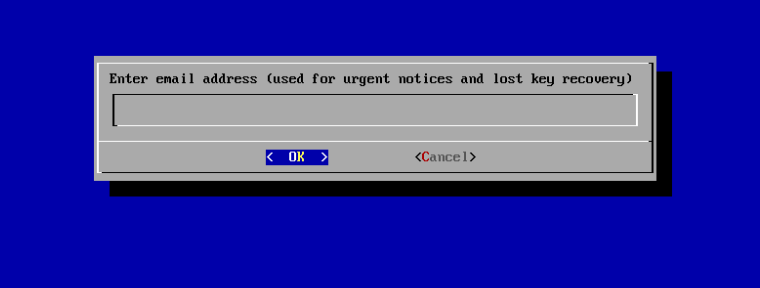
You can automate this process passing the –email parameter at the command line if you wish. So ‘–email admin@testdomain.co.uk’
You will next be asked to agree to the terms of service:
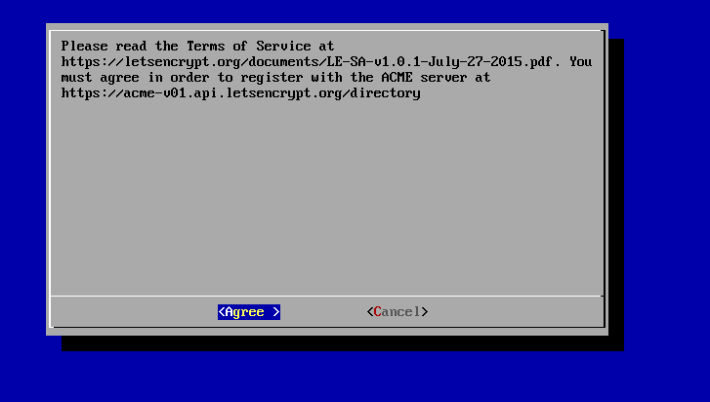
Again you can automate this by passing the –agree-tos in the command line.
Next you will be asked where you want to access your site through http and https or just through https.
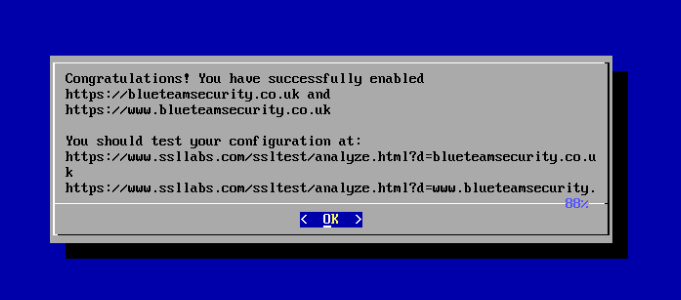
You will then be presented with the ‘Congratulations!’ screen saying you have successfully configured your certificate and enabled https:
Renewal
To renew your certificate run:
letsencrypt-auto renew
This will renew all your certificates with all previously used parameters for certificates that are due to expire within 30 days. passing the -d parameter will renew per domain.
--force-renewal
Allows you to renew before 30 days.
You can also run:
letsencrypt-auto renew --rsa-key-size 4096
This will renew your certificate with a key size of 4096 bit.
You can also rerun the existing command you ran earlier in which case you will be prompted that you have already run the command and to either re-run the install or renew your certificates.
All that is left to do is to automate the renewal with a cron job, one for another post.
Amazing that’s it! This makes obtaining a certificate for a website very accessible to people due to the way the scripts/plugins automate the apache configuration.
**Thumbs up Lets Encrypt this is great project!**
 Many vulnerability scanners will often bring back HTTP TRACE TRACK Methods Allowed against Apache and Microsoft web servers of the older generation. TRACE is usually associated with Apache and TRACK for Microsoft. This has a CVSS score of 4.3 and is a relatively easy fix. Clearly the older generation operating systems should be migrated to a supported platform, both the later distributions of Ubuntu and Microsoft 2012 R2 do not allow these methods to be used. However a simple way to validate this finding is to use telnet to connect to the web server on port 80, once connected you can type something similar to the following for each method. The ‘Host’, ‘TestA’ and ‘TestB’ aren’t needed however if you use some custom text you will be sure to see it echoed back by the web server if trace is enabled.