Pivoting through SSH with dynamic port forwarding. Just a quick post about how we can pivot to an internal/dmz network through a host via SSH. This is a classic example of how we might want to pivot through one host to get to an internal or dmz network using SSH as a tunnel. We can essentially tunnel our traffic of this SSH tunnel via the compromised host to an inside network.
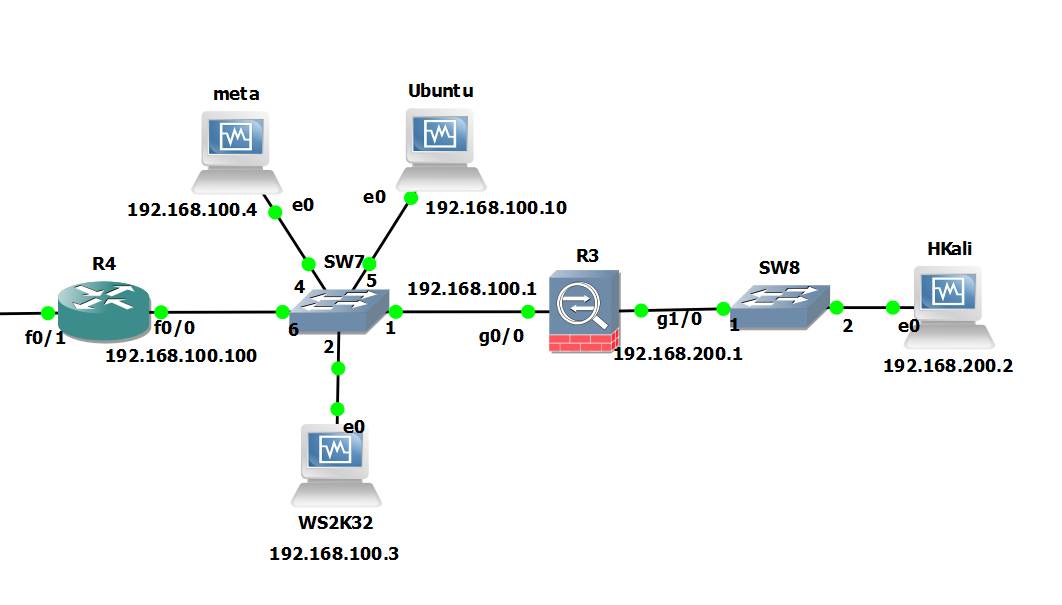
The scenario… A picture paints a thousand words… Essential our ‘Hkali’ machine is on the outside. Our Ubuntu Server is in the internal/dmz, this is going to be our pivot point.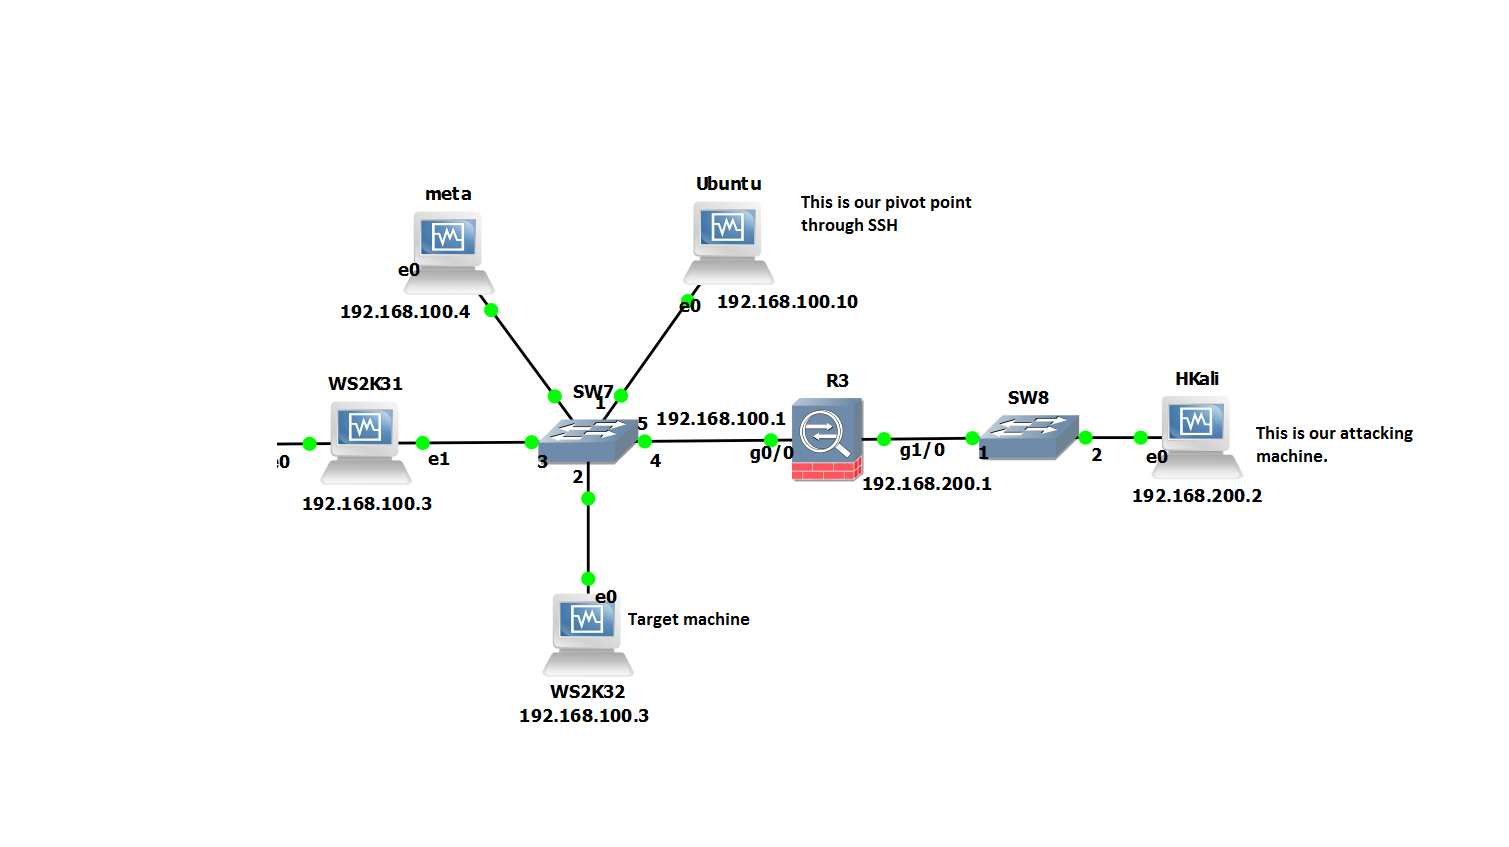
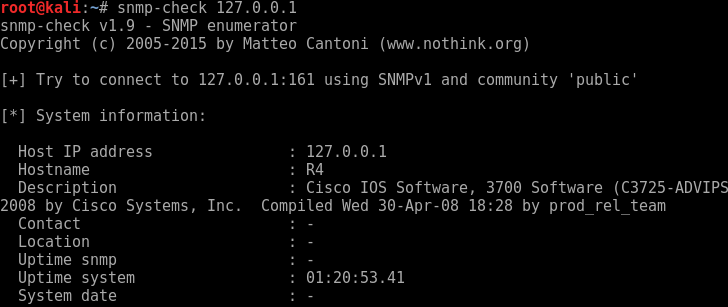
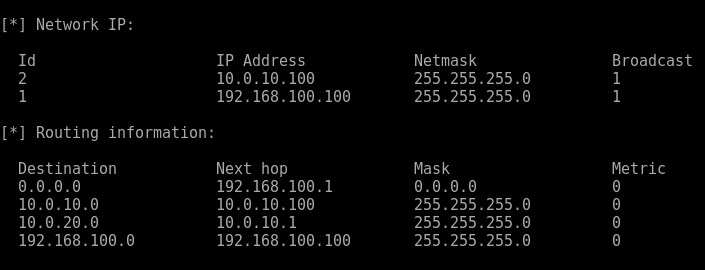
So in this scenario the firewall is only allowing inbound access to our Ubuntu server, on port 22 from our attack box running Kali2.0 ‘HKali’. So from Hkali all we can see is port 22 open on 192.168.100.10. We suspect from our initial enumeration that other servers might be in this network. However, we want to check out the rest of the subnet ie ‘WS2K32’ and ‘meta’ to see whats actually there. Imagine we have compromised the ubuntu server already and have gained login details.
Starting at our attacking machine we will SSH into ‘Ubuntu’. In order to be able to forward traffic for any TCP port on through our SSH tunnel we will want to take advantage of Dynamic port forwarding and specify the ‘-D <port>’ command. This uses ‘Dynamic’ port forwarding feature of SSH. This will allow us to send other tools with Kali to localhost:1234 and thus onward onto any route able networks the ‘Ubuntu’ server can see.
Our command would look similar to the below:
ssh root@192.168.100.10 -D 1234
Before we go any further there are some useful additional options we can pass on the ubuntu server in the SSH command, these being below. However the minimum we need to specify is just the -D for dynamic forwarding:
-f: Sends the process to the background. If you do this you will have to kill the process ID rather than just closing the terminal window as it will already be closed. This is easy enough use ‘ps aux | grep ssh’ to get the process ID then ‘kill <ID number>’.
-C: Compresses the data before sending it through the tunnel, mixed success with this, so experiment.
-q: Uses quiet mode.
-N: Tells SSH that no command will be sent through once the tunnel is up.
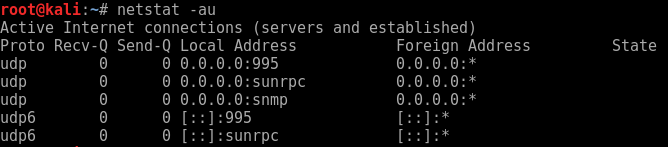
If we take a look at our local network connections we can in fact see our ssh connections and also our localhost listening on port 1234.

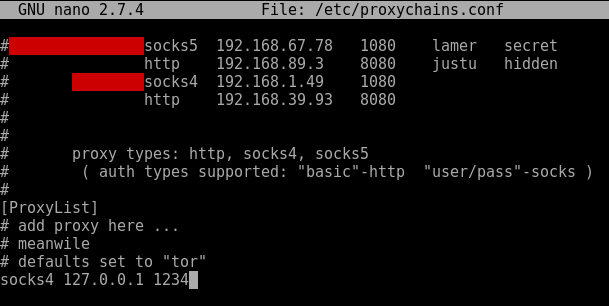
We can now use a socks proxy or equivalent to proxify our traffic through the SSH tunnel and onward to the inside network. For this we will use proxychains. Lets look at how we could do this using a socks4 proxy. First a look at our proxychains configuration. Lets open up /etc/proxychains.conf and ensure the the following line is set in the last line. (note the port should be whatever you used in the SSH command after the ‘-D’.
Now we can proxify something like nmap through to the internal network. Bear in mind we can only proxify full TCP connect commands. So UDP traffic/tools such as snmp-check won’t work – however, we can proxify udp in an alternative way, I describe this here. Some tools won’t play nice with proxychains, so play around in your lab and experiment.
Enjoy!


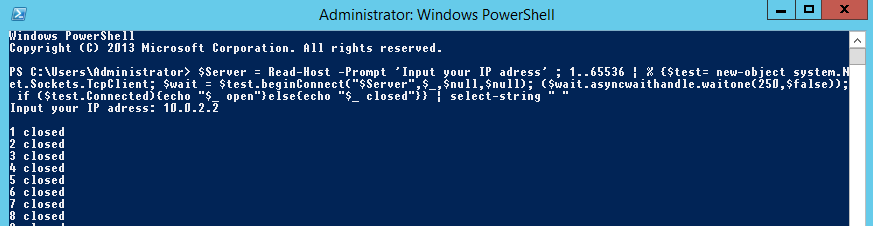
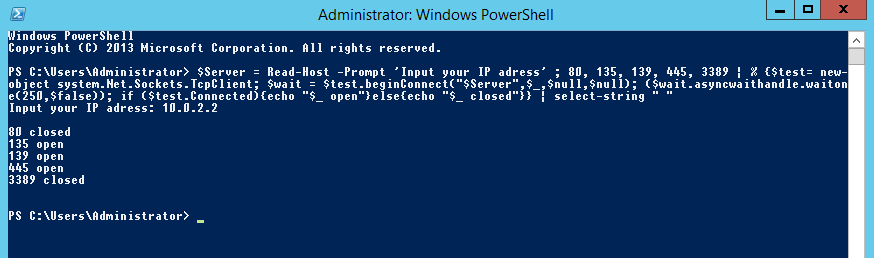
 Searching for password files in PowerShell, can be particularly useful especially for post exploitation recon phase of an engagement. PowerShell is great tool for a penetration tester. Its post exploitation capabilities has grown exceptionally over the last few years. During the course of a penetration test once you have compromised a windows host there is a good chance that you will want to enumerate the host system further and gather as much information as possible. If you have access to a low privilege user you are likely going to want to escalation your privileges to higher account. This being known as post-exploitation. This will almost always likely include searching the local system for passwords. We will want to search for xlsx, docx are classics. Sure we can use the windows built-in gui however we can also use PowerShell. We can use the following syntax in PowerShell to search for files with the text ‘password’ in the filename, just like below. We use the wildcard ‘*’ either end of the ‘passwords’ so we can search for variations in the file name. Ace!