Resizing a Linux Disk in VirtualBox
I came across a need to expand the hdd on Linux virtual machine, as I had run out of space. I thought I would share my experience by walking through the steps I took in resizing a VirtualBox Linux disk for the Debian based OS that I had. The process involves expanding the virtual image file then using GParted to expand the partition. This is actually relatively painless. My particular disk image was in VMDK that I needed to increase by an additional 10Gb. I actually tested this out for a non trivial virtual machine first, this is how I got on:
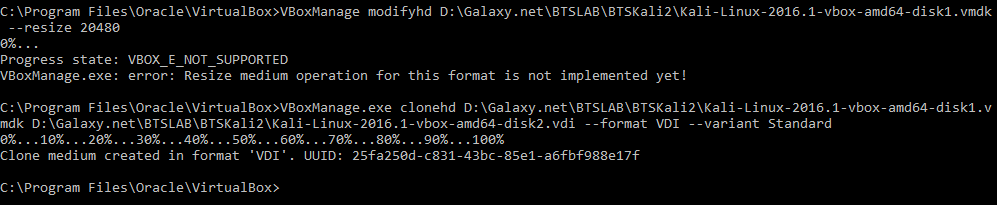
First like me if your using a VMDK you will need to convert the disk image to either a VDI or VHD file. This can be done at the command line (with Admin privs) like below. If you try to expand the a VMDK with VirtualBox you get a nice error as below:
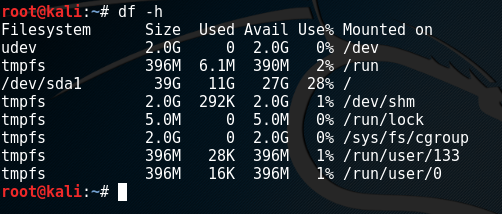
The next stage is optional: Take the new VDI file and create a new virtual machine using the new HDD file. I personally would then boot the machine just to check it boots and everything is in order however this is optional, while I was there I took a quick snip of the HDD space. /dev/sda1 is 29Gb we will increase to 40Gb.
Resize the VDI file at the command line (with Admin privs) like below:

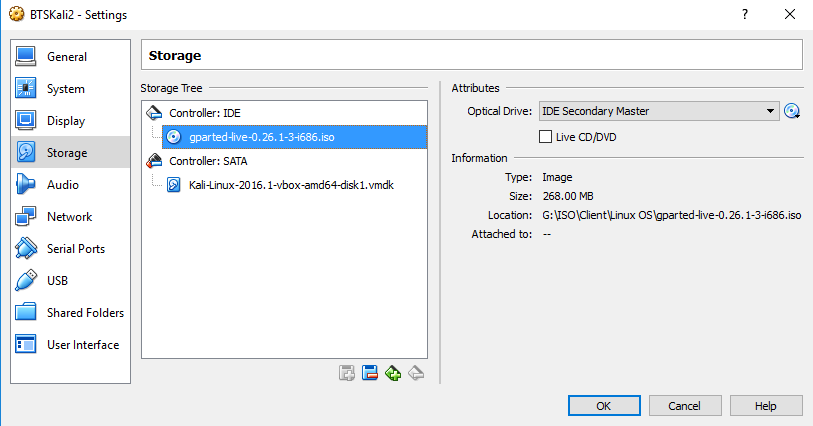
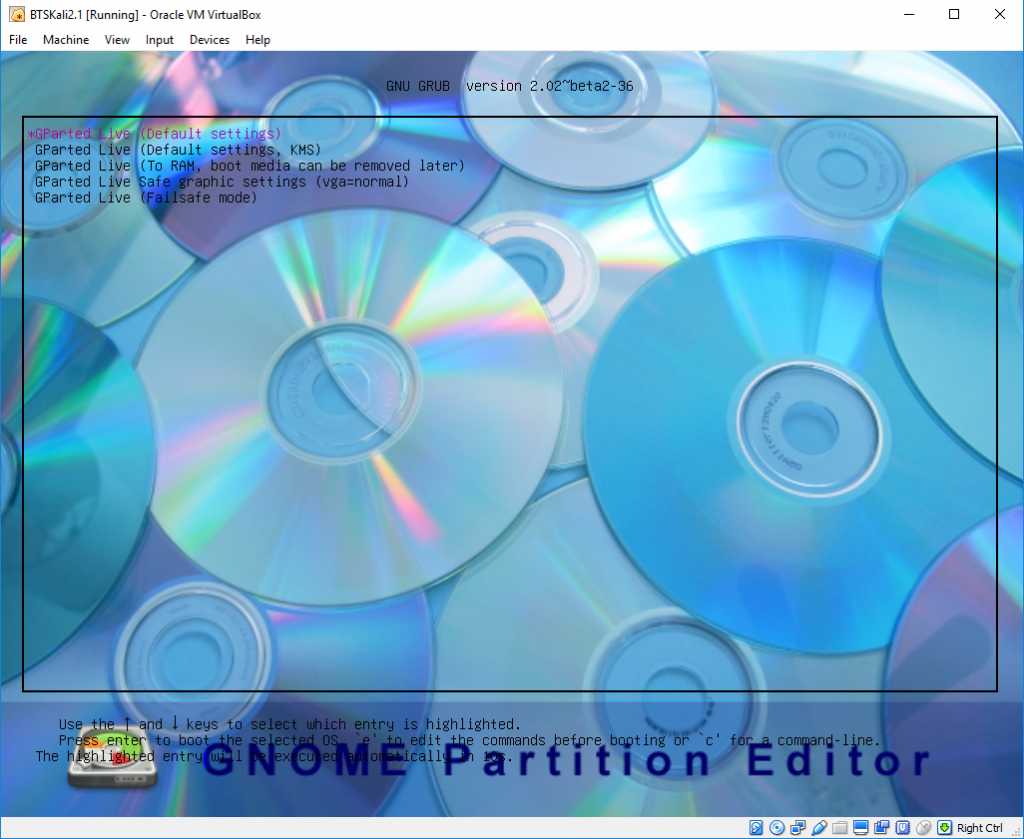
At this point the vm will still boot just fine, however the hdd partition won’t have increased. We will need to extend the partition using a program like Gparted. So we mount the GParted ISO into the guest CD drive. You will also need to enable EFI from the system page in order to boot into the latest GParted GUI, this will need to be unchecked after we have finished to boot back into our Debian os.
Start the vm, allow GParted to boot. Select the first option and allow GParted to continue to load, accept the default settings pressing ‘enter’ three times.
Once booted into GParted you will be presented with the following screen:
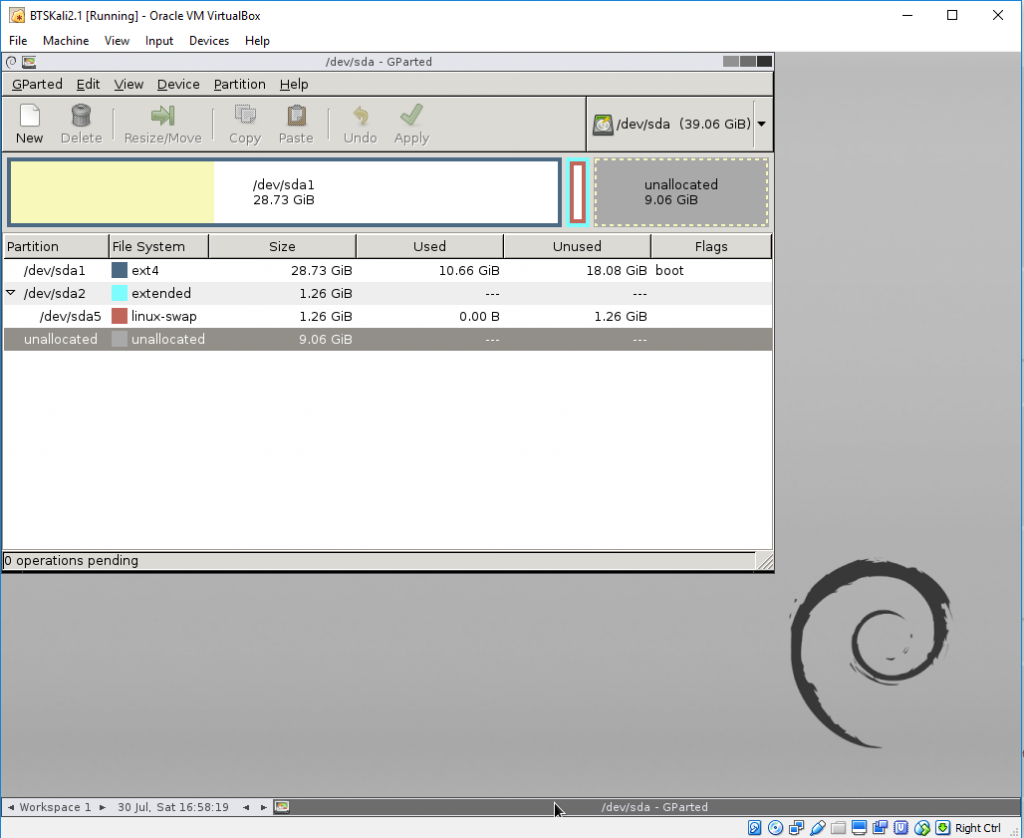
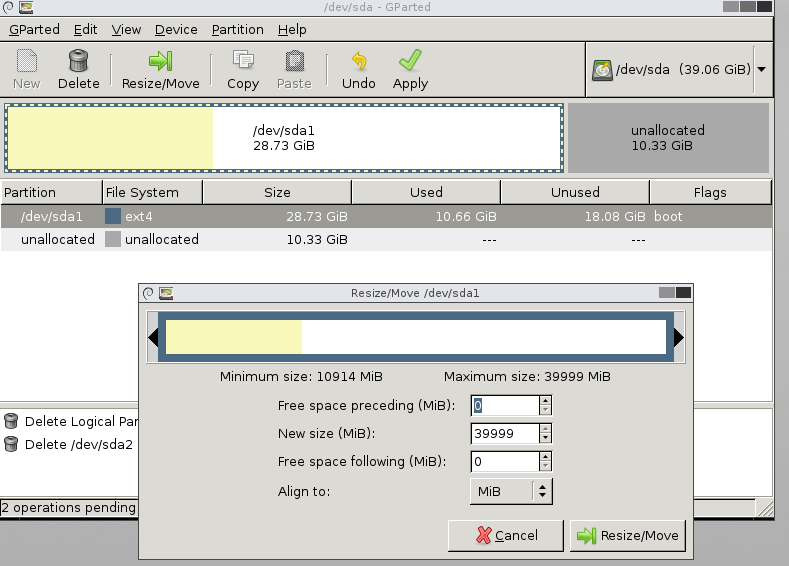
We need to remove ‘/dev/sda2’ (the swap file and recreate it later) in order to extend the partition into the unallocated space. Once this is complete we can then select ‘/dev/sda1’ select ‘Resize/Move’ from the menu, drag the slider bar all the way to the right hand side like below and select ‘Resize/Move’.
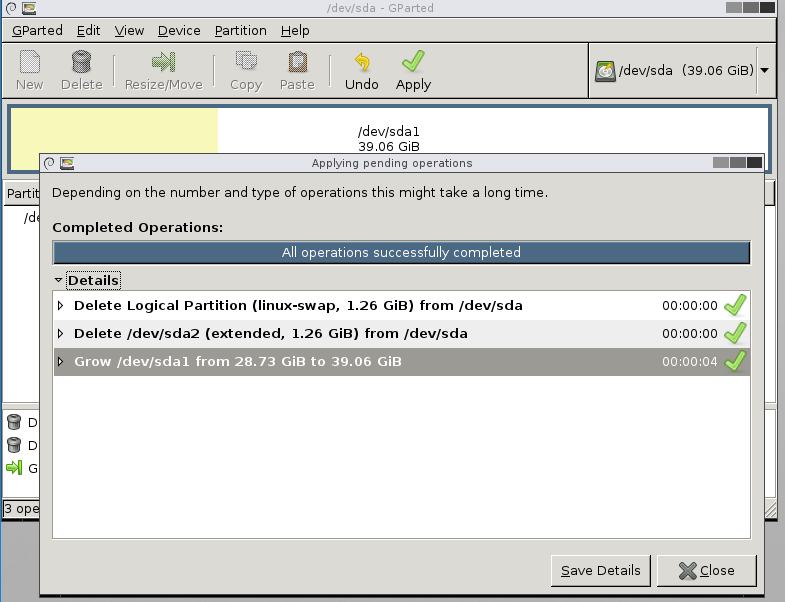
Select ‘Apply’ from the menu, and after a short pause we can see all operations were successful. Once this is complete close the ‘Apply pending operations’ and shutdown.
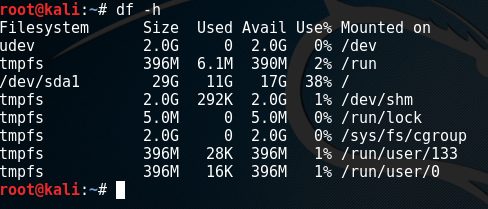
Remember to disable the EFI option in the VirtualBox machine settings for our Debian based system. Boot the machine up and recheck the size; voila, we can see our /dev/sda1 is now 39Gb!