As a mental note to myself more than anything however some one may also find this useful. These are the steps you need to take in order to recover or reset a Cisco Router Password. This was performed on 2800 series router. This may be different for other router models and the break key sequence may also be different for your favorite terminal software, however these are the outline steps required in order to re-gain access to you Cisco Router.
Connect via the console port.
Power cycle the router.
Issue the break sequence command on startup within 60 seconds of power up to put into ROMmon – ‘Ctrl-Break’ or ‘Break’
Change the config register with ‘confreg 0x2142’ command.
Power cycle the router.
skip the initial startup/setup procedure
move into privilege EXEC mode.
Copy the startup configuration to the running configuration.
Check the config with a show run – and change the password.
Change the config register back to the original setting (usually 0x2102) in Global Configuration mode with ‘config-register 0x2102’.
Save your changes and reboot to set the new config register.
Issue a ‘Show version’ to verify you have the correct config register:
Symmetric Encryption Techniques – Block and Stream Ciphers.
Two types of symmetric encryption techniques that are used are Block and Stream Ciphers, in this post I will cover them both in a high level comparison.
Block Ciphers
Block ciphers take a section of plaintext (a block) and turns them into block of ciphertext of 64 or 128 bits. The block size is how much data is encrypted in one go.
The output from a block cipher is usually larger than the input data, due to the ciphertext being a multiple of the orginal block size.
Common modes of operation block ciphers are Cipher Block Chaining (CBC) and Electronic Codebook (ECB). Block ciphers include DES with a 64-bit block size and AES with a 128-bit block size.
Stream Ciphers
Stream ciphers encrypt plaintext one byte or one bit at a time, as opposed to a block of data at a time as with a block cipher. With a stream cipher, the conversion of these smaller plaintext sections of data can vary, depending on when they are viewed during the encryption process. Stream ciphers can be much faster than block ciphers, and usually do not increase the message size, because they can encrypt an any specific number of bits.
Stream ciphers include RC4 (and the RC series) ciphers. DES can also be used in stream cipher mode.
Ways to mitigate VLAN Hopping Attacks on a Cisco Switch.
The ways in which we can prevent basic vlan hopping attacks on a Cisco Switch are more best practice security configurations. Vlan hopping attacks can occur in one of two ways. The first by an attacker spoofing DTP messages directly to a switch, if the switchport has Dynamic Trunking Protocol (DTP) enabled it can then negotiate a vlan and receive tagged packets for that vlan. The second is by introducing a rogue switch and again taking advantage of DTP and negotiating a trunk with the switch and then allowing it to receive all vlans. Not good!
We can do the following to prevent this:
Disable Dynamic Trunking Protocol (DTP) for non-trunked ports with switchport mode access – this should always be done for all ports straight out of the box!
Disable Dynamic Trunking Protocol (DTP) for all trunked ports with switchport non-negotiate.
Manually enable trunk ports with switchport mode trunk.
Set the native vlan to an unused vlan rather than just leaving it on vlan1 with switchport trunk native vlan(your vlan number)
Put all unused ports into an unused vlan and then disable all unused ports – again disabling all unused ports should be done straight out the box.
This week sees a new vulnerability in SSLv2 and TLS. The ‘Drown’ vulnerability standing for “Decrypting RSA using Obsolete and Weakened eNcryption”, this is already sounds pretty harrowing to anyway in the security field, anything with RSA decryption and weakened encryption you know is not going to be good. Matthew Green does a great job in explaining all about this so I won’t attempt to regurgitate his excellent explanation, other than to highlight the issue and to say this doesn’t look good at all and I encourage you to read his blog and take note of this vulnerability:
As an industry we need more information security defenders to play the role of the blueteam in the Enterprise. All too often the IT Team receive a pentest report with a list of red criticals and are immediately overwhelmed with issues to fix. Whilst an organization has regular pentests it has the danger of lulling itself into a feeling of ‘doing the right thing’ however if all they are doing is getting a pentest and not re-mediating the issues then its a waste of time and money. This is a pessimistic view however it is usually the case that more vulnerabilities are released that the IT know what to do with. The IT team tend to either not have enough resource or they don’t have the skills to fix the issues, usually the first being being the case. Penetration testing needs to be more than just a test, it needs to be a more proactive engagement with after test help and support for the enterprise should they need it.
Its easy to criticise the IT department. As Information Security Professionals, we are doped daily with the next new exploit or zero day from the various blogs and podcasts that we listen to. This isn’t a small IT departments main concern or top of their list of to do tasks when they arrive at work, (although it could be argued it should be, with a little more security awareness training). The IT team tend to prioritise keeping those critical business apps or switches up and running (I’ve been that person).
As Information Security Professionals we need to be more involved in fixing and explaining the risks and supporting organisations so that they are better equipped to defend themselves.
The next new shiny security toy in the enterprise may not necessarily be the answer, the existing tools already installed around us could be better used and more creatively used to defend the enterprise. Getting the latest IDS or implementing the next new NextGen Firewall can tend to be a distraction to getting down to what needs to be done i.e. Getting that MS08-067 patched on that business critical server that’s been there for years or tightening up the existing firewall. Hardening existing systems with group policy, tuning WSUS or SCCM to deploy timely updates and utilising windows logging to alert when a domain admin group is modified for example will generally go far further, and are free.
Hopefully sites like this will help contribute to securing enterprises, and assisting system administrators to better defend their existing environments. Enterprises don’t necessarily need to spend huge amounts of money on new technology, the answer could be in being more creative with what you already have.
Configuring a IPSec Site-to-Site VPN Tunnels on a Cisco Router
I thought I would run through configuring IPSec Site-to-Site VPN Tunnels on a cisco router. I’m going to be covering at high level the basic principles needed to configure a IPSec Site-to-Site VPN. The fundemental principals can be used for the Cisco ASA Firewall or Cisco VPN concentrator. The VPN gateways in our example (the routers) are responsible for encapsulating and encrypting the outbound traffic which in a real world example this would from be from a site to a peer gateway at another site. This could be either through an MPLS network from an ISP or more commonly directly over the Internet. When the receiving gateway receives the traffic it strips away the headers, decrypt’s the content with the pre-shared key and forwards on the traffic to a host network on the inside.
In our example we are going to be using 3 networks with an IPSec VPN tunnel being established between two of the routers. I have added the extra network without the tunnel to demonstrate in wireshark the encrypted vs the non encrypted traffic. All three networks are connected to a switch which we are going to image as our either our Internet or MPLS connection.
An IPSec tunnel consists of 5 stages to establish and terminate its connection these are:
An ISAKMP tunnel is initiated when the VPN gateway detects ‘interesting traffic’ which is defined by an ACL.
IKE Phase 1 is established through negotiating the ISAKMP SA policy that is defined in the config.
IKE Phase 2 is established through negotiating the IPSec SA policy.
The IPSec tunnel is created and data can begin to be transferred Encrypted.
The IPSec tunnel is teared down when either the lifetime of the session expires or the IPSec SA is removed.
Below is the extra config that is used for each router other than the initial config of a standard GNS3 router, this can simple be copied into global configuration mode. The config is split into three main sections the interface configuration, EIGRP configuration and the IPSEC configuration.
hostname RouterA
interface fa 0/0
 ip address 4.5.6.1 255.255.255.0
 no shutdown
interface fa 0/1
 ip address 10.0.0.1 255.255.255.0
 no shutdown
 exit
router eigrp 111
 network 10.0.0.0
 network 4.5.6.0
 no auto-summary
 exit
# Identify interesting traffic on RouterA to RouterB with the below ACL
access-list 101 permit ip 10.0.0.0 0.0.0.255 10.0.1.0 0.0.0.255
# Configure the IKE Phase 1 ISAKMP SA policy on RouterA
crypto isakmp policy 10
 encryption aes 256
 authentication pre-share
 hash sha
 group 5
 exit
crypto isakmp key cisco12345 address 4.5.6.2
# Configure the IKE Phase 2 IPsec SA Policy on RouterA
crypto ipsec transform-set VPN-SET esp-aes esp-sha-hmac
crypto map VPN-MAP 10 ipsec-isakmp
 description VPN Connection from RouterA to RouterB
 set peer 4.5.6.2
 set transform-set VPN-SET
 match address 101
 exit
interface fa0/0
 crypto map VPN-MAP
 exit
hostname RouterB
interface fa 0/0
 ip address 4.5.6.2 255.255.255.0
 no shutdown
interface fa 0/1
 ip address 10.0.1.1 255.255.255.0
 no shutdown
 exit
router eigrp 111
 network 10.0.1.0
 network 4.5.6.0
 no auto-summary
 exit
# Identify interesting traffic on RouterB to RouterA with the below ACL
access-list 101 permit ip 10.0.0.0 0.0.0.255 10.0.1.0 0.0.0.255
# Configure the IKE Phase 1 ISAKMP SA policy on RouterB
crypto isakmp policy 10
 encryption aes 256
 authentication pre-share
 hash sha
 group 5
 exit
crypto isakmp key cisco12345 address 4.5.6.1
# Configure the IKE Phase 2 IPsec SA Policy on RouterB
crypto ipsec transform-set VPN-SET esp-aes esp-sha-hmac
crypto map VPN-MAP 10 ipsec-isakmp
 description VPN Connection from RouterB to RouterA
 set peer 4.5.6.1
 set transform-set VPN-SET
 match address 101
 exit
interface fa0/0
 crypto map VPN-MAP
 exit
hostname RouterC
interface fa 0/0
 ip address 4.5.6.3 255.255.255.0
 no shutdown
interface fa 0/1
 ip address 10.0.2.1 255.255.255.0
 no shutdown
 exit
router eigrp 111
 network 10.0.2.0
 network 4.5.6.0
 no auto-summary
 exit
# Note there is no IPSec configuration on this router
I’ve broken down just one of the IPSec configuration below to explain what the various elements are, these need to match at both sites:
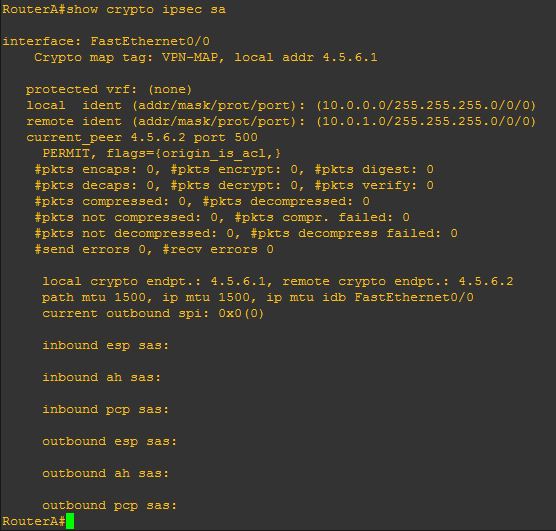
Before generating any interesting traffic if we execute ‘show crypto ipsec sa’ from RouterA we can clearly see there has been no traffic captured by the ACL.
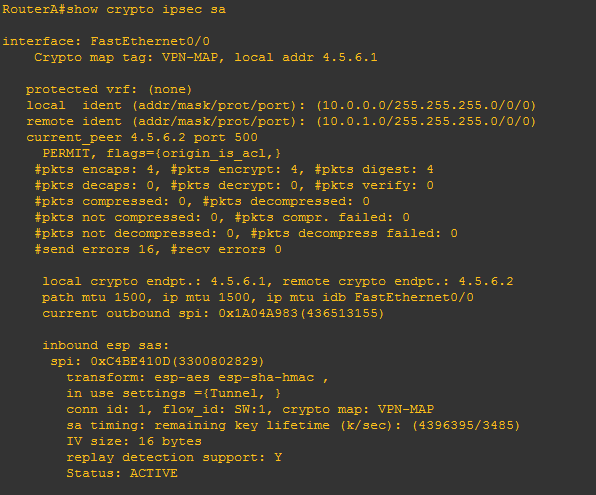
If we now generate some ‘interesting traffic’ such as a ping from PC1 10.0.0.2 to PC3 10.0.1.2 which will match our ACL that is specified in our crypto map, then re-issue ‘show crypto ipsec sa’ we will see from the stats that packets have been encrypted. Further to this we will see the inbound and outbound session will be ‘ACTIVE’.
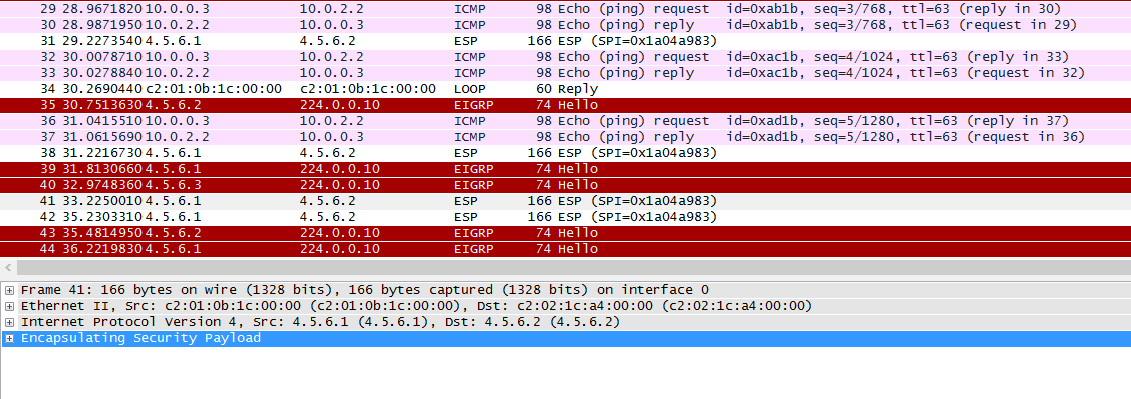
To take this one stage further we will demonstrate the difference in the Encrypted IPSec traffic and ordinary traffic using wireshark. The capture will be taken from the link between RouterA and the core network. We will ping out from PC1 to PC3 (the encrypted traffic caught by our ACL) and PC2 to PC5 (the non-encrypted traffic that doesn’t match our ACL) simultaneously. This is what we see:
As we can see from the wireshark capture our encrypted traffic is shown in the Encapsulated Security Payload and our non encrypted traffic in the clear (the ping request and reply).
I thought I would share with you all a new podcast I have been listening to (well new to me). Risky Business, as taken from the website ‘Risky Business was established in February, 2007. It takes a lighthearted look at information security news and features!’ – I’ve found this weeks episode #399 particularly interesting, it contained news stories that are current at the moment, with just the right amount of technical detail to keep me listening. Notably the stories of the week that were discussed were around the iPhone FBI saga that started last week, GLibc vulnerability and interestingly the new NIST Cyber Security framework which was discussed by Cris Thomas, a.k.a. Space Rogue.
I invite you to also listen to Risky Business and maybe let me know what you think:
I thought I would run through the process of obtaining a certificate for a web server from Lets Encrypt the open certificate authority by the Internet Security Research Group (ISRG) , for free!
The Lets Encrypt initiative has been setup to simplify the process of obtaining a certificate and make it more accessible for people to use encryption on their websites you can read more about it here: https://letsencrypt.org/. Certificates are free and valid for 90 days and need to be renewed for continuation of the service. (which can be automated). Those who have been through the process of provisioning certificates will understand the involved process to get it working, this is a breath of fresh air in comparison.
Sounds great so what do we need to do? Well the below example runs through the process for an already created standard HTTP apache debian based system.
OK So Lets Encrypt!
First we need to obtain the Lets Encrypt files. We will pull the files across from the Official GitHub repository. We’ll do this through git. This ensures that we have the latest version of the Lets Encrypt files. We will drop it under the /opt folder.
(If you want to update in the future run ‘git pull’ in the same folder.)
Move into the lets encrypt folder:
cd /opt/letsencrypt
We then need to install the Lets Encrypt client through the ‘letsencrypt-auto’ command, when this is run it will essentially pull down all the related dependencies from your OS repositories and update the client through either apt-get or yum for example. From there on you can run either ‘letsencrypt’ or ‘letsencrypt-auto’ command for new certs of renewals.
Next we will obtain our certificate and bundle for our test domain testdomain.co.uk and subdomain www.testdomain.co.uk with the letsencrypt-auto command. This is the recommended method from the Lets Encrypt website.
There are a number of plugins that can be used with letsencrypt run command, and a number of command line parameters you can pass, these are all designed to help ease the process along. We are going to be running the Apache plugin and so will pass it the ‘–apache’ command. This plugin is designed to be used with Apache (funnily enough!) which automates the process of obtaining and installing the certificate with Apache2.4 on Debian based systems. This effectively sorts all the certificate configuration within Apache and then restarts the service.
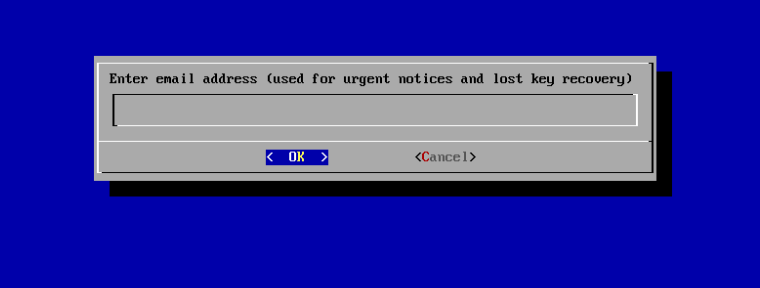
After this is executed you should see the updates scroll through pulling content from your repositories, after a while you will presented with the following screen asking you to confirm your email. This is used as a reminder for renewal:
Lets Encrypt Confirm Email
You can automate this process passing the –email parameter at the command line if you wish. So ‘–email admin@testdomain.co.uk’
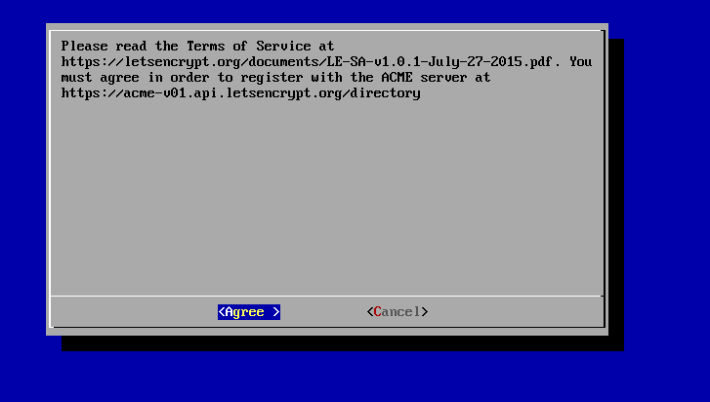
You will next be asked to agree to the terms of service:
Lets Encrypt ToS
Again you can automate this by passing the –agree-tos in the command line.
Next you will be asked where you want to access your site through http and https or just through https.
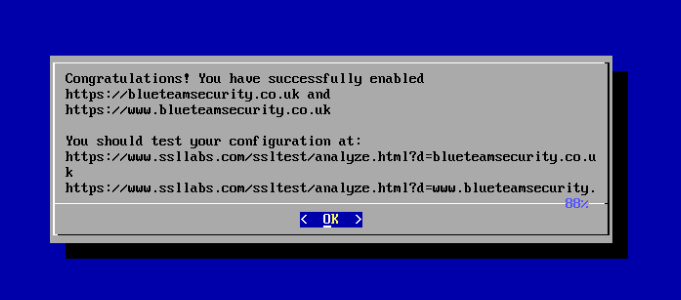
You will then be presented with the ‘Congratulations!’ screen saying you have successfully configured your certificate and enabled https:
Lets Encrypt! Congratulations
Renewal
To renew your certificate run:
letsencrypt-auto renew
This will renew all your certificates with all previously used parameters for certificates that are due to expire within 30 days. passing the -d parameter will renew per domain.
--force-renewal
Allows you to renew before 30 days.
You can also run:
letsencrypt-auto renew --rsa-key-size 4096
This will renew your certificate with a key size of 4096 bit.
You can also rerun the existing command you ran earlier in which case you will be prompted that you have already run the command and to either re-run the install or renew your certificates.
All that is left to do is to automate the renewal with a cron job, one for another post.
Amazing that’s it! This makes obtaining a certificate for a website very accessible to people due to the way the scripts/plugins automate the apache configuration.
Many vulnerability scanners will often bring back HTTP TRACE TRACK Methods Allowed against Apache and Microsoft web servers of the older generation. TRACE is usually associated with Apache and TRACK for Microsoft. This has a CVSS score of 4.3 and is a relatively easy fix. Clearly the older generation operating systems should be migrated to a supported platform, both the later distributions of Ubuntu and Microsoft 2012 R2 do not allow these methods to be used. However a simple way to validate this finding is to use telnet to connect to the web server on port 80, once connected you can type something similar to the following for each method. The ‘Host’, ‘TestA’ and ‘TestB’ aren’t needed however if you use some custom text you will be sure to see it echoed back by the web server if trace is enabled.
TRACE / HTTP/1.1
Host: 192.168.0.29
TestA: Is this correct?
TestB: Are we sure?
Tap return twice to send.
Which would look something like the below as you can see the user input was returned, the web server accepting the method:
HTTP Trace enabled on Apache
Remediation:
As I said the HTTP TRACK / TRACE issue is this is relatively straight forward to fix, simple add ‘TraceEnable off’ somewhere in your main Apache config file outside of the vhost configuration.
Once implemented retesting should reveal that the method is not allowed:
I have been recently testing out some SIEM (Secuirty Incident & Event Management) software by SolarWinds there LEM product, (a review for another post perhaps). During the testing I can across the requirement to relay mail notification emails out to a set of test users (this typically being IT, 3rd Line in my scenario) based on certain events, I wanted to ensure the rules were being fired correctly. I haven’t really come across this requirement before in testing so had to give this some thought. I didn’t really want to stand up a whole mail environment with clients etc in my lab simply due to complexity and configuration hassle that I should imagine it would entail, it also takes the focus off what I’m actually trying to achieve. Whilst googling some idea’s for ‘quick and dirty mail deployments’ I came across ‘mailtrap.io’.
Mailtrap.io essentially allows you to relay mail out across the Internet to there mail servers without it actually being forwarded onto the end recipient, a little bit like a fake smtp server. It is specifically designed for test, dev and QA environments for testing mail notifications without actually sending emails to customers or users. You can view the email messages online.
You can sign up for free account which gives you a single mailbox and allows you to receive upto 50 email messages. You receive a username and password and all the other details required for relaying mail, such as smtp address etc. These can be reset at the flick of a button enabling you to reset the creds at the end of your lab session.
Thumbs up for mailtrap.io I will be using this again in the future no doubt check it out at http://www.mailtrap.io


 This week sees a new vulnerability in SSLv2 and TLS. The ‘Drown’ vulnerability standing for “Decrypting RSA using Obsolete and Weakened eNcryption”, this is already sounds pretty harrowing to anyway in the security field, anything with RSA decryption and weakened encryption you know is not going to be good. Matthew Green does a great job in explaining all about this so I won’t attempt to regurgitate his excellent explanation, other than to highlight the issue and to say this doesn’t look good at all and I encourage you to read his blog and take note of this vulnerability:
 As an industry we need more information security defenders to play the role of the blueteam in the Enterprise. All too often the IT Team receive a pentest report with a list of red criticals and are immediately overwhelmed with issues to fix. Whilst an organization has regular pentests it has the danger of lulling itself into a feeling of ‘doing the right thing’ however if all they are doing is getting a pentest and not re-mediating the issues then its a waste of time and money. This is a pessimistic view however it is usually the case that more vulnerabilities are released that the IT know what to do with. The IT team tend to either not have enough resource or they don’t have the skills to fix the issues, usually the first being being the case. Penetration testing needs to be more than just a test, it needs to be a more proactive engagement with after test help and support for the enterprise should they need it.

 I thought I would share with you all a new podcast I have been listening to (well new to me). Risky Business, as taken from the website ‘Risky Business was established in February, 2007. It takes a lighthearted look at information security news and features!’ – I’ve found this weeks episode #399 particularly interesting, it contained news stories that are current at the moment, with just the right amount of technical detail to keep me listening. Notably the stories of the week that were discussed were around the iPhone FBI saga that started last week, GLibc vulnerability and interestingly the new NIST Cyber Security framework which was discussed by Cris Thomas, a.k.a. Space Rogue.
 Many vulnerability scanners will often bring back HTTP TRACE TRACK Methods Allowed against Apache and Microsoft web servers of the older generation. TRACE is usually associated with Apache and TRACK for Microsoft. This has a CVSS score of 4.3 and is a relatively easy fix. Clearly the older generation operating systems should be migrated to a supported platform, both the later distributions of Ubuntu and Microsoft 2012 R2 do not allow these methods to be used. However a simple way to validate this finding is to use telnet to connect to the web server on port 80, once connected you can type something similar to the following for each method. The ‘Host’, ‘TestA’ and ‘TestB’ aren’t needed however if you use some custom text you will be sure to see it echoed back by the web server if trace is enabled.

 Email Relaying with mailtrap.io