This post walks through MiTM Thick Client Web Services Testing designed for testing thick client web applications for web services using burp and iptables on an internal engagement.
Scenario:
So you need to man in the middle web traffic for application testing on an internal test. This could be either a thick client application for web services that has no proxy settings. Or a client device that is using the system proxy settings (ie proxy settings controlled from Internet Explorer). Or proxying traffic from a client device through the browser as any other usual web application test.
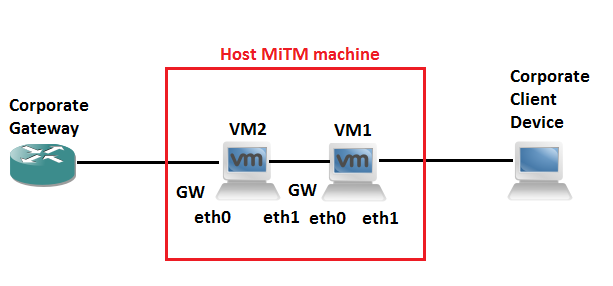
In this scenario the thick client application is installed on a corporate device. So we look to setup some sort of MiTM (Man in The Middle) scenario to watch and alter the traffic as we see fit. The client device IP address must remain the same (ACLs are in place for example or you are unable to change the IP address on the client device). A simple solution to this is two use two virtual machines on your testing laptop to get around having two default gateways with the same IP on one device. With some clever iptables rules we can essentially do a double nat type affair and spoof the client device on the corporate network, at the same time spoofing the gateway for the client device. Bingo MiTM nobody is non the wiser. I talk a bit more about iptables in this post.
If DHCP is used on the client device this is significantly simpler. Rather than using the same ip address range as the corporate network you can set this to an alternative IP and thus removing the need for two virtual machines supporting the double NAT scenario.
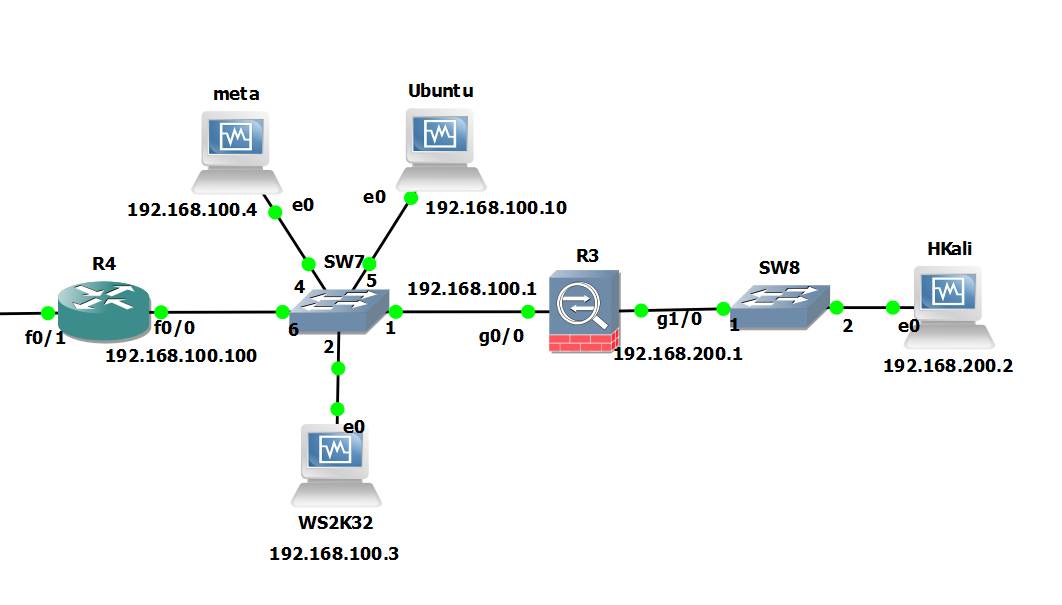
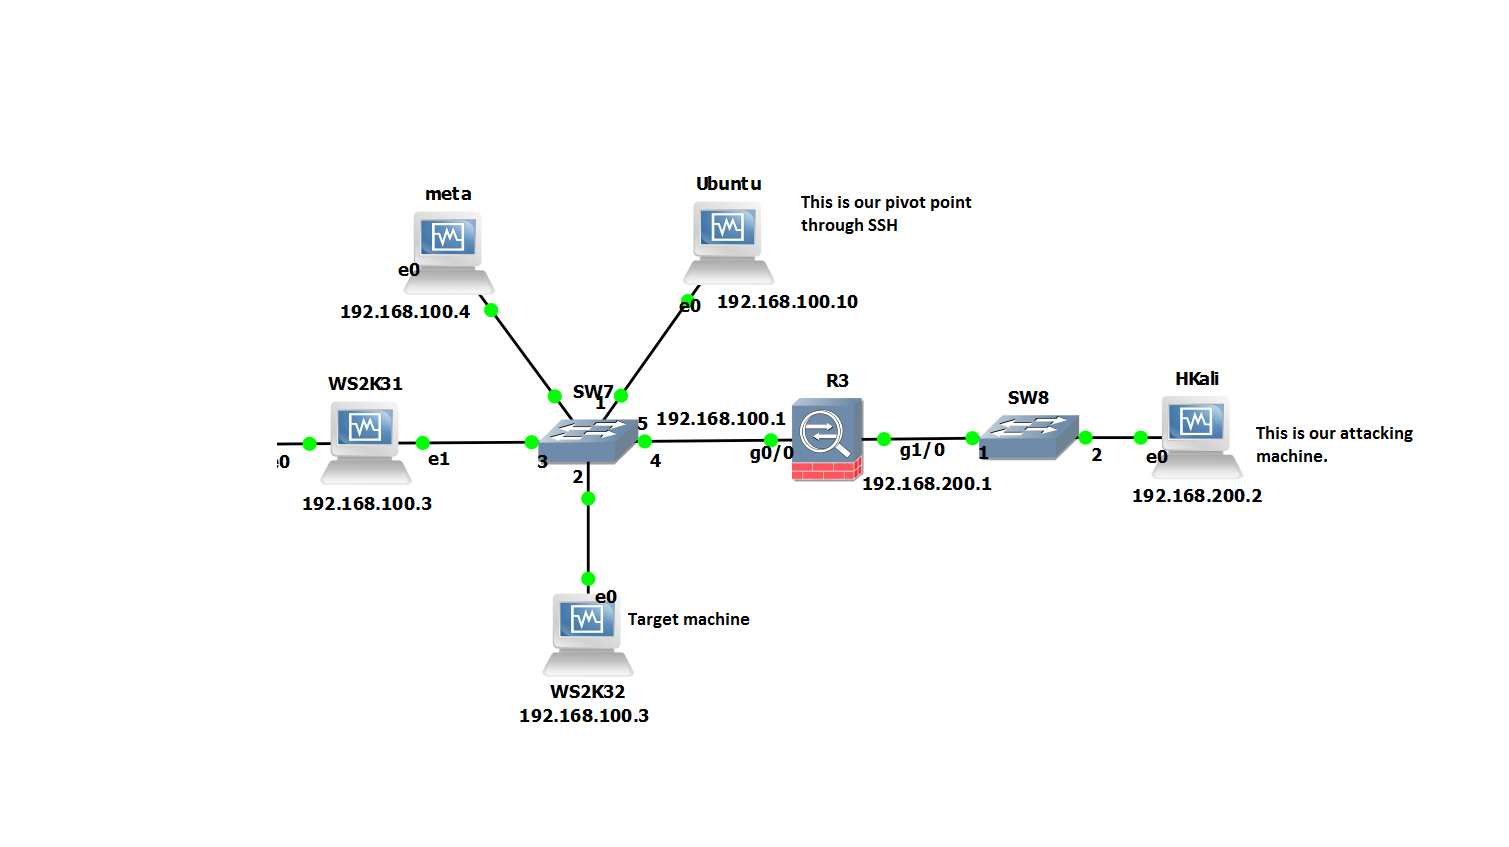
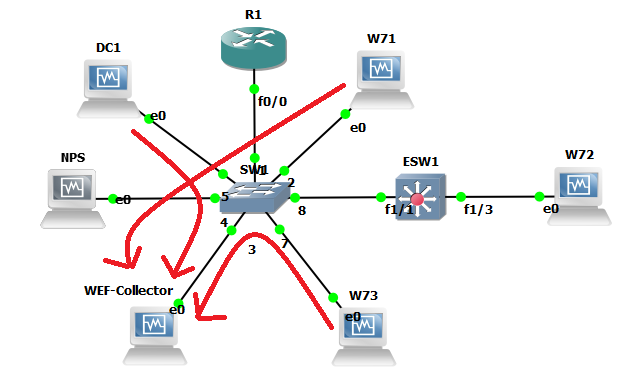
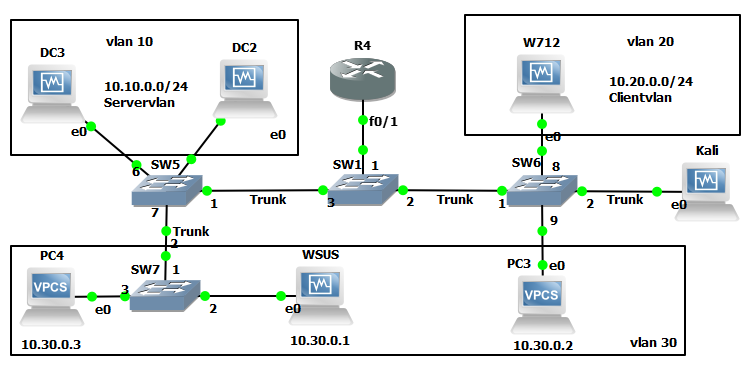
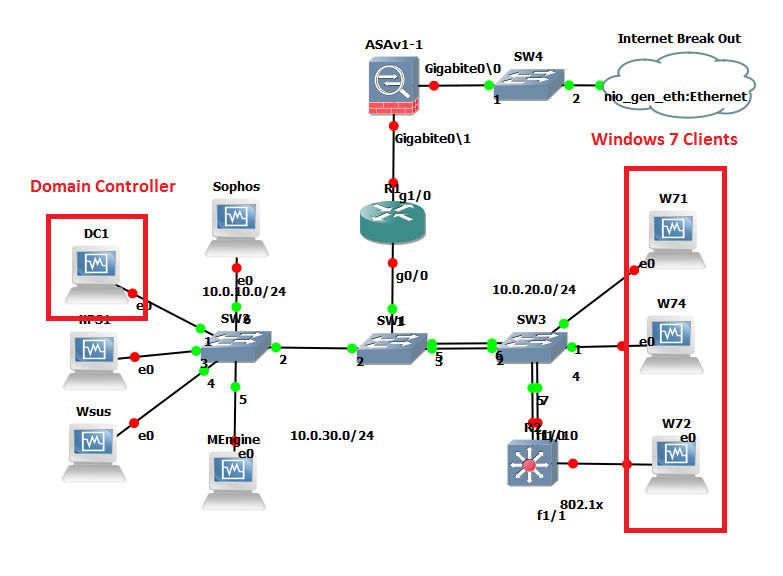
They say a picture paints a thousand words… so to bring it all together it the scenario looks similar to this:
Example 1 Configurable proxy settings on client device:
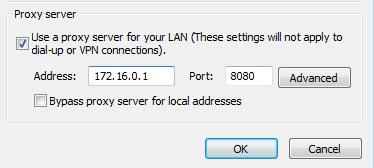
In this example the application on the client system is using the proxy settings configured for IE or Firefox. You are able to modify these and so you can redirect traffic to the proxy of your choice on 8080 for example like so. Note Chrome uses IE system settings:
 Network Configuration:
Caution: Don’t use network-manager for this. Dual homing interfaces does not play nice in network manager. Stop the network-manager service first, verify it is stopped then continue to work in the standard networking service with the interfaces file.
service network-manager status
service network-manager stop
service network-manager status
service networking status
Now continue to work using just the interfaces file with the standard networking services.
Set the mac address of the eth0 on VM2 the same as the PC mac address
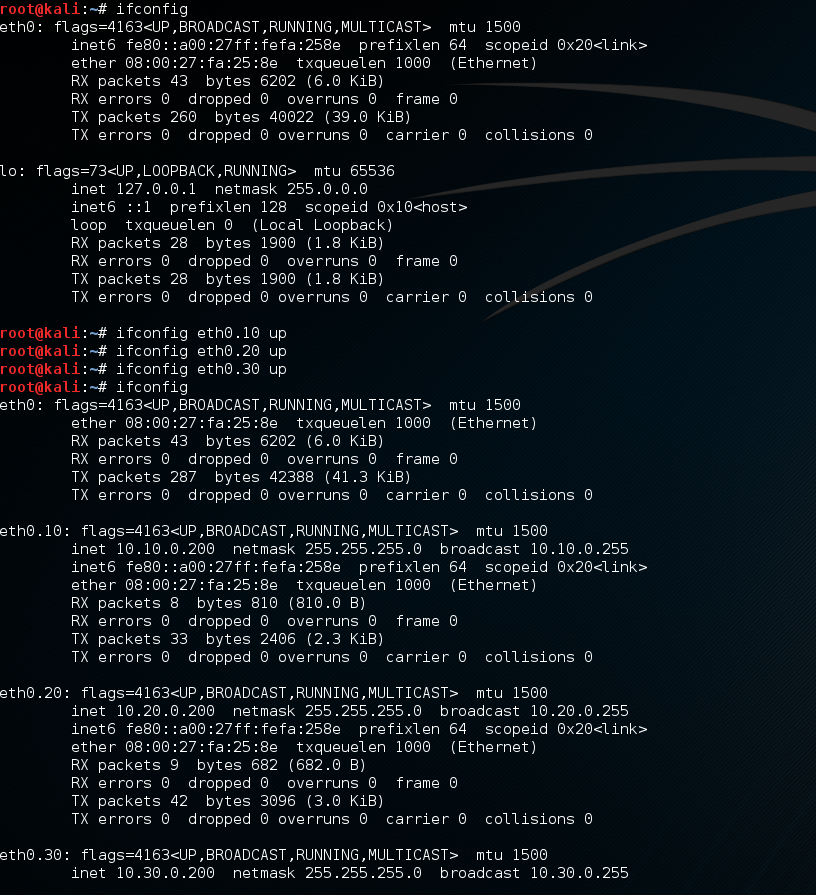
Ifconfig eth0 down
macchanger –mac 08:00:27:8D:CD:53 eth0
ifconfig eth0 up
On both VM2 and VM1:
echo 1 > /proc/sys/net/ipv4/ip_forward
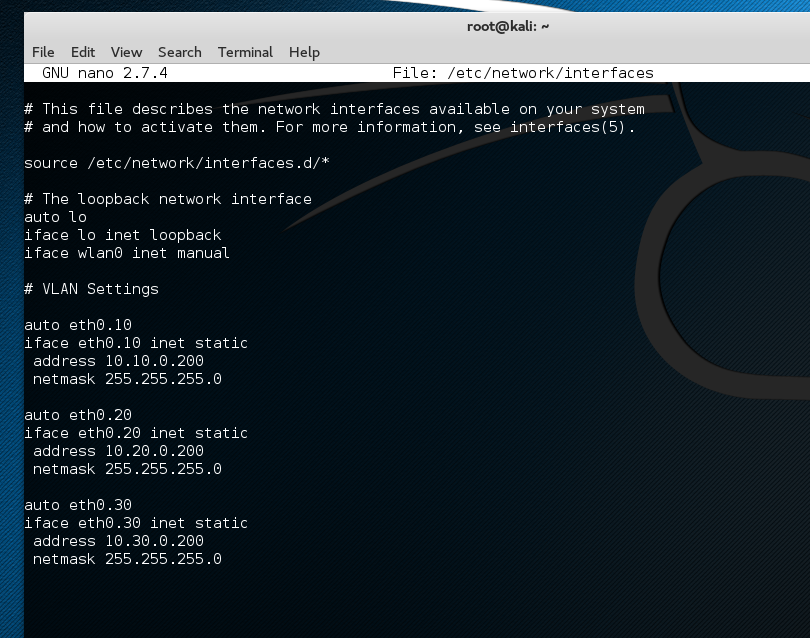
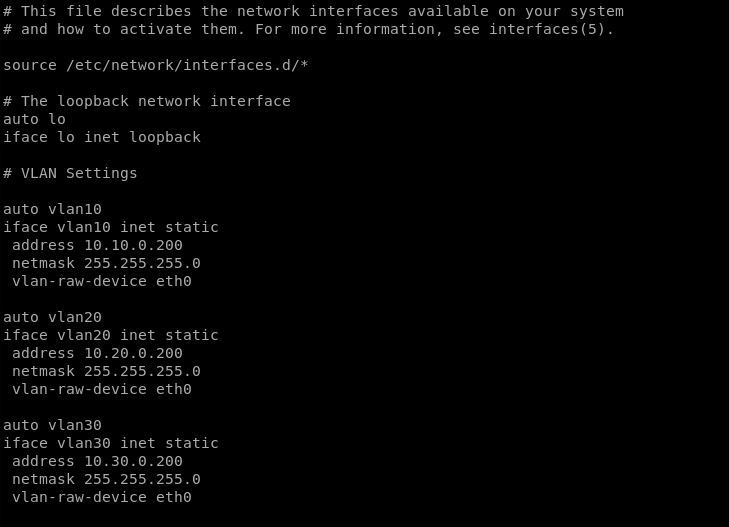
VM2 interfaces file:
# This file describes the network interfaces available on your system
# and how to activate them. For more information, see interfaces(5).

source /etc/network/interfaces.d/*

# The loopback network interface
auto lo
iface lo inet loopback

auto eth0
iface eth0 inet static
address 172.16.0.2
gateway 172.16.0.1
netmask 255.255.255.0
dns-nameservers 8.8.8.8 8.8.4.4


auto eth1
iface eth1 inet static
address 192.168.0.2
netmask 255.255.255.0
dns-nameservers 8.8.8.8 8.8.4.4
**Gateway is always set on the forwarding interface.
VM2 iptables:
iptables -t nat -A POSTROUTING –out-interface eth0 -j MASQUERADE
VM1 interfaces file:
# This file describes the network interfaces available on your system
# and how to activate them. For more information, see interfaces(5).

source /etc/network/interfaces.d/*

# The loopback network interface
auto lo
iface lo inet loopback

auto eth0
iface eth0 inet static
address 192.168.0.1
gateway 192.168.0.2
netmask 255.255.255.0
dns-nameservers 8.8.8.8 8.8.4.4

auto eth1
iface eth1 inet static
address 172.16.0.1
netmask 255.255.255.0
dns-nameservers 8.8.8.8 8.8.4.4
**Gateway is always set on the forwarding interface.
VM1 iptables configuration:
iptables -t nat -A POSTROUTING –out-interface eth0 -j MASQUERADE
Using burp set your proxy to the listening IP and port.
Example 2: No proxy Settings/Thick client App or Web Services etc..
In this example you have a thick client app that doesn’t allow you to set a proxy and doesn’t use the system proxy settings. You can use ‘prerouting’ in IP tables on VM1. This will route traffic destination port 443 and ‘redirect this to port 8081 with this command:
iptables -t nat -A PREROUTING -i eth1 -p tcp –dport 80 -j REDIRECT –to-port 8080
iptables -t nat -A PREROUTING -i eth1 -p tcp –dport 443 -j REDIRECT –to-port 8081
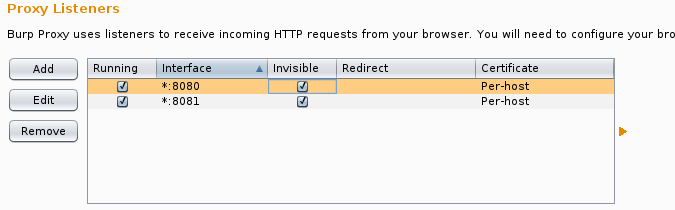
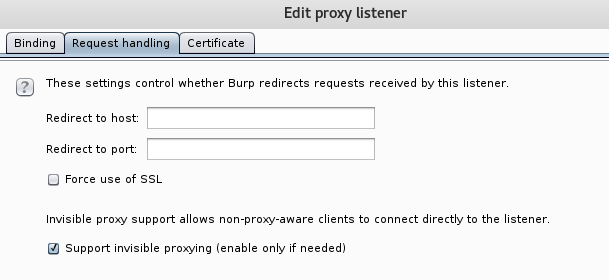
Then using burp configure your proxy to listen on all interfaces for 8080 and 8081 do this for as many destination ports as required. In addition to this ensure ‘Support for ‘invisible proxying’ is enabled.
Things to Remember!:
After every reboot IP forwarding and iptables will reset so check both on a restart:
cat /proc/sys/net/ipv4/ip_forward
iptables -t nat -L -v -n
To make IP forwarding persistent you can do the following:
Edit /etc/sysctl.conf and uncomment the ‘net’ line:
# Uncomment the next line to enable packet forwarding for IPv4
#net.ipv4.ip_forward=1
DNS: hostnames will need to resolve on both the client and proxy machine.
Its is useful to create a bash script for your config for each machine. Then on a reboot there is no faffery looking for the right commands simply run the bash script. Note – the nameservers are pushed to the resolve.conf to save bringing down and back up the interfaces, and restarting the networking. A sample script might look like the below:
On the proxy VM:
#!/bin/sh

service network-manager stop
echo 1 > /proc/sys/net/ipv4/ip_forward

echo nameserver 8.8.8.8 > /etc/resolv.conf

iptables -t nat -A POSTROUTING --out-interface eth0 -j MASQUERADE

iptables -t nat -A PREROUTING -i eth1 -p tcp --dport 80 -j REDIRECT --to-port 8080
iptables -t nat -A PREROUTING -i eth1 -p tcp --dport 443 -j REDIRECT --to-port 8081
This is definitely a labs worth! Hope this helps!