Creating custom word lists:
In this post we are going through how to generate custom word lists with extra combinations based on an initial set of predefined words or generated words using John The Ripper. Why would we want to do this. Well you probably already have giant word lists that you can download from the internet such as the famous ‘rockyou’ list. Or passwords lists from breaches etc. What these huge lists don’t have are tailored words to suit your target specifically. For example we could use a tool called Cewl to spider a website and scrape all words on this site with a minumim length of 6 and a max of 10. We could also add words manually that relate to that target specifically. We then have a very custom set of words to do with that target, in which to generating new words for. (Obviously for a penetration test of which you have authoirsation to test). We could then use another program such as John The Ripper (JTR) to generate iterations of those words, for example adding the year to the end of the word. (this is a classic)
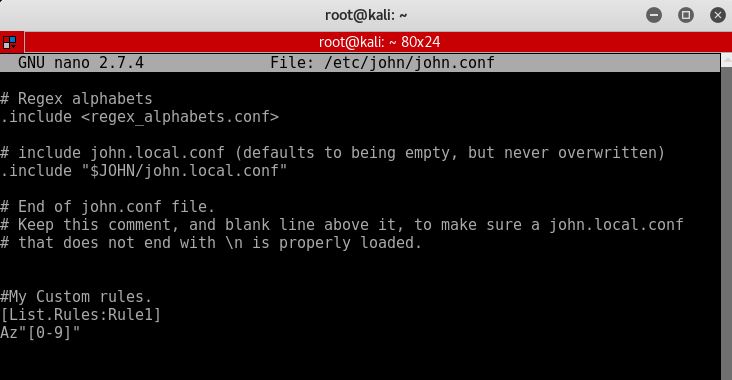
In this example we will use the list ‘list1.txt’ as our starting point. We will then use commands to output a new file called ‘newlist1.txt’. We will use JTR in Kali to do this. JTR has a set of predefined rules that will generate us new words based on the original words in any given list. We will add custom rule sets in JTR to generate different combinations of the original word(s). This configuration is found in /etc/john/john.conf.
Lets get started with an example. If we start with the list ‘list1.txt’ and add one word to keep things simple so we can see the words being generated by JTR and our custom rules. Lets start with the below rule which we will append to the bottom of our john.conf file like below:
Append the below text to the bottom of our john.conf file:
#My Custom rules.
[List.Rules:Rule1]
cAz”[0-9]”
like so:
Now use JTR to generate words using the below command:
john –wordlist=list1.txt –rules=Rule1 –stdout > newlist1.txt
Which looks like:
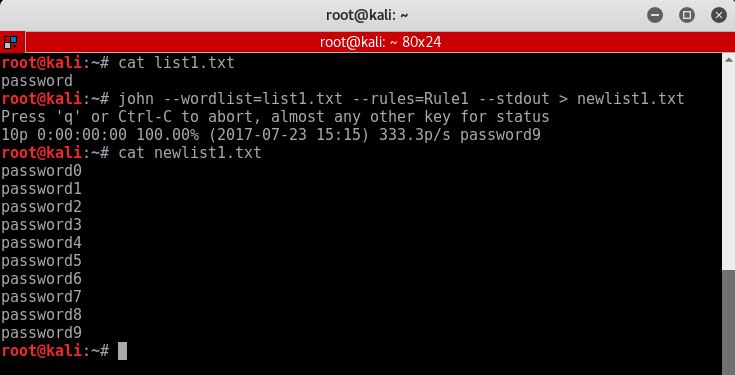
As you can see this simple rule adds numbers 0-9 to the end of the word and adds it to the new list called newlist1.txt.
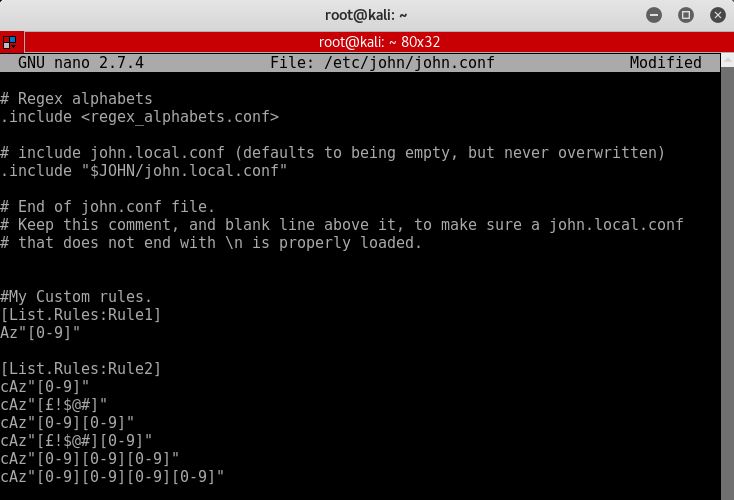
Lets try a few more rules how about the below, append the text to the bottom of your john.conf.
[List.Rules:Rule2]
cAz”[0-9]”
cAz”[£!$@#]”
cAz”[0-9][0-9]”
cAz”[£!$@#][0-9]”
cAz”[0-9][0-9][0-9]”
cAz”[0-9][0-9][0-9][0-9]”
Which will in turn generate us the below:
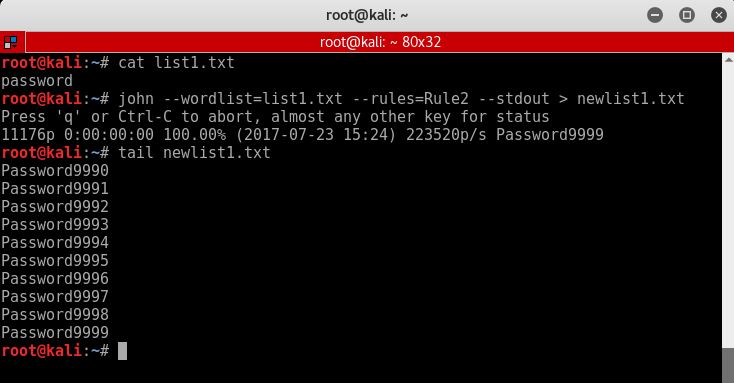
As you can see I have had to tail the newlist.txt file as john has created a huge list, 11176 to be precise.
There are multiple sets of rules available across the internet, for example Korelogic have rules check them out here. See below for some further example rules:
#My Custom rules.
[List.Rules:Rule1]
cAz”[0-9]”
cAz”[£!$@#]”
cAz”[0-9][0-9]”
cAz”[£!$@#][0-9]”
cAz”[0-9][0-9][0-9]”
cAz”[0-9][0-9][0-9][0-9]”
#Replace letters for numbers
[List.Rules:Rule2]
>2!?Aso0
>2!?Asb8
>2!?AsB8
>2!?As1!
>2!?AsA4
>2!?Asa4
>2!?Ase3
>2!?Aso0se3
>2!?Aso0se3si1
>2!?Asi1
>2!?Ass5
Enjoy.
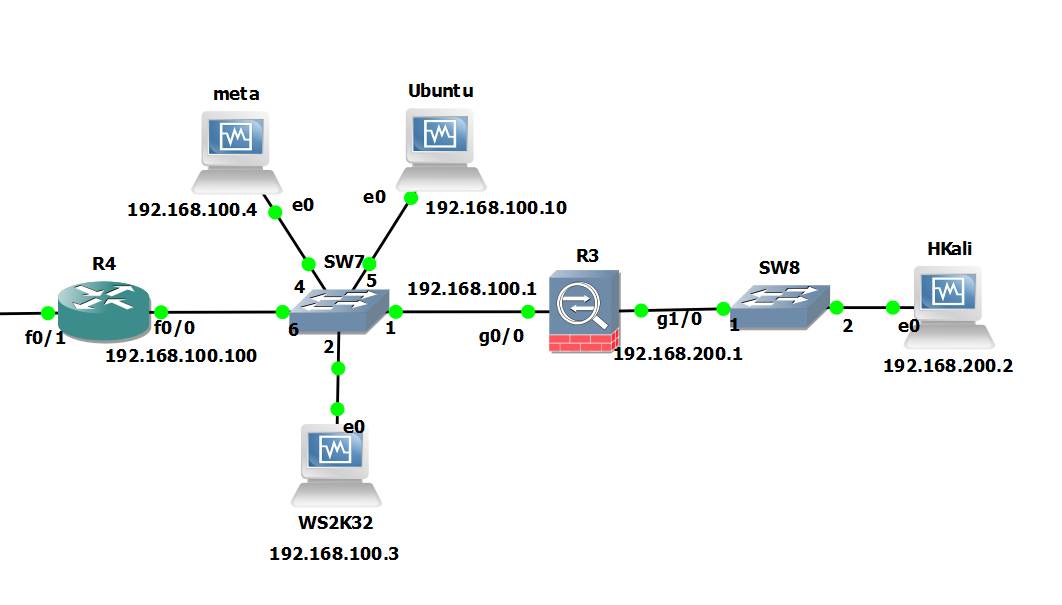
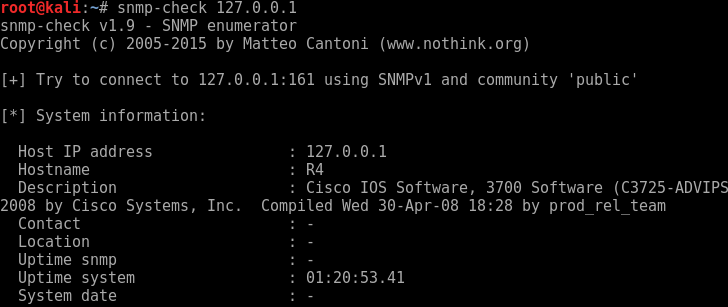
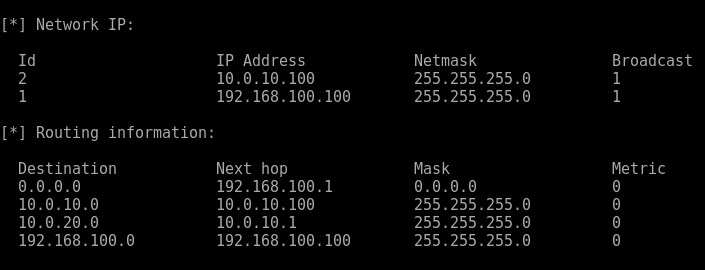
 Network Configuration:
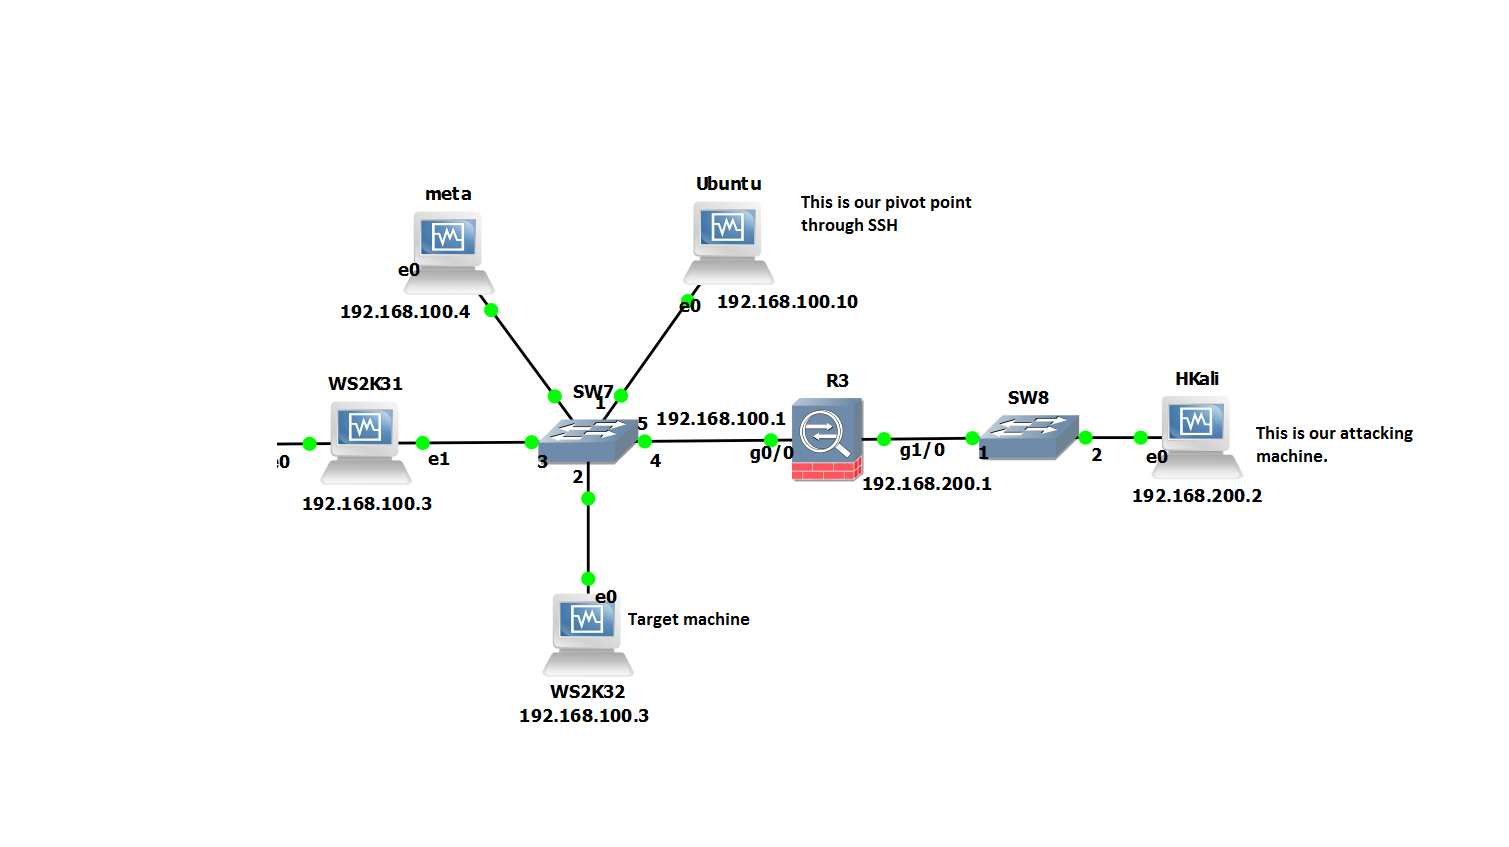