
Setting a static IP address in Ubuntu 18.04.1. Oh boy where to start. The name Bionic Beaver or netplan.
OK lets concentrate on netplan, and what’s happened with networking in Ubuntu 18.04.1. Setting a persistent static IP address has changed a little in the new release of Ubuntu, where as before we would have modified the interfaces file we now modify a .yaml file in /etc/netplan directory. Netplan is the new kid on the block for configuring networking in your Beaver. Its not all that different, or difficult once you know how. However the standard is pretty precise in terms of how we configure the file. If you look in your netplan directory you may have a 50-cloud-init.yaml file this is where the configuration is stored. Lets go ahead and modify the netplan directory to set a static IP address:
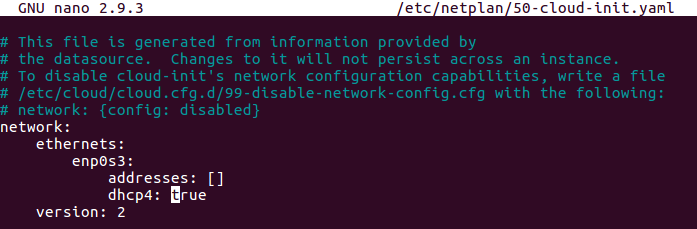
This is how our standard /etc/netplan/50-cloud-init.yaml file looks like:
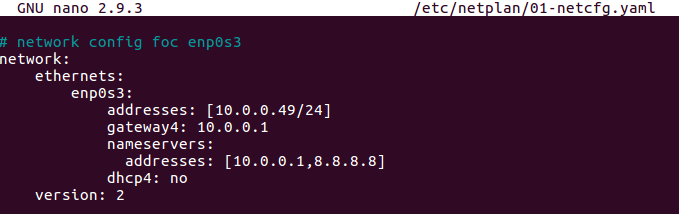
To set a static IP address I’m going to copy the current config into a new file called 01-netcfg.yaml for further configuration.
Take care of the spacing within the yaml file. It will not take tab completion, and will require spaces for the indentation, the number of spaces will not matter, as long as each section is appropriately indented with spaces.
For example you could use this:
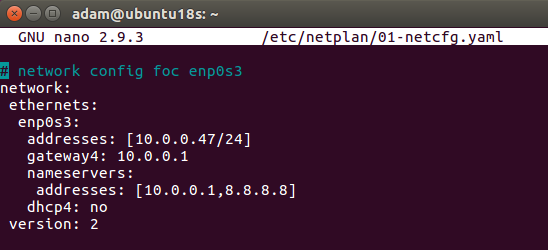
Indenting each section with 1 space also works:
All that’s left to do is to apply the netplan config with:
sudo netplan apply
If you do get errors you can use the debug feature:
sudo netplan --debug generate
Well hope this helps.