
Connecting to Trunked Ports!
Just a quick post on how to configure VLAN tagging in Kali Linux 2.0. If we have a trunk port presented to us, how do we utilise it?
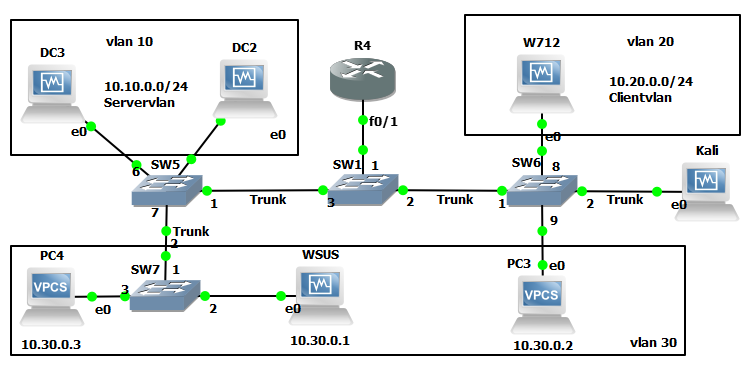
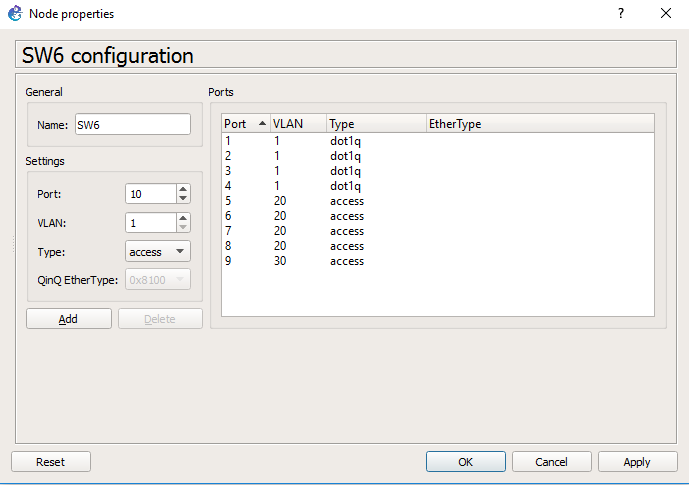
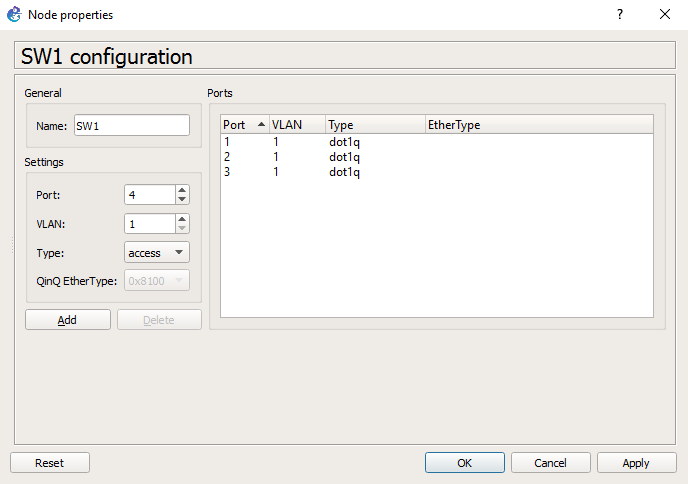
To setup vlan tagging in Kali Linux 2.0 is pretty straight forward, to set the scene and demonstrate this further we need a lab. The below lab is our ‘test.local’ environment set up in GNS3. There are 3 vlans, 10 20 and 30. 10 and 20 are routable, vlan 30 is isolated from 10 and 20. In the lab we have a ‘router on stick’ configured at R4, fa0/1 is sub interfaced with vlans 10 and 20. utilising DHCP, vlan 10 for servers and vlan 20 for clients. All devices in vlan 30 are statically assigned IP addresses and not routable to the 10 and 20 vlan networks. In all switches there are a variety of 802.1q trunked and access ports.
The idea of the lab is that vlan 30 can’t talk to vlan 10 or 20. However as a trunked port is presented to the Kali vm, it will be able to communicate to all vlans.
This is how it looks:


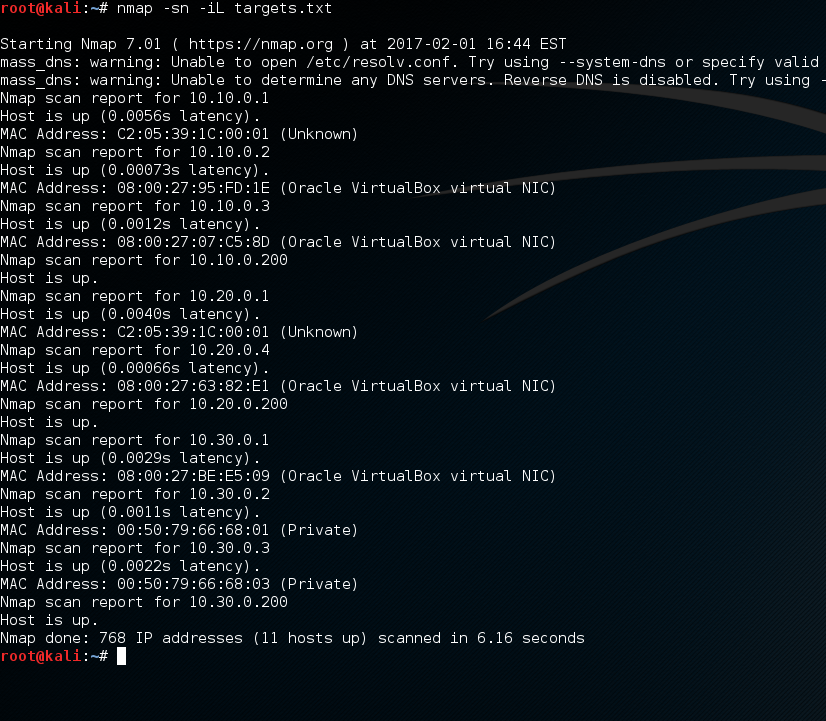
Lets look at how we would configure Kali to test all hosts in the different vlans, first via CLI and then via GUI in Network Manager:
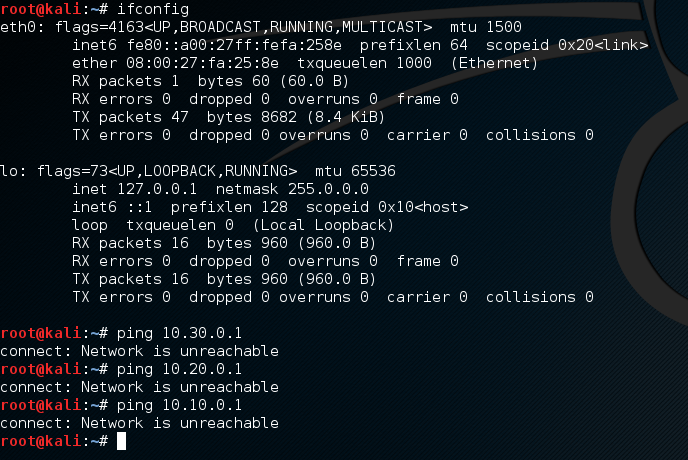
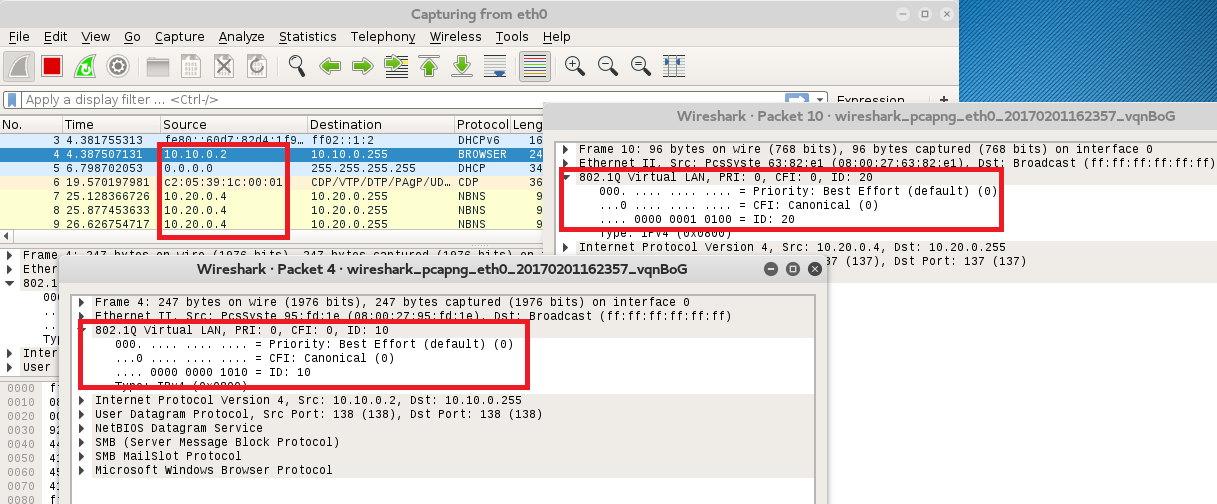
As you can see with the current trunk connection we can’t access any of the networks, however a quick Wireshark does reveal we can see traffic and the different vlans…
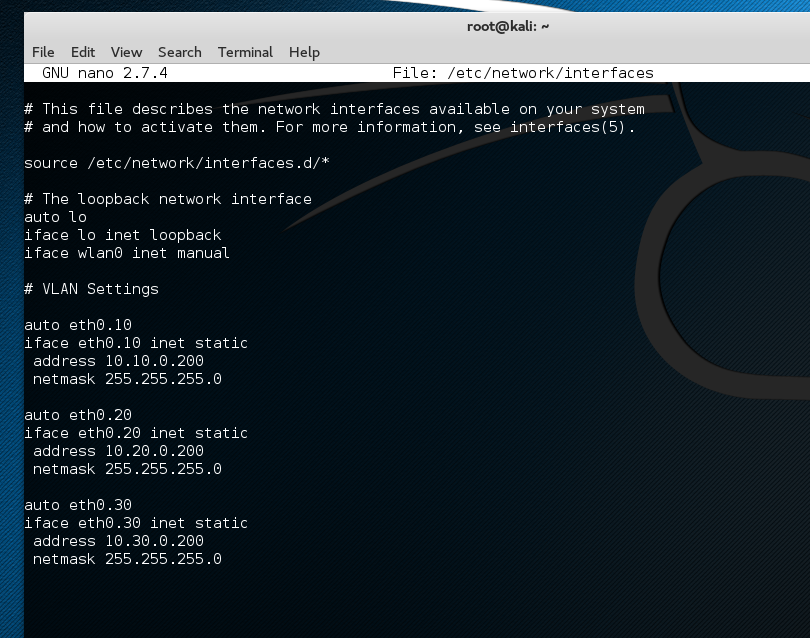
First lets open up ‘/etc/network/interfaces’ in nano and add our interfaces. The idea is very similar to a cisco router we are essentially sub interfacing our network connection in the interfaces file:
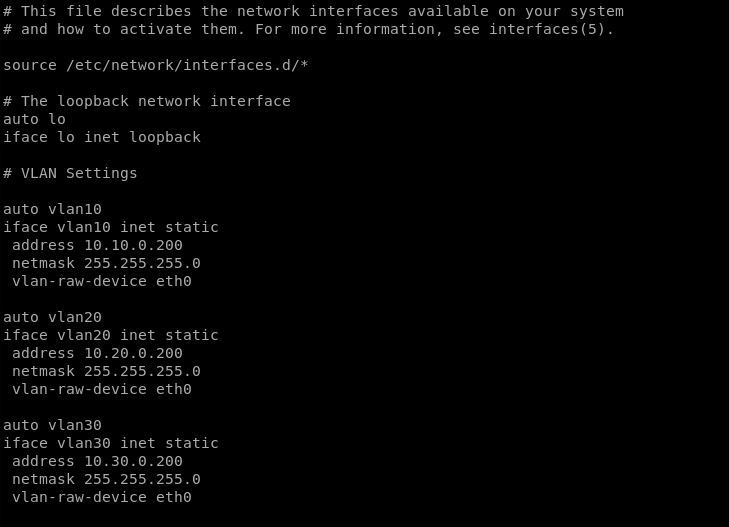
An alternative configuration for the interfaces file which I have used as well is the following, both work just as well:
Save our file restart the networking service and then simply bring up the sub-interfaces with ‘ifconfig XXX up’ where XXX is our subinterface so:
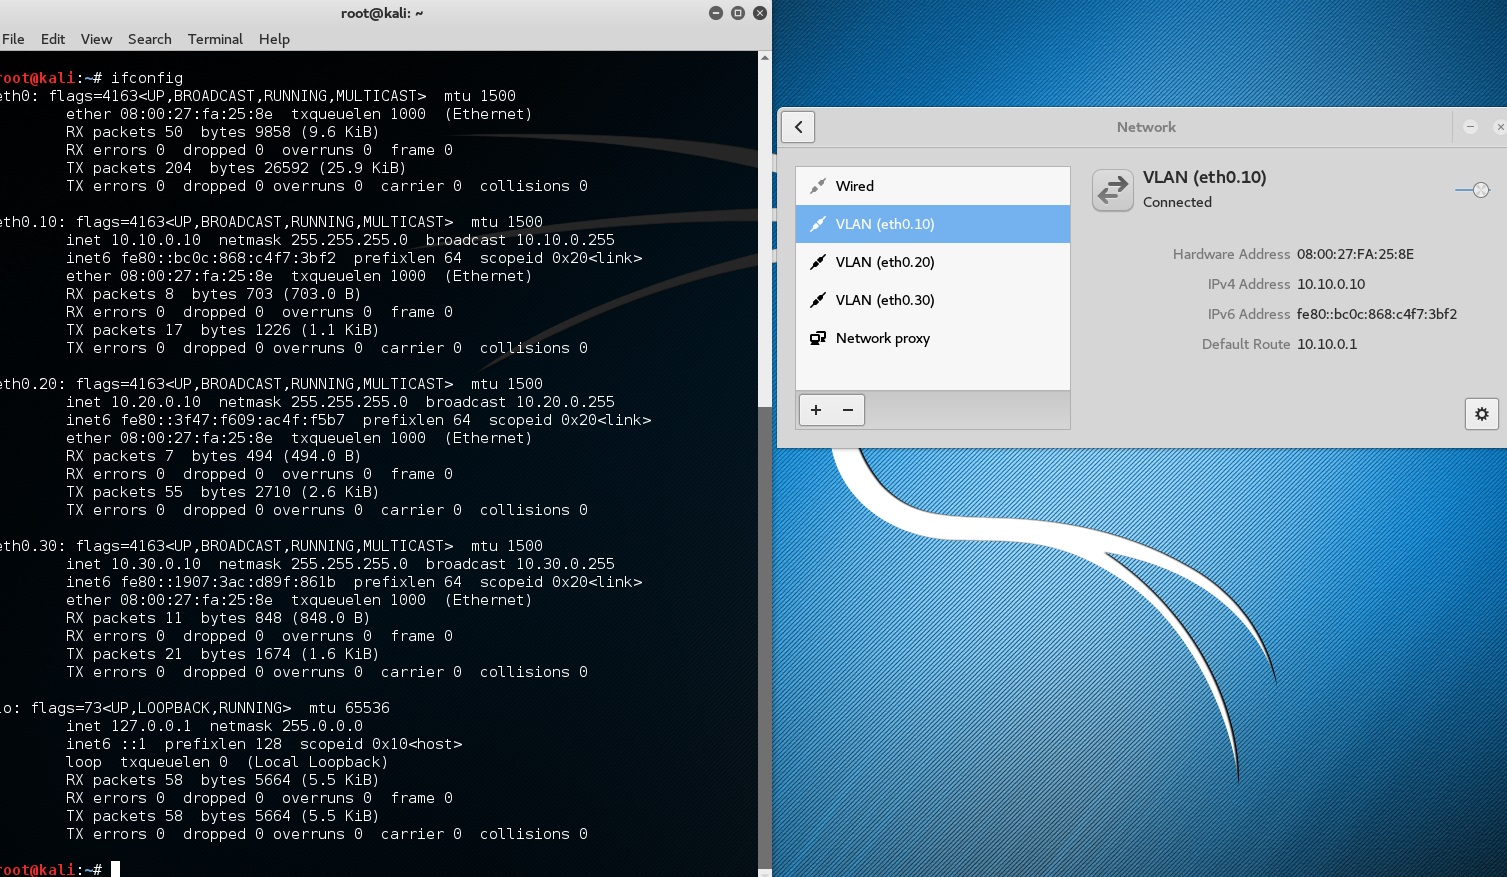
‘ifconfig vlan10 up’ or ‘ifconfig eth0.10 up’ as below:
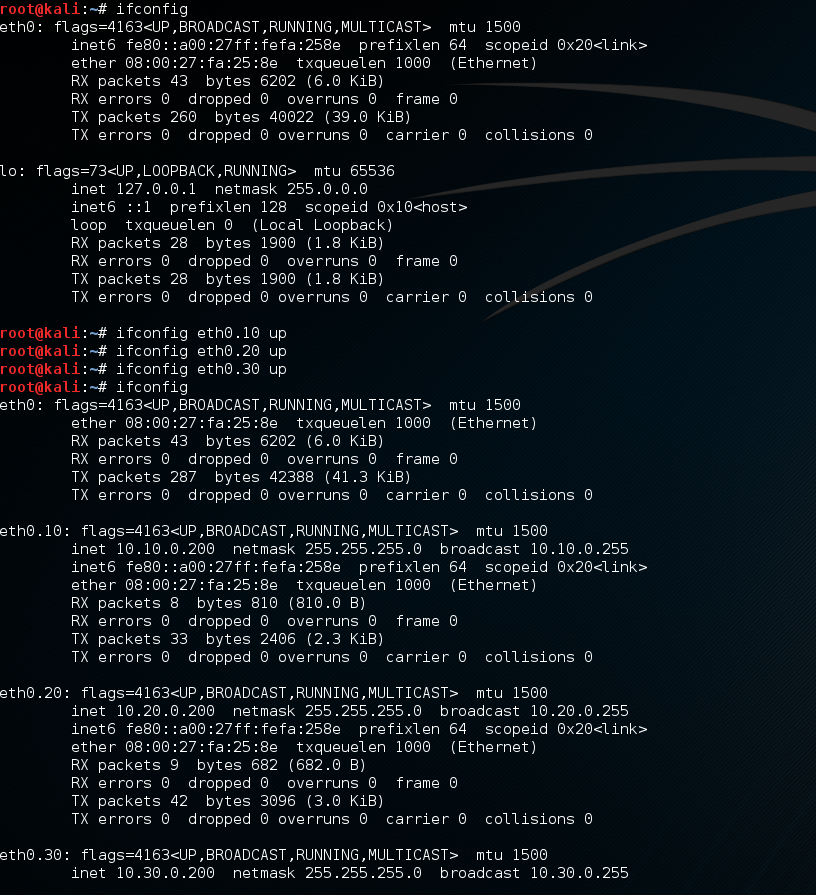
We can now access all of our vlans in question.
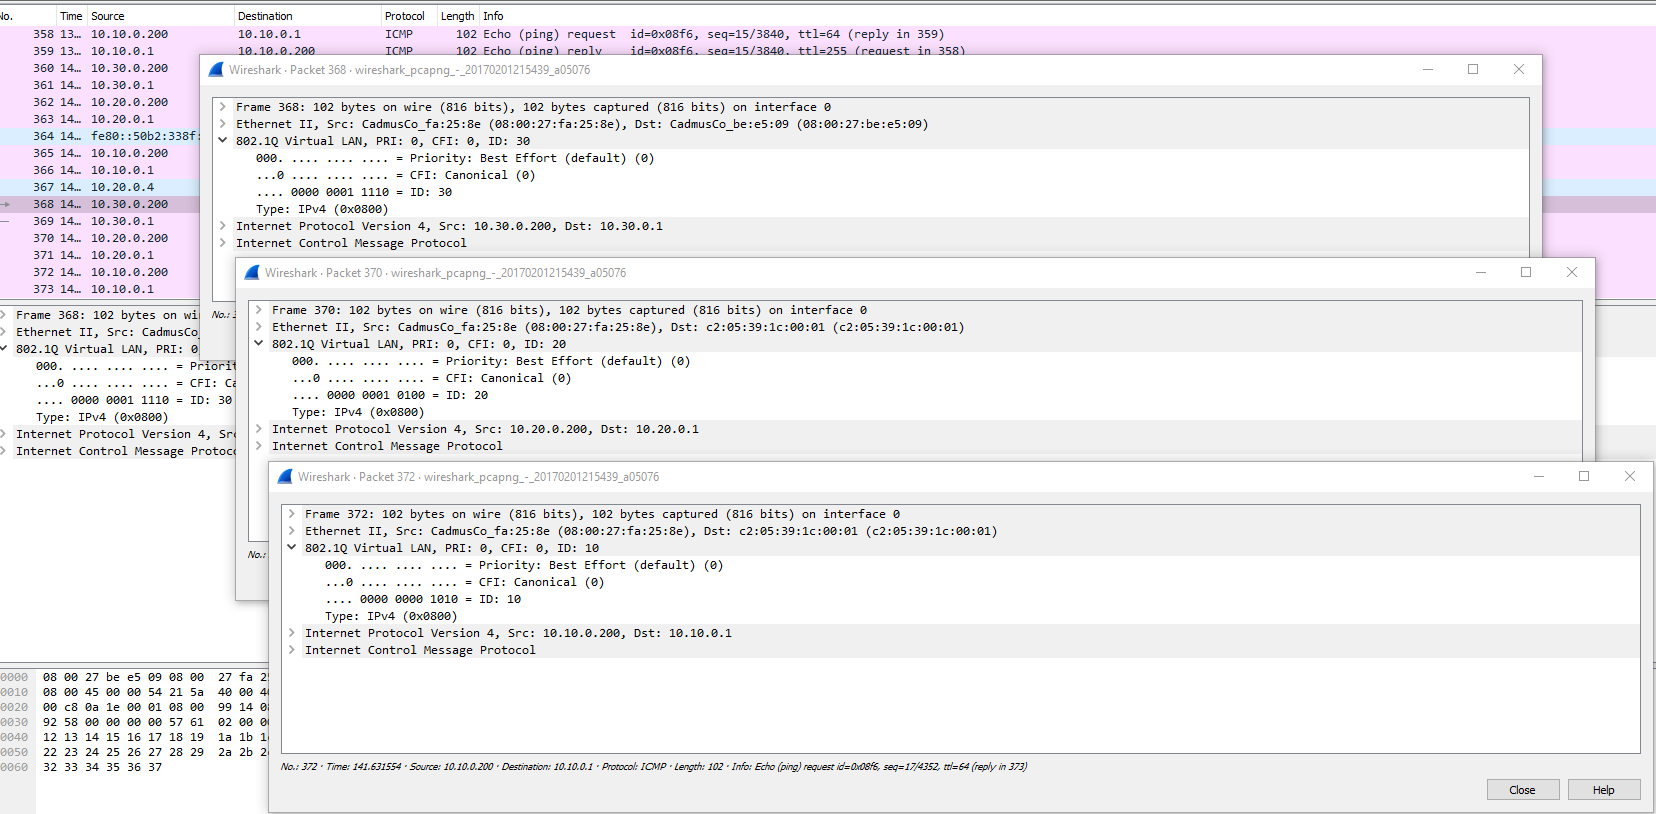
Further to this, if we set off a ping to each network and Wireshark the trunk connection we can see our tagged packets. Hooray.
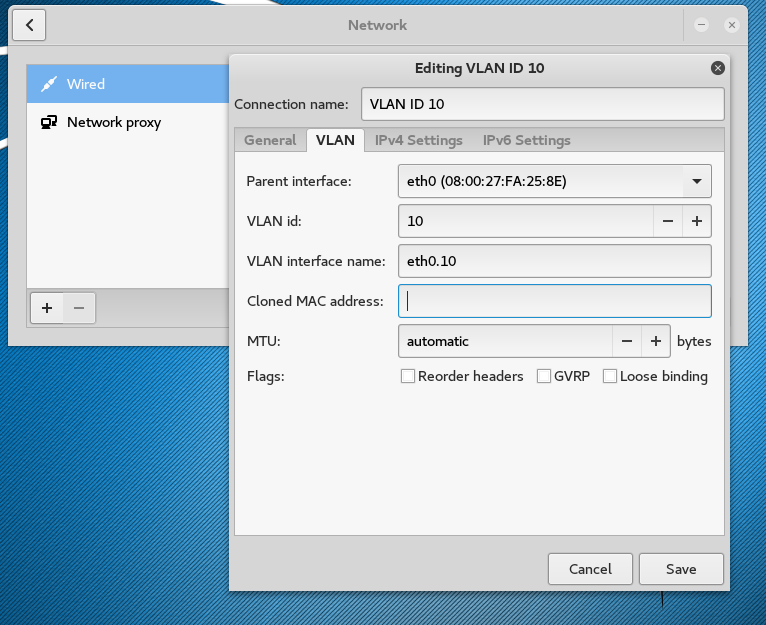
The Gui is even easier, lets configure it via the Network Manager. We will do this via opening up our network connections/Network Manager, simple click on the ‘+’ sign, select ‘VLAN’ fill in the details on the vlan tab as well as the ‘IPv4Settings’ tab:
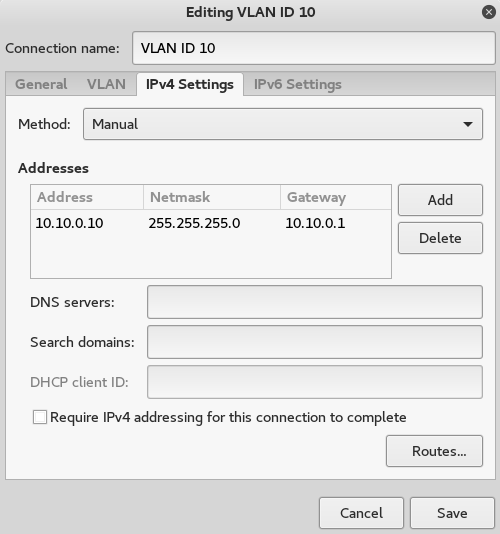
And there you have it.
I hope this helps someone!