Fixing Unquoted Service Paths in Windows.
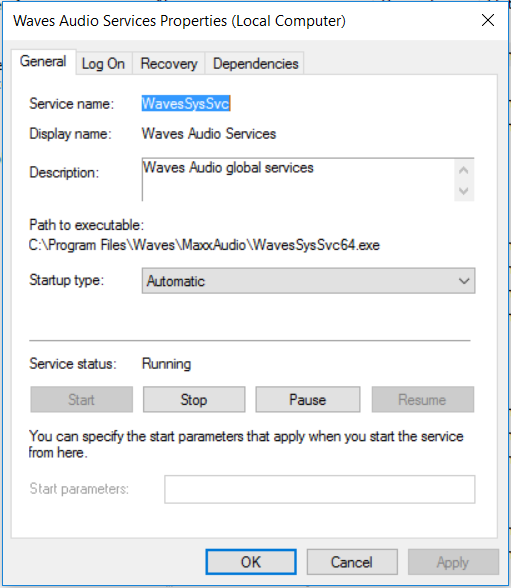
This is just a short write up on unquoted service paths, what they are, why they are bad and how we can fix them. A vulnerabilty scanner will often find these on an ‘Authenticated’ type of scan. However we can search for them via WMI (Windows Managment Interface) query or by manually looking through the services one by one. So what is an unquoted service path? It is the path/file location of the service-exe for a given service that isn’t wrapped in quotes, like in the picture.
OK, so what? Why are these bad?
The problem with unquoted service paths is that as windows starts up or as the service is started Windows needs to locate the service-exe for that service. (I keep saying ‘service-exe’, well we’ll come on to that in a sec!). It looks for the service-exe in the path specified in the ‘Path to executable:’ field of the service. If the path is quoted and contains white space in the path windows knows to go directly to the location. If the path is unquoted and contains white space, Windows will essentially query the different locations in the path until the service-exe is found.
Where the service path contains white space and is unquoted, an attacker can use this to escalate privileges from a standard user account. For example if the service is running as SYSTEM, an attacker can create a service-exe to say create an account and drop it in the local administrators group. The attacker would also need to have ntfs permissions as the standard user in the location in the path so ‘C:\’ might not be viable however further down the path might be. The attacker then restarts the service and the new service-exe will be executed by the service running as SYSTEM.
The service-exe I keep refereing to is special type of executable file that is used by services, its not any old exe you can’t just drop cmd.exe in the path unfortunatly…
If I can’t do an Authenticated Vulnerability Scan how can I find them..?
We can use two methods, we can either use WMI query or manually open up each service and check each one, then check the ntfs permissions of each location. We can use the follwoing WMI command from Common Exploits; this will filter out the automatic service and also look for unquoted service paths:
wmic service get name,displayname,pathname,startmode |findstr /i "auto" |findstr /i /v "c:\windows\\" |findstr /i /v """
Running the above wmi query will display something like the the following if present:
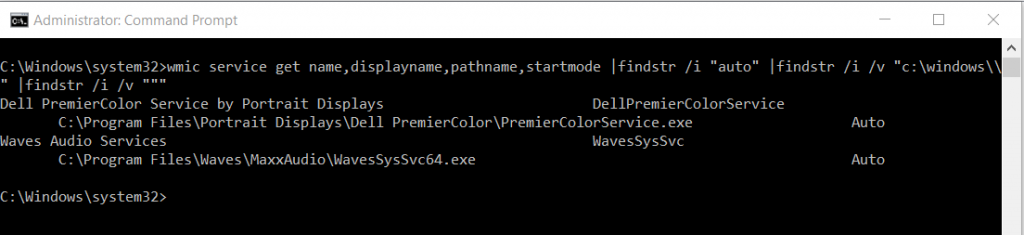
As we can see large mainstream manufactures still implment unquoted service paths!
I’ve found one, how do I fix it?
This is relatively straight forward however this should be tested before being rolled out into production (goes without saying). We need to add the quotes to our service path so windows know where to go for the service-exe directly immediatly, rather than searching each directory. We can do this through the registry.
Fire up the registry and navigate to the service as below:
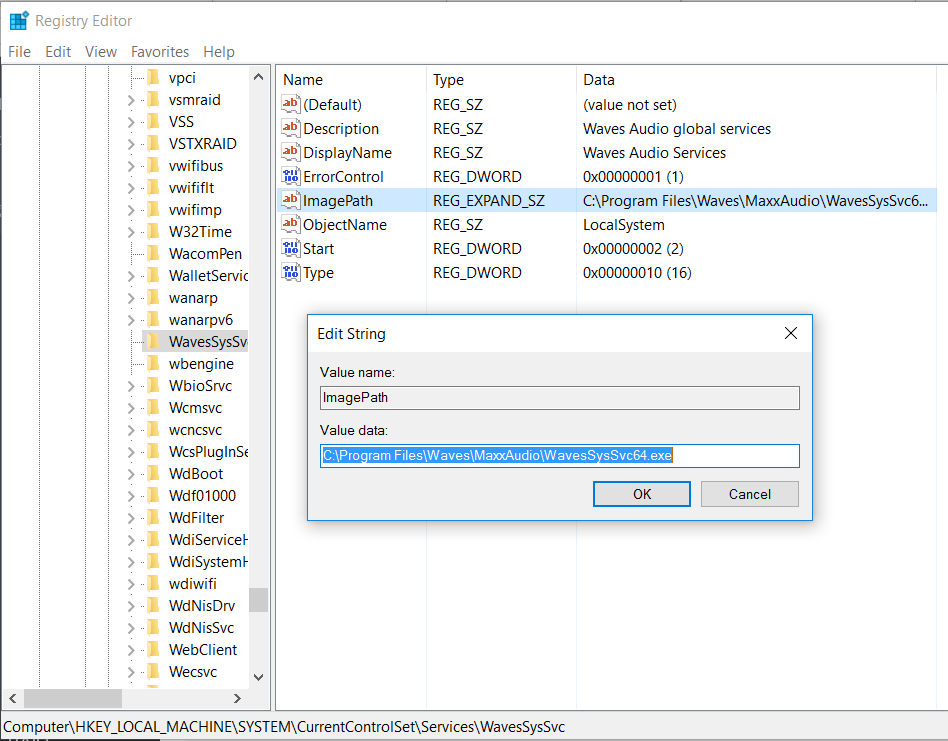
Open up the ImagePath string and simple add the quotes as below:
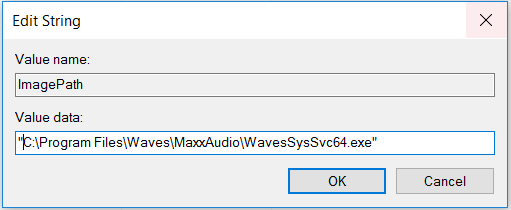
Restart the service and ensure the service starts properly. We can also open up the service and also re run the WMI query to ensure our affected service now has quotes. This will ensure any attackers should they manage to compromise the machine as a standard user, stop them being able to escalte privileges in this manner!
Hopefully this post will help you resolve the uquoted service path issue.
 Just a quick note to reference the following video on YouTube. This video demonstrates setting up Active Directory Authentication for Cisco Devices, such as Routers and Switches etc. This is using AAA on the router and RADIUS through the Network Access Policy (NAP) role in Windows Server 2012 R2, this in turn enables a Network Policy Server (NPS). The Windows server (the Radius Server) is registered in Active Directory which allows it to query the domain it is connected too for authenticating users in Active Directory to the Cisco IOS devices. You can control who has access to various network devices through rules created on the NPS. This can in turn be achieved in Active Directory via groups, binding those groups to privilege levels to pass through to deifferent devices.