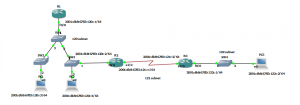
I decided to to look into configuring a quick simple IPV6 lab in GNS3 using RIP. I put together the following lab using the RIP routing protocol for ease of use. The lab consists of 3 routers multiple interfaces, 3 subnets, 3 PC’s and switches for endpoint connectivity, I find its easier to use the virtual switches if I want to expand the lab later. The routers are the using the c7200-adventerprisek9-mz.152-4.S4 image and the PC’s are simply the virtual PCs (VPCS) from GNS3 again for ease of use. I do normally prefer to connect an actual operating system as PC’s as I find it more realistic however as we are just testing connectivity and routing the VPCS option is a good fit here and light on system resources.
Below is the simple topology:

Some of the basic configuration for RIP and IPV6 is show below for R1. This can then be replicated across the other routers and interfaces changing the IPV6 subnet ID and Interface ID as you go along. Using Global IPV6 addresses with a made up subnet ID.
Straight in the configuration starting in global configuration mode on R1:
R1(config)#ipv6 unicast-routing
R1(config)#int fa0/0
R1(config-if)#ipv6 address 2001:db8:6783:120::1/64
R1(config-if)#no shutdown
Verify the interface:

Note the new IPV6 Link Local address that has been automatically assigned to the interface when it was brought up, the closest thing to explaining for now is the 169.254.x.x/16 address asinged by APIPA. The Link Local address is made of the first 10 bits (identifiable as the Link Local FE80) the other 54 bits being Zeros (::) and the remaining 64 bits being made up of the MAC address and FFFE slotted in the middle. 🙂
Onto the routing:
R1(config)#ipv6 router rip RIP1
R1(config)#int fa0/0
R1(config-if)#ipv6 rip RIP1 enable
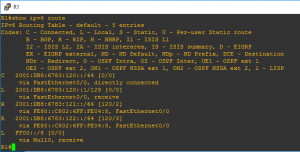
The router will then advertise its routes through the enabled interface for RIP1 using rip and likewise for R2 and R3. Once R3 has been configured 30 seconds later a quick check of the routing table from R1 should display:

We can see the advertised routes for rip, also notice that the advertised route is via its IPV6 Link Local address starting with FE80.
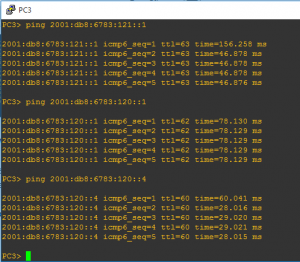
A quick check from PC3 to R1 and PC4 further verifies connectivity through IPV6 and rip configuration:

Interesting, more to come from IPV6 in the future for sure.
