
How to set up a basic firewall rule set with iptables for a webserver on Linux.
On this page we are going to run through how to setup some basic firewall rules for a webserver using iptables.
The firewall rules in iptables are broken down into three categories called chains. These are displayed when you view the rules with the command ‘iptables -L’; input, output and forward are the default chains. ‘
INPUT – being data that is flowing into the server.
FORWARD – being data that is being forwarded onto another destination, ie data being re-routed.
OUTPUT – being data flowing outbound from the server.
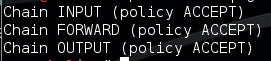
There is a default policy rule for each chain, this is set to ‘ACCEPT’. It can be changed to DROP or REJECT. As you can imagine the default rule, is the over-arching policy for that chain so if a connection comes in and doesn’t match a predefined rule it will take on the default policy rule.
ACCEPT – Allow all.
DROP – Block and drop the connection and also don’t reply, appear as if nothing is there or alive.
REJECT – Block the connection and tell the sender. So the sender will know a firewall has blocked the connection.
For this example we are going to look at a setting a few basic rules for a typical web server. For a typical web server we would want to allow port 80 for HTTP, 443 for HTTPS and more than likely 22 for SSH for management. As these are inbound connection rules we would add these into the INPUT chain. Although this would allow these three types of connections, we also want to block all other connections (all other ports). We can do this in two ways by either changing the default rule from ‘ACCEPT’ to ‘DROP’ or leave the ‘ACCEPT’ as the default and add a last rule to the list to ‘deny’ all other traffic. As data comes in it is parsed through the rules one at a time until it reaches a match. The two methods mentioned above have different advantages, for example if all the rules got removed from the INPUT chain by accident (or on purpose) the default ‘ACCEPT’ rule would still allow you to be able to remotely gain access to the server. On the other hand I would personally argue by changing the default to ‘DROP’ it protects your server if rules get dumped, however this does mean no other traffic is getting to the server until you can get to the console to reset the iptables. Give this some thought, obviously if you have physical access to the server its not too much of an issue, but what about a vps? Do you still have a console window etc.
Here are a few basic useful commands to get started with:
Lists all rules and chains:
iptables -L
Lists all rules and chains with verbose: (gives you packet count)
iptables -L -v
Lists all rules with a rule Line no: (if you have no rules you obviously won’t see any line no’s so save this till later)
iptables -L --line-number
Resets the iptables chain rules back to default when you need it from a console connection:
iptables -F
To start with, as with the above scenario of allowing port 80, 443 and 22 inbound we will want to enter the following rules into the input chain with the following commands:
iptables -A INPUT -p tcp --dport 22 -j ACCEPT
iptables -A INPUT -p tcp --dport 80 -j ACCEPT
iptables -A INPUT -p tcp --dport 443 -j ACCEPT
To break these commands down the options are as below:
-A append rule the following chain.
INPUT specifies the chain; INPUT being inbound to the server.
-p tcp specifies the protocol being TCP.
–dport 22 specifies the destination port.
-j ACCEPT specifies the packets that match this rule should be allowed.
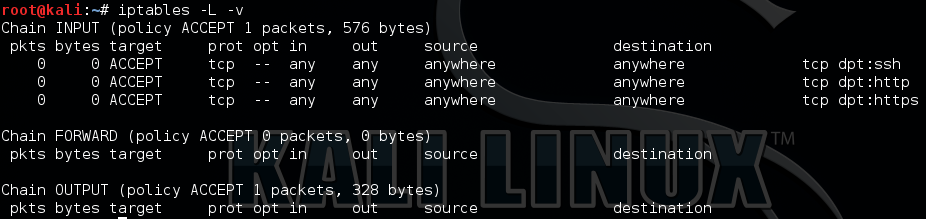
After adding these three rules, re-running ‘iptables -L -v’ should give the following output:
We need to add in the loopback device in order for system services to be able to talk to each other. We can do this with the following rule:
iptables -I INPUT 1 -i lo -j ACCEPT
The final rule we need to add is either the last ‘deny’ rule or to change the default rule in the INPUT chain to drop. We will tackle these separately.
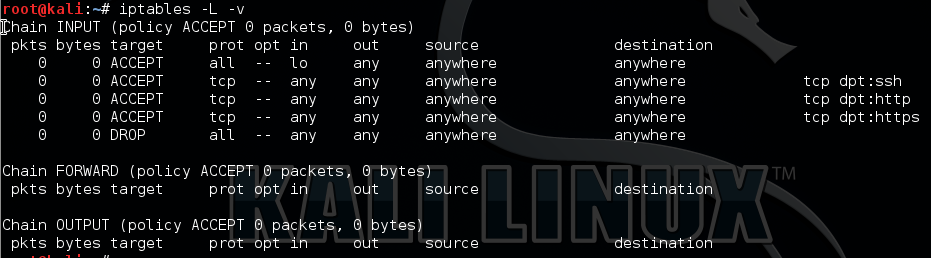
To add the deny rule to the bottom of the list we can use:
iptables -A INPUT -j DROP
Your rule set should now look like this:
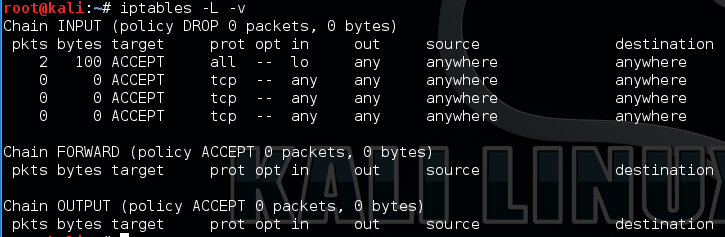
Alternatively to change the default rule from ACCEPT to DROP and vice versa on the INPUT chain we would use:
-P Stipulates the policy for the the rule INPUT in this case.
iptables -P INPUT DROP
iptables -P INPUT ACCEPT
Issueing the ‘DROP’ command would like like this, note the the DROP next to the ‘INPUT ( Policy’ designating its default rule is to drop:
Note however, if we use the ‘Deny’ rule as the last rule and later wanted to add a new rule we would have to either delete the ‘Deny’ rule or we can insert a rule using the line cumber command. First we would need to find the line number using ‘iptables -L –line-number’, find the line number where we want to add the new rule in and issue the following command:
iptables -I INPUT 3 'NEW RULE'
In the above example the ‘3’ is the line number of where you want the new rule to go.
Or alternatively to delete the drop rule use this command: (don’t forget to reissue it though!)
iptables -D INPUT -j DROP
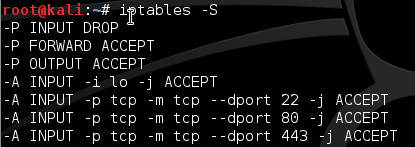
Tip: Issuing the ‘iptables -L -v’ although lists all the rules in order doesn’t give you certain information like port number, use the ‘iptables -S’ in addition.
To make the rules persistent across reboots we can use ‘iptables-persistent’ package, however we will need to download and install this, so issue the command ‘apt-get install iptables persistent’. Half way through the install the program will ask if you want to save the current rule set to /etc/iptables/rules.v4 and /etc/iptables/rules.v6 respectively on a pink screen. This will install as a service and once started will add files to the iptables on reboot.
Of course it goes without saying this should always be tested first in a lab to try out the commands and feel comfortable your not going to lock yourself out. I would also subsequently nmap the server afterwards to confirm only the relevant ports are open.